
How to Set Time and Date on a Trail Camera (Including TIME.TXT)
The time and date stamped on each trail camera photo is one of the most useful pieces of information you will get. It tells you when deer move, when a buck shows up in daylight, and how activity changes with weather and the rut. A wrong clock makes all of that useless. Here is how to set the time and date on a trail camera, including the TIME.TXT trick for cameras without a screen, and how to keep it correct.
On most trail cameras, switch to Setup mode, open the menu, find Time/Date (or Clock), set the date, the time and the 12- or 24-hour format, then save. For cameras without a screen, many brands use a TIME.TXT file: create a plain text file named TIME.TXT on the SD card with the date and time in the format your manual gives (for example 2026:11:14 06:30:00), insert the card and power on. Cellular cameras usually sync the clock automatically. Check the clock after battery changes and daylight saving time changes.
- Where to set it
- Setup menu, Time/Date
- No screen?
- TIME.TXT file on the SD card
- Format
- Varies by brand, check the manual
- Cellular cameras
- Usually auto-sync
- Common reset cause
- Dead or removed batteries
- Check after
- Battery swaps and DST changes
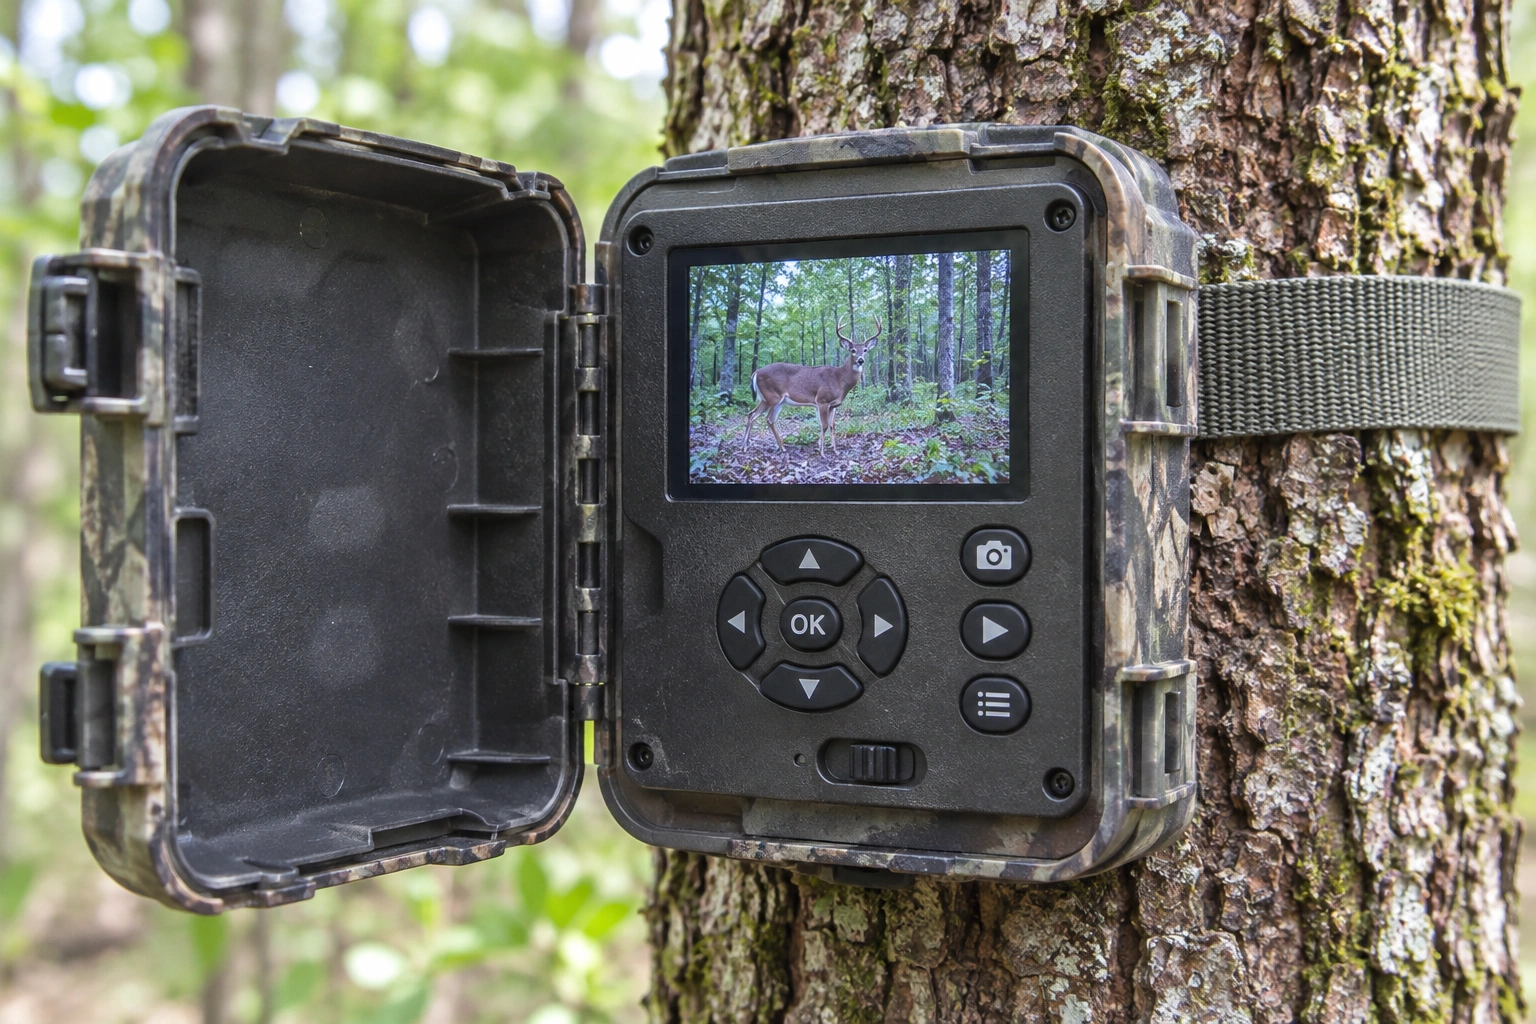
Why the Timestamp Matters
- Patterning deer: you need accurate times to know when a buck uses a trail, and whether he moves in daylight. See how to pattern a buck with trail cameras.
- Comparing cameras: the same buck at 6:40 a.m. on one camera and 7:05 a.m. on another shows his route. Wrong clocks break that.
- Linking to weather and moon: accurate dates let you compare movement with fronts, temperature and moon phase.
- Security and legal use: if you use a camera for property security, a correct timestamp makes the photo far more useful.
Setting the Time in the Menu
Menus differ by brand, but the steps are similar on most cameras with a screen:
- Insert batteries and an SD card.
- Slide the power switch to Setup (or Test/Menu) mode.
- Press Menu and scroll to Time/Date, Clock or System.
- Set the date format (month/day/year or day/month/year) and time format (12 or 24 hours).
- Enter the date and time with the arrow keys, then press OK or Save.
- Turn the camera to On, take a test photo, and check the stamp.
For brand-specific steps, see how to set the time on a Stealth Cam trail camera and our guide on how to program a trail camera.
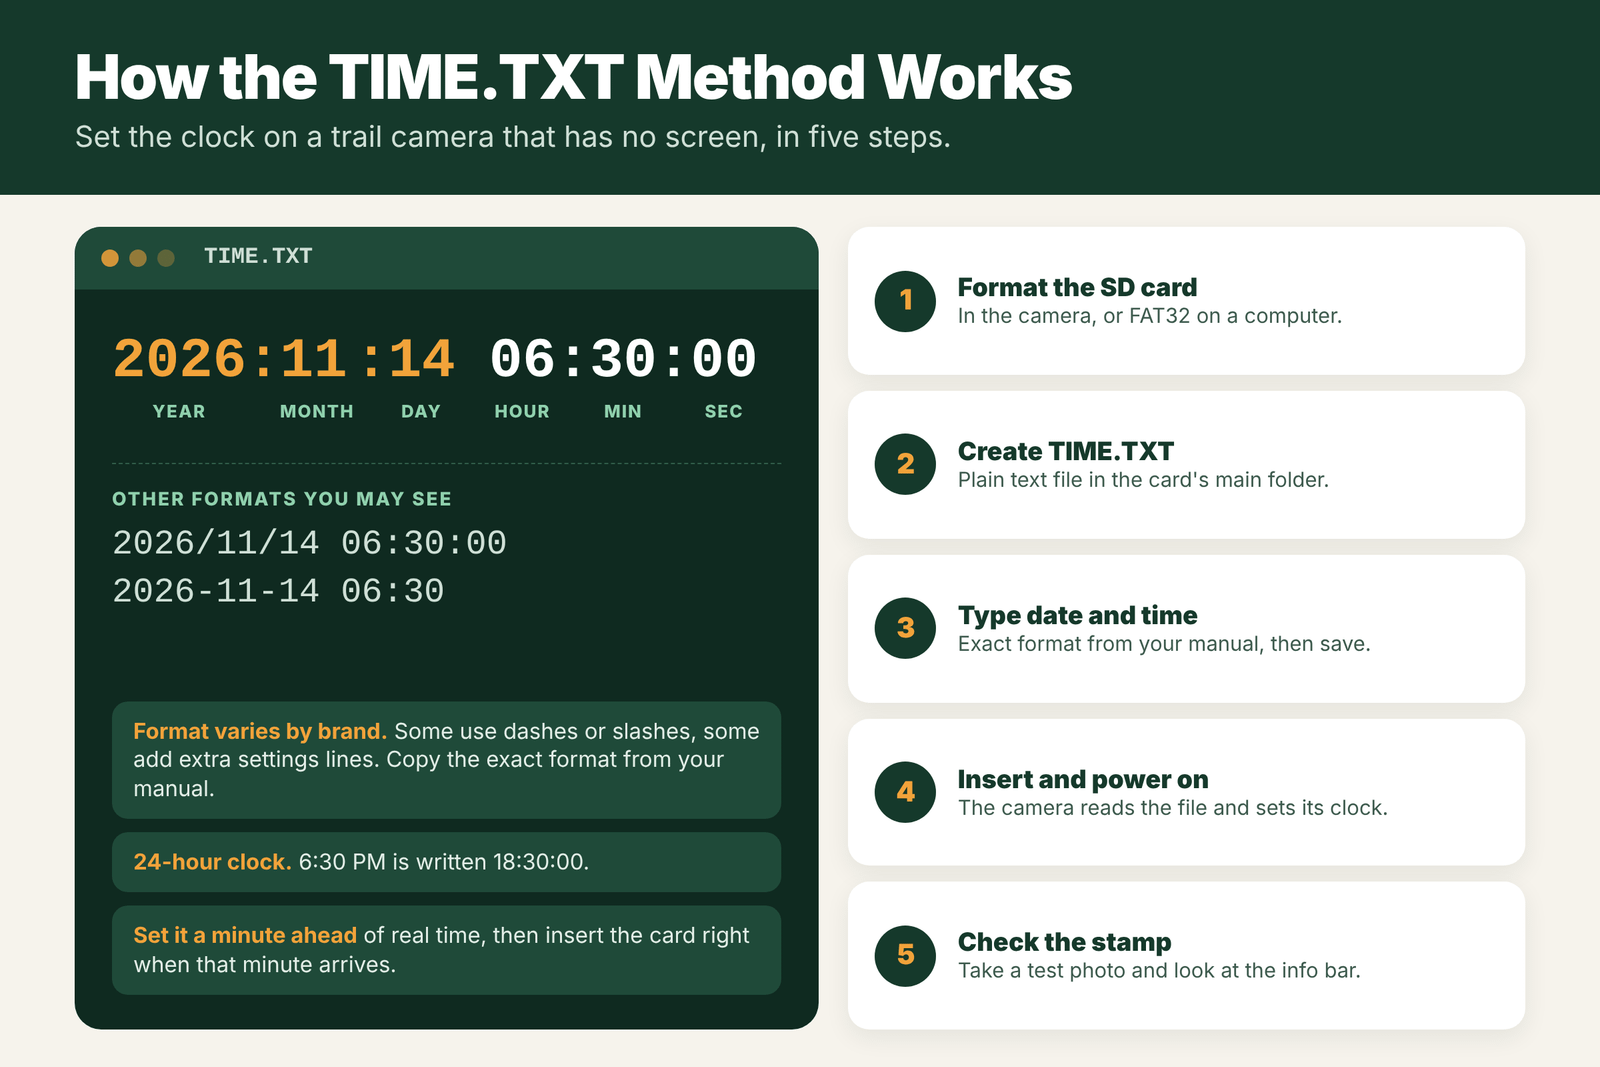
The TIME.TXT Method for Screenless Cameras
Some small or budget cameras have no screen. Many of these let you set the clock with a text file on the SD card:
- Format the SD card in the camera, or as FAT32 on a computer.
- Create a plain text file named exactly TIME.TXT (some cameras use another name, so check the manual) in the main folder of the card, not inside a subfolder.
- Type the date and time in the exact format your manual shows. A common format is YYYY:MM:DD HH:MM:SS, such as 2026:11:14 06:30:00, using a 24-hour clock. Other cameras use slashes or dashes, or add more lines for other settings.
- Save the file as plain text (not a Word document), and safely eject the card.
- Insert the card and power on. The camera reads the file and sets its clock. Some cameras delete or rename the file afterward.
- Take a test photo and check the stamp.
Tip: set the time in the file about a minute ahead of the real time, and insert the card and switch on right when that minute arrives.
Cellular Auto-Sync
Most cellular trail cameras get the correct time from the cell network or the app when they connect. If the time is wrong:
- Check the time zone setting in the app.
- Make sure the camera has signal and has finished its first connection.
- Update the firmware and the app.
- Some apps show photos in your phone’s time zone, while the stamp on the image uses the camera’s setting.
Daylight Saving Time Fix
Most non-cellular trail cameras do not change for daylight saving time on their own. When clocks change in spring and fall:
- Reset the time on each camera at your next card check.
- If you cannot reach a camera, remember that its photos are one hour off until you fix it.
- Some hunters leave all cameras on standard time all year, so photo times stay consistent through the season. Pick one method and stick to it.
Why Your Trail Camera Clock Keeps Resetting
- Dead or removed batteries: many cameras lose the time when power is cut. Swap batteries quickly, or check the clock after every change.
- Weak internal backup battery: some cameras have a small backup cell that can wear out over the years.
- Cold weather: low battery voltage in the cold can cause resets. Use lithium batteries.
- Firmware bugs: check the maker’s site for updates.
New to your camera? Start with our step-by-step guide to using a trail camera.
Time Settings Explained
| Setting | What it does | Recommended |
|---|---|---|
| Date | Stamps the day on every photo and video | Set it every time you change batteries |
| Time | Stamps the hour and minute | Set to local time, checked against your phone |
| 12h / 24h format | How time is shown | 24-hour avoids AM/PM mix-ups |
| Date format | Order of month, day and year | Pick one and use it on every camera |
| Time zone (cellular) | Used when the camera syncs with the network | Match where the camera is, not where you live |
| Info strip / stamp | Prints date, time, temp, moon on the photo | On, so the data stays with the image |
Step-by-Step: Setting the Clock at Home Before Deployment
- Put in fresh batteries and a formatted SD card.
- Switch to Setup mode and open the menu.
- Find Date/Time, often under System, Settings or Clock.
- Set the date, then the time, using your phone as the reference.
- Choose the format (24-hour recommended) and save.
- Take a test photo and check the stamp on the screen or on a computer.
- Write the camera name or location in the camera ID field if it has one.
- Switch to On mode only when the camera is mounted.
Doing this at home on the kitchen table is much easier than fumbling with buttons in the cold.
Why Correct Time Matters for Patterning
A trail camera’s real value is in patterns, not single photos. When you know a buck passes a scrape at 5:40 p.m. three nights in a row, you can plan a hunt. If the clock is an hour off, you might be climbing into your stand just as he walks by. Wrong dates are just as bad: you might think a buck is using an area now when the photo was from last week. Correct time also matters for moon phase and temperature data, which many hunters use to compare deer movement with weather. See deer movement chart and how to pattern a buck with a trail camera.
Field Examples
The daylight saving mix-up: in early November, a hunter sees a buck at 6:10 p.m. on camera and sits until dark, with no luck. The camera never changed for daylight saving time, so the buck really came at 5:10 p.m. Checking the camera time against a phone on every visit fixes this.
The reset after a battery swap: a camera shows photos dated 2019. Its backup clock battery is dead, so the clock resets every time the main batteries are removed. Setting the time after every swap, or replacing the internal coin cell if the camera has a user-replaceable one, solves it.
Two cameras that do not match: a hunter compares a field camera and a trail camera and gets confused when deer appear on the field before the trail. One camera is 20 minutes off. Syncing both to the same phone clock makes the timeline make sense.
Mistakes to Avoid
- Setting the time once a year. Clocks drift and reset. Check it on every card swap.
- Mixing AM and PM. A 12-hour clock set to 6:00 AM instead of PM makes every photo 12 hours off. Use 24-hour time.
- Wrong TIME.TXT format. Even one wrong character can cause the camera to ignore the file. Copy the exact format from your manual.
- Forgetting the time zone on cellular cameras. If you live in one time zone and hunt in another, set the camera’s zone to where it is.
- Editing photo files. If you need photos for evidence, keep originals with their stamp and metadata untouched.
Checking the Time in the Field
On your next visit, take a quick photo of your phone’s clock screen in front of the camera, or just wave at it and note the time on your phone. When you look at the photos later, compare the camera’s stamp with what your phone said. If they differ by more than a few minutes, reset the clock. This 10-second habit saves a lot of confusion later in the season.
Frequently Asked Questions
How do I set the time and date on my trail camera?
Switch to Setup mode, open the menu, choose Time/Date or Clock, enter the date and time, choose the format and save. Take a test photo to check it.
What is TIME.TXT on a trail camera?
It is a plain text file you put on the SD card with the date and time in a set format. Cameras without a screen read it at power-on to set their clock.
What format does TIME.TXT use?
It varies by brand. A common format is YYYY:MM:DD HH:MM:SS with a 24-hour clock, such as 2026:11:14 06:30:00. Always use the format in your manual.
Why does my trail camera time keep resetting?
Usually because the batteries died or were removed. Cold weather, a worn backup battery or a firmware bug can also cause it.
Do trail cameras change for daylight saving time?
Most non-cellular cameras do not. Reset the clock after the change, or keep all cameras on standard time all year. Cellular cameras often update automatically.
How do I check if my trail camera time is correct?
Take a test photo, then compare the time stamp with your phone. Reset the clock if it is off by more than a few minutes.
Should I use 12-hour or 24-hour time on my trail camera?
24-hour time avoids AM and PM mistakes, which can make every photo 12 hours off.
Why are my trail camera photos dated years ago?
The clock reset to the factory default, often after a battery change. Set the date and time again.