
Start a trail camera by powering it, inserting the SD card, picking a spot, and testing.
I’ve used trail cameras for years to monitor wildlife, protect property, and scout hunting grounds. This step-by-step guide on how to use trail camera step by step guide walks you from unboxing to advanced settings. Read on to learn practical setup steps, placement tips, real-world lessons, and troubleshooting so you get reliable photos and videos every time.

Why use a trail camera and what it reveals
Trail cameras capture motion-triggered photos and video for wildlife study, security, and scouting. They run on batteries, last for weeks, and operate without human presence.
Using how to use trail camera step by step guide helps you decide settings, placement, and data management. You’ll learn to read images, reduce false triggers, and optimize battery life. This knowledge increases detection rates and gives you better evidence or scouting insight.

Choosing the right trail camera
Match the camera to your goals. Common features to compare include resolution, trigger speed, detection range, night vision, battery life, and storage.
- Resolution: Higher resolution gives clearer images for ID and evidence.
- Trigger speed: Faster trigger catches running animals.
- Detection range: Choose longer range for open fields; shorter range for dense cover.
- Night vision: Low-glow or no-glow LEDs reduce spooking.
- Power options: AA batteries are simple; extended batteries or solar help long deployments.
- Connectivity: Cellular vs. non-cellular depends on how often you want remote photos.
How to use trail camera step by step guide starts with picking the model that fits these needs. If you plan long-term monitoring, invest more in battery life and rugged build.

What you need before setup
Collect these items before you begin.
- Trail camera unit and mounting strap or lock.
- Fresh batteries or external power source.
- Formatted SD card with enough capacity.
- Small screwdriver and level or smartphone for alignment.
- Protective case or camo wrap if needed.
- Notebook or phone to log location and settings.
Preparing gear makes the how to use trail camera step by step guide smooth and fast. Avoid last-minute trips to the store.

Step-by-step setup: quick and clear
Follow these ordered steps to set up any trail camera. Each step is short and actionable.
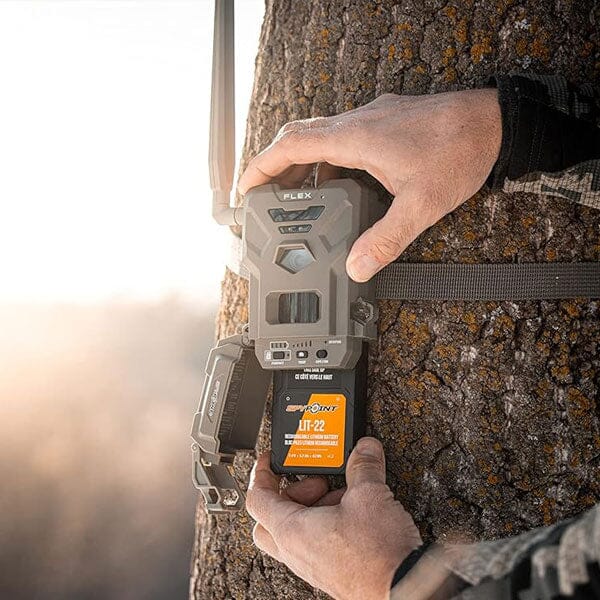
- Charge or insert batteries and confirm polarity.
- Insert a formatted SD card into the card slot.
- Power on the camera and set date and time.
- Select photo, video, or hybrid mode.
- Set resolution and length for video clips.
- Adjust trigger sensitivity and interval between shots.
- Set time-lapse or scheduled active hours if available.
- Run a test trigger by walking in front of the camera at the target distance.
- Check the photo/video quality and adjust aim or height.
- Lock the camera to a tree or mount and record location and settings.
Repeat the how to use trail camera step by step guide test at night if you plan nocturnal monitoring. Doing tests saves hours of guesswork later.
Best placement and mounting tips
Where you put the camera matters more than which camera you buy. Use these placement rules.
- Height: Mount 2.5 to 3.5 feet high for deer; lower for small mammals.
- Angle: Tilt slightly down to avoid sky triggers and capture the animal’s body.
- Trail orientation: Aim parallel to game trails for lateral motion, which triggers sensors more reliably.
- Avoid direct sun: Morning or evening sun can cause glare and false exposures.
- Use natural funnels: Place near pinch points, water, or feeding spots to increase encounters.
- Camouflage and scent control: Handle with gloves and mask scents when possible.
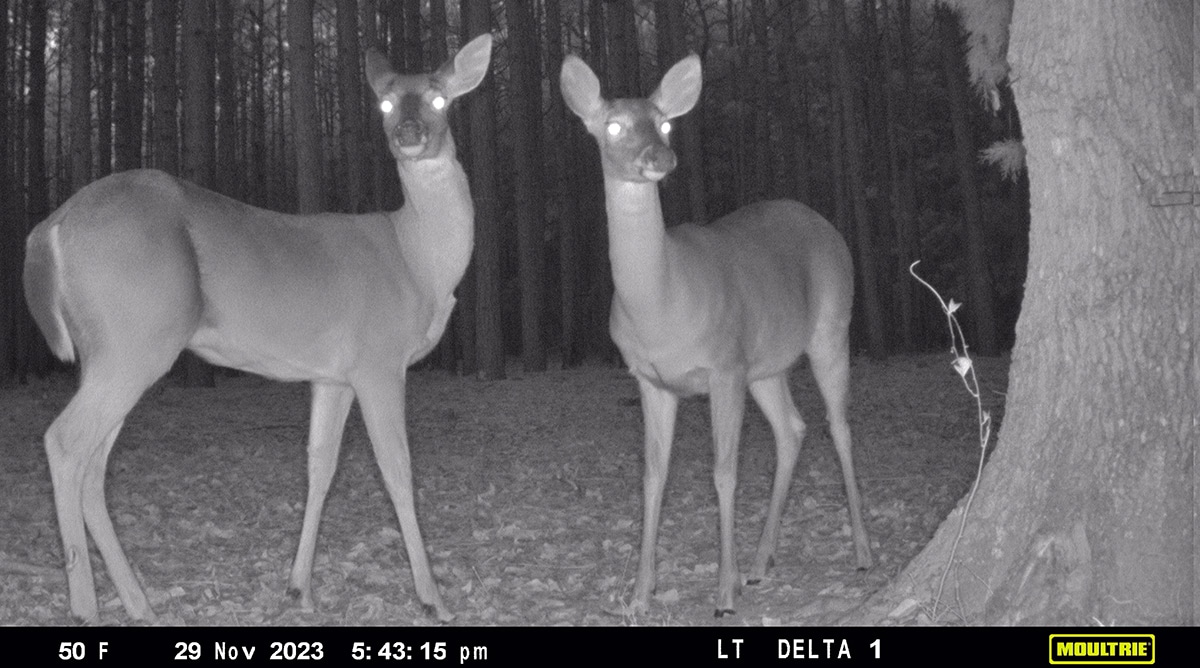
Following how to use trail camera step by step guide placement tips significantly improves capture rates. I learned this after dozens of blank weekends; small shifts in angle doubled my catches.
Camera settings explained
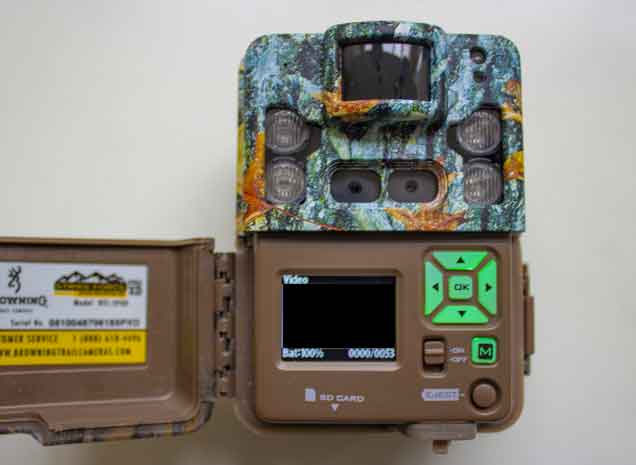
Understand the main settings so you can adapt to conditions.
- Resolution: Higher = better detail, larger files.
- Trigger interval: Short intervals capture bursts; long intervals save batteries.
- Sensitivity: Low reduces false triggers; high catches smaller animals.
- Night mode: Choose no-glow for stealth, low-glow for longer range.
- Repeat shot modes: Useful for multi-shot ID or movement analysis.
When applying how to use trail camera step by step guide, balance image quality, battery life, and storage. My rule: moderate resolution with sensible intervals yields the best long-term dataset.

Power and storage management
Plan power and storage to avoid missing critical captures.
- Batteries: Use high-quality alkalines or lithium for long life.
- External power: Solar panels or rechargeable packs extend deployments.
- SD cards: Use class 10 or higher and swap them regularly.
- File naming and rotation: Keep dated folders or label cards with location and date.
Pro tip from experience: always carry a spare battery pack and an extra SD card. That one time I forgot cost me a week of footage.
Reviewing footage and image management
Organize and analyze images efficiently.
- Download images after each visit and back them up.
- Rename files by date-location for quick search.
- Use basic image software to sort and tag species or events.
- Note environmental conditions in your log for context.
Using how to use trail camera step by step guide for data handling keeps your archive useful over seasons. Organized files save research time and make patterns easier to spot.
Troubleshooting common problems
Quick fixes for common issues you’ll face.
- Blank images: Check batteries, SD card, and power contacts.
- Motion blur: Reduce ISO or increase shutter speed if possible.
- False triggers: Lower sensitivity and shield the camera from moving foliage.
- Too few captures: Reassess placement, angle, and detection zone.
- Corrupted files: Use a different SD card brand and reformat regularly.
How to use trail camera step by step guide includes testing after each change to confirm the fix. Small adjustments often solve big problems.
Legal and ethical considerations
Know laws and best practices before deploying a camera.
- Check local laws on surveillance and private property.
- Avoid placing cameras on public trails or private land without permission.
- Respect animal welfare: do not bait in areas where it’s illegal or harmful.
- Mask your identity and secure cameras to prevent theft.
Being responsible is part of how to use trail camera step by step guide. Ethical use protects wildlife and your reputation.
Personal experience and lessons learned
I started with a basic camera and learned fast. Early mistakes taught me to test settings at night and to log each camera’s exact GPS point. One season I lost images because I used low-quality SD cards and a cold snap ruined batteries. After that I switched to lithium AAs and weatherproof cases.
Key lessons I share from hands-on use:
- Always do a full test at the actual location.
- Use a small checklist for each deployment.
- Keep spare batteries and cards in a dry, warm pocket.
- Note that height and angle often matter more than brand.
These real-life tips are core to my how to use trail camera step by step guide approach. They’ll save you time and frustration.
PAA-style questions (People Also Ask)
Q: How do I set a trail camera to take photos only at night?
A: Use the scheduled active hours or night-only mode on your camera and test settings after sunset.
Q: How far should a trail camera be from the trail?
A: Place it 10 to 20 feet from the trail and aim parallel for best trigger performance.
Q: How often should I check the camera?
A: Check every 1–2 weeks for batteries and storage; longer if using external power or cellular upload.
Frequently Asked Questions of how to use trail camera step by step guide
How long should batteries last in a trail camera?
Battery life varies by model and usage. Expect weeks to months; using lithium batteries and lower trigger rates extends life.
What SD card size do I need for a trail camera?
A 32GB or 64GB card is common and gives many photos and hours of video. Choose class 10 or higher for reliable writes.
Can I leave a trail camera out all year?
Yes, but protect it from extreme weather and check it seasonally to prevent moisture and battery failures.
How do I prevent theft of my trail camera?
Use a lock, secure straps, and place cameras in less visible spots. Record serial numbers and use camo covers.
Why are my night photos black and grainy?
This happens with low power, weak IR LEDs, or high ISO settings. Improve lighting, use better night mode, or lower sensitivity to reduce grain.
Conclusion
You now have a clear how to use trail camera step by step guide. Start by choosing the right camera, gather supplies, follow the setup checklist, place and aim carefully, and test at day and night. Keep logs, manage power and storage, and adjust settings as you learn. Try one setup this weekend, test it thoroughly, and refine with each visit. Share your results, subscribe for updates, or leave a comment with questions — I’d love to help you optimize your next deployment.
As an Amazon Associate, I earn from Qualifying Purchases.