
How to Set a Trail Camera Over a Deer Scrape (Height, Angle, Settings)
A scrape is one of the best places in the woods to put a trail camera. Bucks of every age visit it, often more than once, and they stand still while they work the licking branch. Yet a lot of scrape cameras only return blurry legs, a tail leaving the frame, or a bright white flash with nothing in it. Setting a trail camera over a scrape the right way comes down to four things: distance, height, angle and settings.
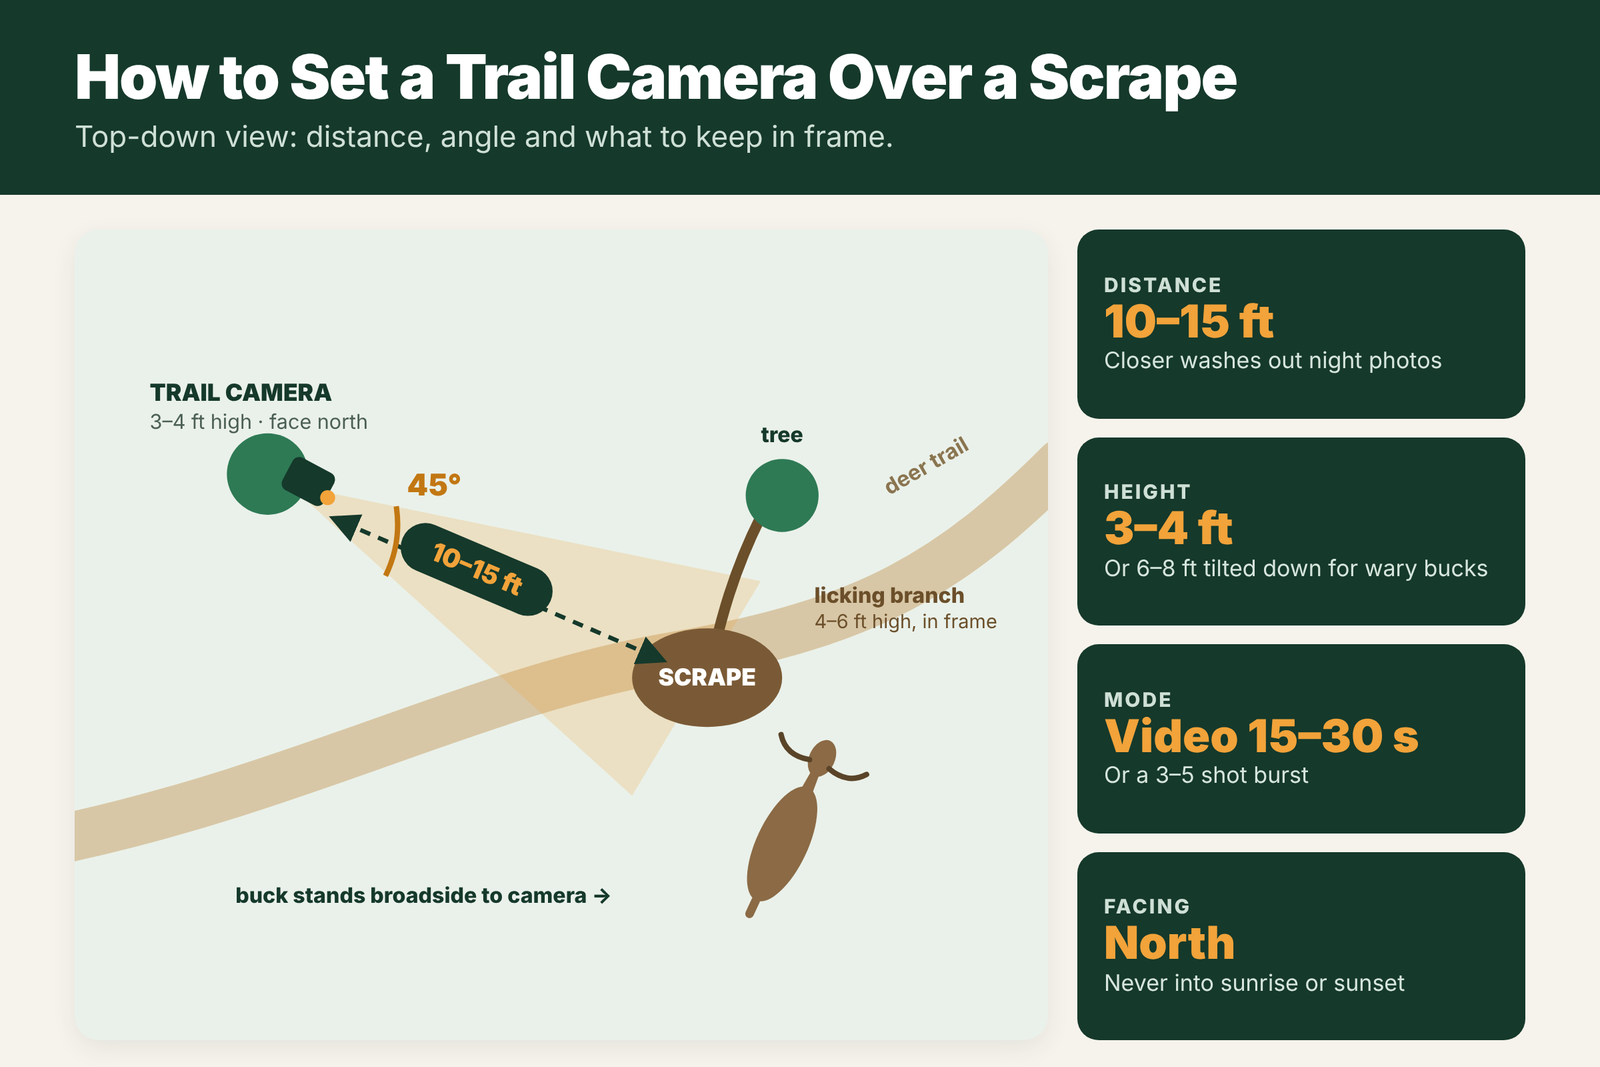
Mount the camera 10–15 feet from the scrape, at about 3–4 feet high, or 6–8 feet high and tilted down if mature bucks in your area shy away from cameras. Aim at a 45° angle to the scrape so the buck stands broadside, and keep the licking branch in the top of the frame. Face the camera north if you can. Use video (15–30 seconds) or a 3–5 shot burst with a short delay, and a fast trigger.
- Distance from scrape
- 10–15 ft (closer washes out at night)
- Height
- 3–4 ft standard, 6–8 ft angled down for wary bucks
- Angle
- About 45°, buck broadside, licking branch in frame
- Facing
- North (or south-facing shade), never into sunrise/sunset
- Mode
- Video 15–30 s, or 3–5 shot burst
- Best time
- Late October to early November (pre-rut)
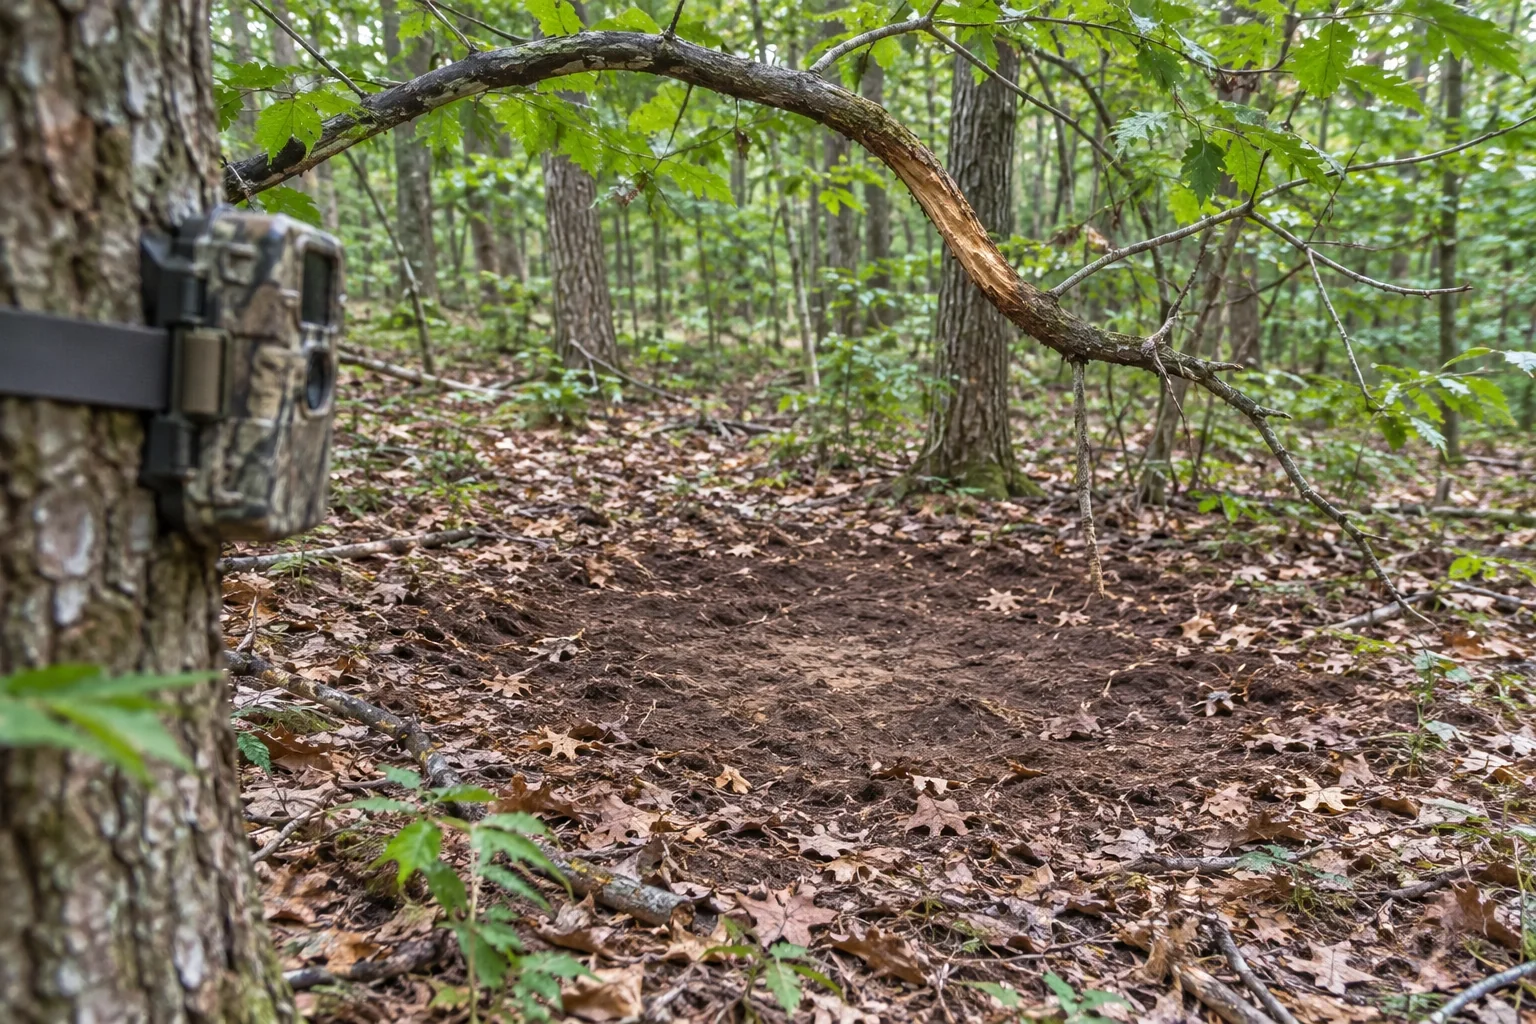
What a Deer Scrape Is and Why Bucks Keep Coming Back
A scrape is a patch of ground, usually one to four feet across, that a buck paws down to bare dirt. Above it there is almost always a licking branch: a low branch, about 4 to 6 feet off the ground, that the buck chews, rubs with his forehead and rubs with the glands near his eyes. He often urinates over his hind legs into the dirt as well.
Together the dirt and the branch work like a message board. Bucks leave their scent, does check in, and other bucks come by to find out who is around. That is why a single good scrape can show you several different bucks in one week. Scrape activity is highest in the pre-rut, from late October into early November in most northern states. Once does come into heat, bucks spend less time on scrapes, which we cover in our trail camera strategy for the rut.
Not every scrape is worth a camera. Look for one that is fresh (clean dirt, no leaves on it), has a well-chewed licking branch, and sits on a field edge, a trail junction, an old logging road or the edge of thick cover. Big scrapes that come back in the same spot every year are the best of all.
How Far and How High to Mount a Camera Over a Scrape
Distance: 10 to 15 feet
Most trail cameras are set up for a sweet spot of about 10 to 20 feet. Over a scrape, 10 to 15 feet works best. Any closer and the infrared flash will wash the buck out at night, which is when most scrape visits happen. You will also cut off the head or the rack because the buck fills the whole frame. Much farther and the deer becomes small, and a weak flash may not light him up at all.
Height: two good options
- Standard, 3–4 feet: about chest height on a deer. This gives the sharpest, most natural photos and the most reliable trigger, because the motion sensor sees the deer’s body straight on. Use it on most properties.
- High and angled down, 6–8 feet: mature bucks that see or smell a camera at eye level sometimes stop using a scrape in daylight. Mounting higher keeps the camera out of their line of sight and makes it harder to steal. Tilt it down with a wedge, a stick behind the top of the camera, or a tilting mount so the scrape sits in the middle of the frame.
Our guide to trail camera mounting height for deer goes deeper on this, and the best height for a trail camera covers other animals too.
The Best Angle: Side-On, Not Straight at the Scrape
It feels natural to point the camera straight at the scrape. The problem is that a buck walking straight toward or away from the camera gives you a photo of his face or his rear, and you cannot judge his rack or body size well. A camera aimed straight down a trail also has less time to wake up, because the deer crosses the sensor zone slowly from its point of view.
Instead, set the camera so it looks at the scrape from about a 45° angle. This way:
- The buck usually stands broadside or quartering while he paws and works the branch.
- The licking branch stays in the upper part of the frame, so you can see him reach up to it.
- You catch the trail he came in on, which tells you his direction of travel.
Before you leave, take a test photo or walk through the scene on your hands and knees in front of the camera. Clear any weeds or small branches between the camera and the scrape. They move in the wind and cause hundreds of empty photos. See how to aim a trail camera correctly for a step-by-step walk test.
Video or Photo Burst on a Scrape?
A buck at a scrape stays in one place for anywhere from a few seconds to a couple of minutes. That makes scrapes the best place to use video.
- Video, 15–30 seconds: shows the whole routine, from pawing to working the branch to which way he walks off. You also learn which bucks are visiting the same scrape and in what order. Night video uses more battery, so switch to lithium AA batteries.
- Burst, 3–5 photos: better if your SD card is small, your batteries are weak, or you use a cellular camera with a limited data plan.
- Detection delay: keep it short, around 5–30 seconds. Several deer often arrive close together, and you do not want to miss the buck that walks in behind the doe.
- Trigger speed and sensitivity: fastest trigger, PIR sensitivity on high in cold weather. Turn it down to medium if wind on the licking branch keeps triggering the camera.
A good middle ground is the “hybrid” mode many cameras have, which takes one photo and then a short video clip.
Night vs Day Visits: How to Read Your Scrape Camera Data
Do not be surprised if most of your scrape photos are at night. Research by deer biologists has shown that the large majority of scrape visits happen after dark, and that many different bucks use the same scrape. A scrape camera full of night photos is normal and still very useful.
What you are looking for is the change. Each time you pull the card, note:
- Time stamps: are visits creeping closer to dawn or dusk? A buck that shows up at 9 p.m. one week and 5:30 p.m. the next is about to give you a daylight chance.
- Which buck: one buck coming back over and over usually means his core area is close by.
- Direction: which way he comes in and leaves shows you where he beds. Hunt between the scrape and that bedding cover, not right on the scrape.
- Wind and temperature: daytime visits often follow a cold front or a sharp drop in temperature.
Check scrape cameras every 7–10 days in the middle of the day, or use a cellular camera so you never walk in. Our guide on using a trail camera without spooking deer has more ways to keep pressure low.
How to Set Up a Mock Scrape Camera
If you cannot find a good natural scrape where you want one, make your own. A mock scrape lets you choose a spot that is easy to reach, has a good camera tree and gives you a clear shot from your stand.
- Pick the spot: a trail junction or field edge with a branch hanging about 4 to 6 feet off the ground. If there is no branch, hang one from a rope or tie a vine between two trees.
- Make the scrape: wear rubber boots and gloves. Rake an area about 2 to 3 feet across down to bare dirt under the branch.
- Add scent (optional): a little scrape scent or buck urine in the dirt, and some forehead or preorbital gland scent on the branch. Check your state rules first, as some states limit natural deer urine because of chronic wasting disease (CWD).
- Set the camera: use the same 10–15 foot distance and 45° angle as on a natural scrape. Mock scrapes work best when made two to three weeks before the pre-rut.
- Leave it alone: give it a week before your first check. If bucks take it over, they will start keeping it fresh themselves.
Common Scrape Camera Mistakes
- Mounting the camera 5 feet or less from the scrape, so night photos are white blobs.
- Aiming straight down the trail instead of from the side.
- Cutting the licking branch out of the frame.
- Facing the camera east or west, so the sun blinds it at dawn and dusk.
- Leaving the camera on scrapes after the peak rut starts and bucks move on to does.
- Hunting right on the scrape instead of the route between the scrape and bedding.
Frequently Asked Questions
How far should a trail camera be from a scrape?
About 10 to 15 feet. Closer than that, the infrared flash washes out night photos and the buck fills the frame. Much farther, the deer looks small and the flash may not reach him.
How high should I put a trail camera over a scrape?
About 3 to 4 feet high for the clearest photos. If mature bucks in your area avoid cameras, mount it 6 to 8 feet high and tilt it down so the scrape is in the middle of the frame.
Should a scrape camera use video or photos?
Video of 15 to 30 seconds works best because bucks stay at a scrape for a while and you can see their whole routine. Use a 3 to 5 shot burst if storage, battery or a cellular data plan is limited.
Why are all my scrape camera photos at night?
That is normal. Most scrape visits happen after dark. Watch for visit times moving closer to dawn or dusk and for repeat visits by one buck, which point to a daylight opportunity.
Do mock scrapes work with trail cameras?
Yes. A mock scrape made under a 4 to 6 foot licking branch two to three weeks before the pre-rut can draw bucks to a spot you choose, where the camera angle and access are easy.