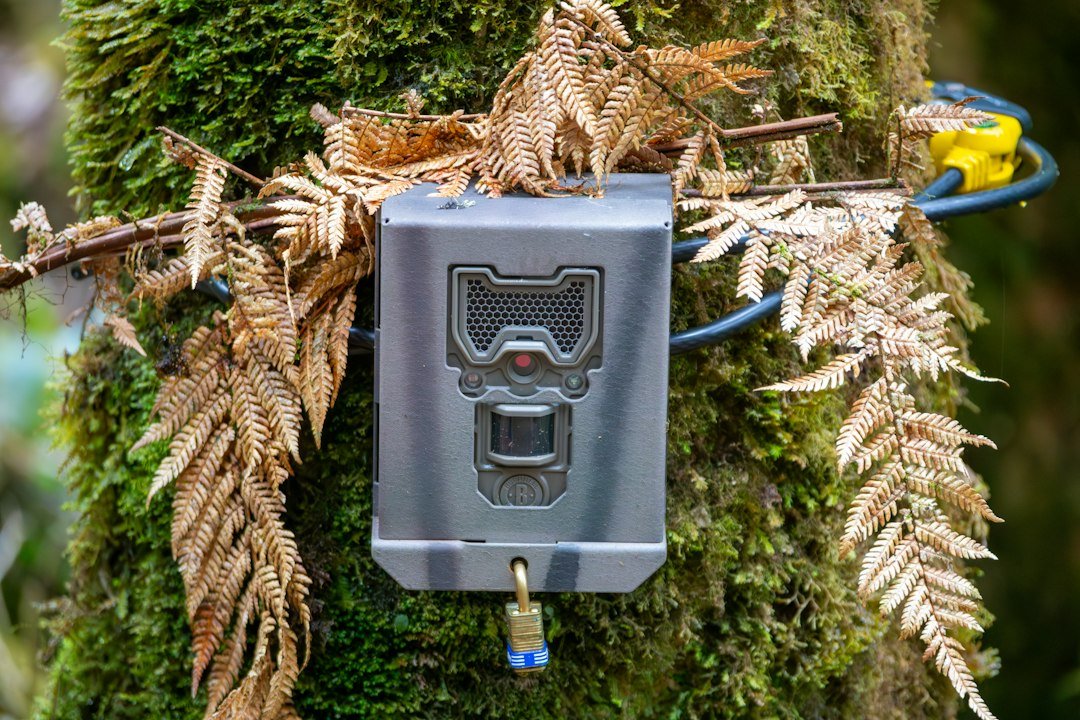
What is the best height for a trail camera? For deer, roughly three to four feet above the ground is a useful starting point. Small animals, sloping terrain, and security monitoring may require a different height. The most reliable approach is to test both the camera angle and motion detection at the actual site.
Quick Answer: What Is the Best Height for a Trail Camera?
For deer and general wildlife observation, mounting a trail camera around three to four feet above the ground is a practical starting point. This is not a universal rule: the ideal height depends on the animal’s size, distance from the lens, camera field of view, ground slope, and your purpose. Small animals often require a lower position, while a camera installed for property monitoring may be mounted higher and tilted downward. The most reliable method is to set an initial height, take test images, and adjust until the target is visible throughout the detection area. Manufacturer guidance for some models also recommends roughly three to four feet, but always check your exact camera manual.
Why Camera Height Matters
Mounting height affects what the lens sees and what the passive infrared sensor detects. If a camera is too high and aimed horizontally, small animals may pass beneath the detection zone. If it is too low, nearby grass can block the lens or cause false triggers. A camera placed too close to a narrow trail may cut off the animal’s head or body. Height also changes the angle of infrared illumination at night and the likelihood of glare from vegetation. Good placement balances detection, framing, security, and ease of maintenance. There is no single number that guarantees success across all habitats and camera designs.
Best Height for Deer Trail Cameras
Start around three to four feet above ground when photographing deer on a relatively level trail. This places many cameras near the height of a deer’s torso and can help keep the animal within the sensor’s coverage and the lens’s field of view. If the trail is very close to the camera, angle the unit slightly downward or adjust its position so a deer does not fill the entire frame. If the ground slopes, measure height relative to the animal’s path rather than only the tree base. Walk through the area at the expected distance and inspect the photographs. The right final height may differ from the initial three-to-four-foot setting.
Best Height for Small Animals
For rabbits, raccoons, foxes, and other smaller wildlife, a lower mounting position may produce better framing than a deer-oriented setup. A starting range of roughly one to two feet can be useful in some situations, but the camera’s minimum focus distance and detection pattern matter. Keep the lens above nearby grass and avoid placing the housing where flooding, snow, or mud can cover it. For very small animals, consider a purpose-built close-focus wildlife camera if your model cannot focus nearby. Test with an object or willing person at the expected distance and check the resulting frame. Avoid approaching nests or dens or disturbing protected habitats to obtain a closer image.
Best Height for Bears and Larger Wildlife
For bears and other large animals, a camera may need a different framing angle than one aimed at smaller species. A moderate mounting height can still work, but the lens should cover the animal’s expected body position at the distance of the trail. Avoid placing the camera where a large animal is likely to strike or rub against it. In bear country, follow local safety guidance and never approach wildlife to adjust equipment. Consider a protective enclosure where allowed and a stable mounting location that does not interfere with movement. Because bear size and terrain vary, confirm the framing through safe test captures rather than relying on a fixed height.
Best Height for Home Security
For a driveway, shed, or backyard gate, choose a height that captures the relevant approach without aiming into private areas. Mounting somewhat higher than typical deer height and angling downward may help protect the camera from accidental contact or tampering, but higher placement can reduce face detail if the subject is far away. A low camera may capture better frontal details but be easier to spot or damage. Test with a person walking at a normal pace and check whether the recorded image is useful. A trail camera should be considered supplemental monitoring rather than a substitute for a dedicated security system. See our home security guide.
Does the Angle Matter More Than Height?
Height and angle work together. A camera mounted four feet above the ground and pointed straight ahead will frame a trail differently from the same camera tilted downward. If the device is high, a downward angle can bring the detection zone onto the path. Too much downward tilt, however, may leave very little time for an approaching animal to trigger a useful photograph. Aiming directly at the ground can also produce overexposed nighttime images from close reflective objects. Begin with the lens aimed toward the expected path, then use test captures to refine the angle. Our trail camera aiming guide covers practical positioning.
How Distance Changes the Best Height
A camera placed only a few feet from a trail needs different framing from one monitoring a clearing farther away. At close range, a small change in height or tilt can make a large difference in whether the subject fits inside the frame. At longer distances, the camera may capture a wider scene but with less detail on the animal. Check the manufacturer’s stated detection and illumination ranges, remembering that real-world performance can vary. If you want recognizable detail rather than merely proof of movement, avoid placing the camera unnecessarily far from the target. Walk tests at multiple distances reveal where the sensor triggers and what the lens actually records.
Slopes, Hills, and Uneven Ground
When a trail runs uphill or downhill, measure camera height relative to where the animal will pass. A camera attached three feet above the ground at the base of a tree may effectively sit much higher or lower relative to the trail several yards away. Aim across the path and adjust tilt so the detection zone intersects the expected movement. On steep slopes, avoid pointing directly into nearby vegetation or the ground. Check the view from both directions of travel, because an animal moving uphill may be framed differently from one moving downhill. Take test images rather than assuming a level-ground recommendation will work unchanged.
Best Height at a Feeder or Water Source
At a feeder, water source, or other fixed observation point where camera use is permitted, choose a height that keeps the expected animals within the frame without letting nearby structures block the lens. A three-to-four-foot starting point may work for deer, but the best position depends on the distance to the feeder and the size of the visiting animals. Be mindful that baiting and feeding wildlife can be restricted or prohibited in some areas. Do not alter protected habitats or use attractants without checking local rules. Avoid pointing the camera toward highly reflective surfaces that may wash out night photographs. Review both daytime and nighttime test images before leaving the equipment unattended.
Best Height for Night Pictures
Nighttime photographs depend on infrared illumination as well as the lens and detection sensor. If the camera is too close to tall grass, branches, or a reflective post, infrared light can bounce back and make the image appear white or washed out. A higher mounting position with a gentle downward angle may help avoid some foreground obstructions, but it can also shorten the useful flash distance to the ground. Keep the infrared LED window clear and test after dark at the expected animal distance. If nighttime images are black, blurry, or missing, investigate battery power and flash settings as well as placement. See our night photo troubleshooting guide.
Mounting Height and PIR Detection
Many trail cameras use a passive infrared sensor that responds to changes in heat patterns moving across its detection zone. The shape of that zone is not necessarily identical to the lens’s field of view. A camera may detect a person at the edge of its sensor coverage but capture only part of the subject. Raising or lowering the device changes where the detection zone intersects the ground. For this reason, a height that produces a nice-looking static view may still miss moving animals. Walk across the intended path at several points, then inspect the saved images. Our PIR trigger explanation describes this process.
How to Mount a Trail Camera Step by Step
Choose a stable tree or post where mounting is allowed. Attach the camera using the supplied strap or an approved bracket and set the lens at an initial height suited to the target animal. Tighten the mount enough to prevent movement without damaging the tree. Keep vegetation clear of the lens and sensor, but avoid cutting plants where prohibited. Aim across the likely path, check the view, and activate the camera’s test mode if available. Walk through the detection area and review several captures. Adjust the height or angle one variable at a time until the subject is centered. Finally, check the camera after dark if night monitoring is important.
Common Height and Placement Mistakes
A frequent mistake is mounting a camera at an arbitrary height without testing it. Another is aiming too far downward from a high position, causing the sensor to cover only a small patch of ground. Mounting too low can create blocked views, splash exposure, and false triggers from moving plants. A camera mounted on a flexible sapling may move in the wind and produce unusable images. Avoid pointing toward bright sunrise or sunset when possible, and do not place the lens directly behind reflective branches. Check the actual files rather than trusting the viewfinder alone. If your camera captures empty frames, changing height may help, but sensitivity and vegetation also deserve attention.
Should You Hide a Trail Camera Higher Up?
Some users mount cameras above eye level and tilt them downward to make them less noticeable. This can be useful for security or theft deterrence, but it may reduce image detail and detection reliability if the angle is too steep. Higher placement can also make battery and memory card changes harder and may require unsafe climbing. Do not use a ladder on unstable terrain or attach equipment to structures without permission. For wildlife monitoring, a discreet mount at a suitable detection height may be more useful than an extremely high installation. See our camera concealment guide for responsible placement ideas.
How Often Should You Recheck Camera Height?
Check framing shortly after initial installation and whenever the environment changes. Growing vegetation, snow accumulation, shifting branches, or a loosened mounting strap can change what the camera sees. If you switch from monitoring deer to smaller animals, reconsider the height and angle. If you move the camera to a slope or a different trail width, repeat the walk test. Periodic review also helps identify false triggers, nighttime glare, and low batteries before you lose weeks of useful recordings. Do not disturb wildlife unnecessarily when checking equipment. A brief test during setup can save multiple return visits later.
Frequently Asked Questions
Is three feet a good height for a trail camera? It is a practical starting point for many deer-monitoring situations. Is four feet too high? Not necessarily; it depends on the target, distance, and tilt. Should a trail camera point downward? A slight downward angle can help when mounted above the target path, but test the framing. What height works for raccoons? A lower position may help, provided the camera can focus and detect the animal. Can I mount it ten feet high? Some users do, but steep angles and reduced detail can be problems. Does height affect night vision? Yes, it changes illumination angle and nearby reflections. What matters most? Confirming real captures at the intended location.
Final Recommendation
For deer and general wildlife, begin around three to four feet above the ground, aim toward the animal’s expected path, and adjust based on test photographs. Use a lower position for small animals when appropriate and consider a higher, downward-angled mount for some security applications. Treat all numerical ranges as starting points rather than manufacturer-independent guarantees. The best height is the one that consistently captures your target clearly without excessive false triggers or habitat disturbance. Consult the manual for your specific camera, particularly if its PIR detection zone or lens angle differs from common designs. You can also review the Browning Trail Cameras and Tactacam support resources for model-specific installation guidance.
As an Amazon Associate, I earn from Qualifying Purchases.