
Trail Camera Sun Glare: How to Stop Washed-Out Photos
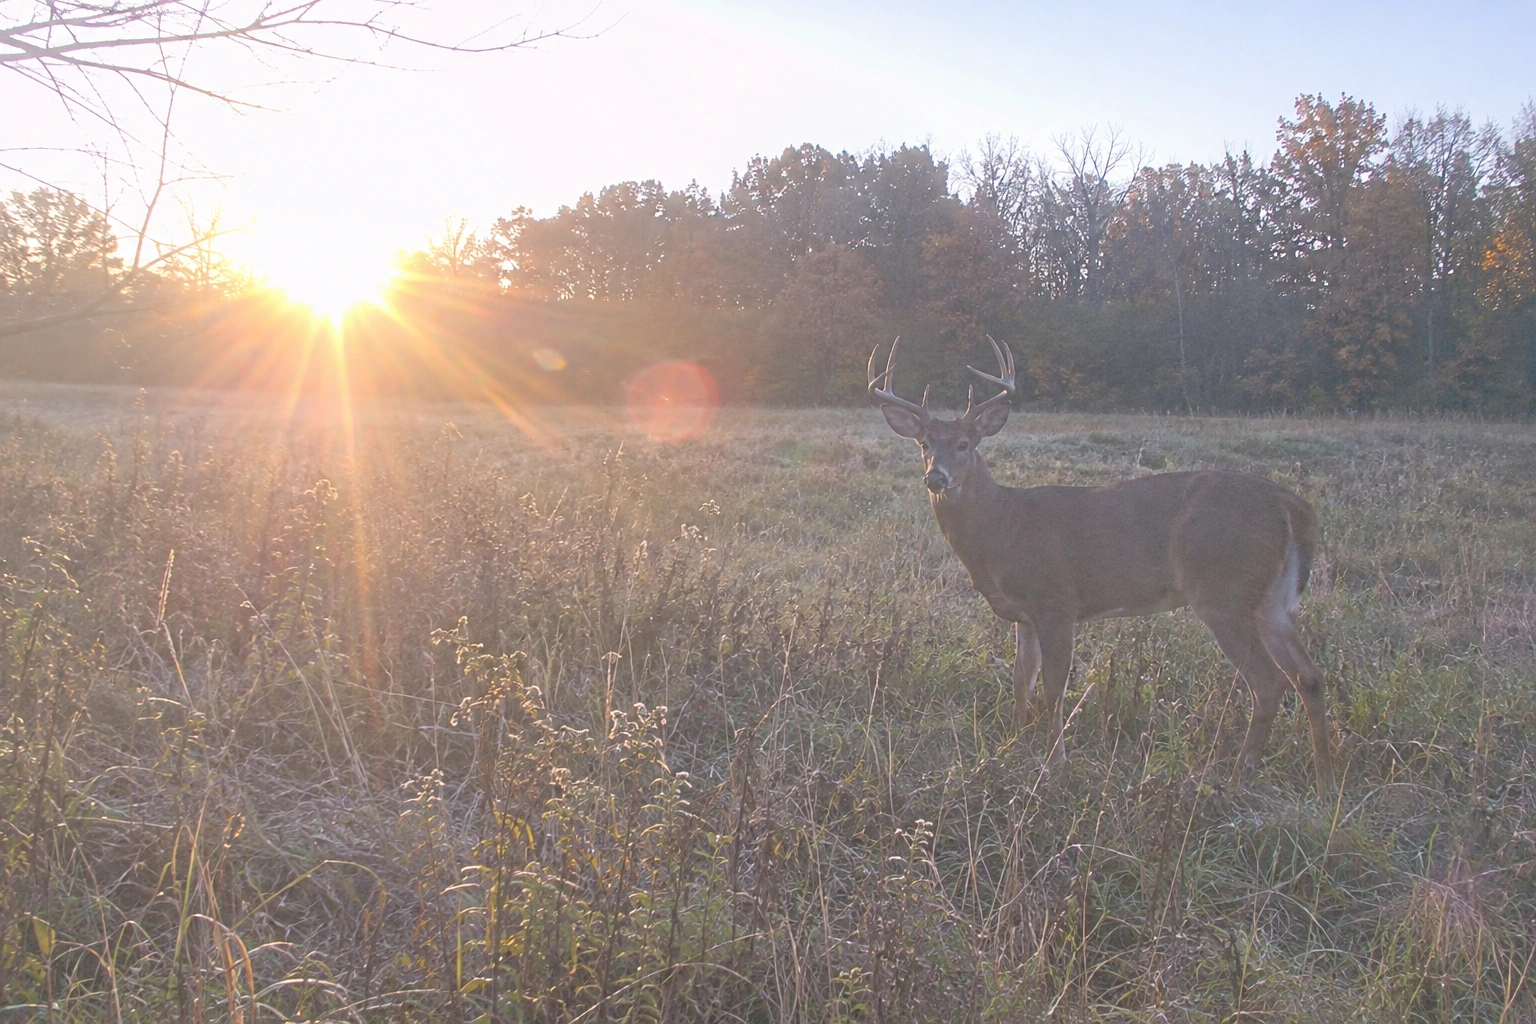
You pull the card and find a stack of daytime photos that are white, hazy or streaked with bright flare. The deer are there, but you can barely see them. Or worse, half the photos have no animal at all. Nine times out of ten, the cause is trail camera sun glare: the camera is pointed too close to the sun. The good news is that it is one of the easiest problems to fix.
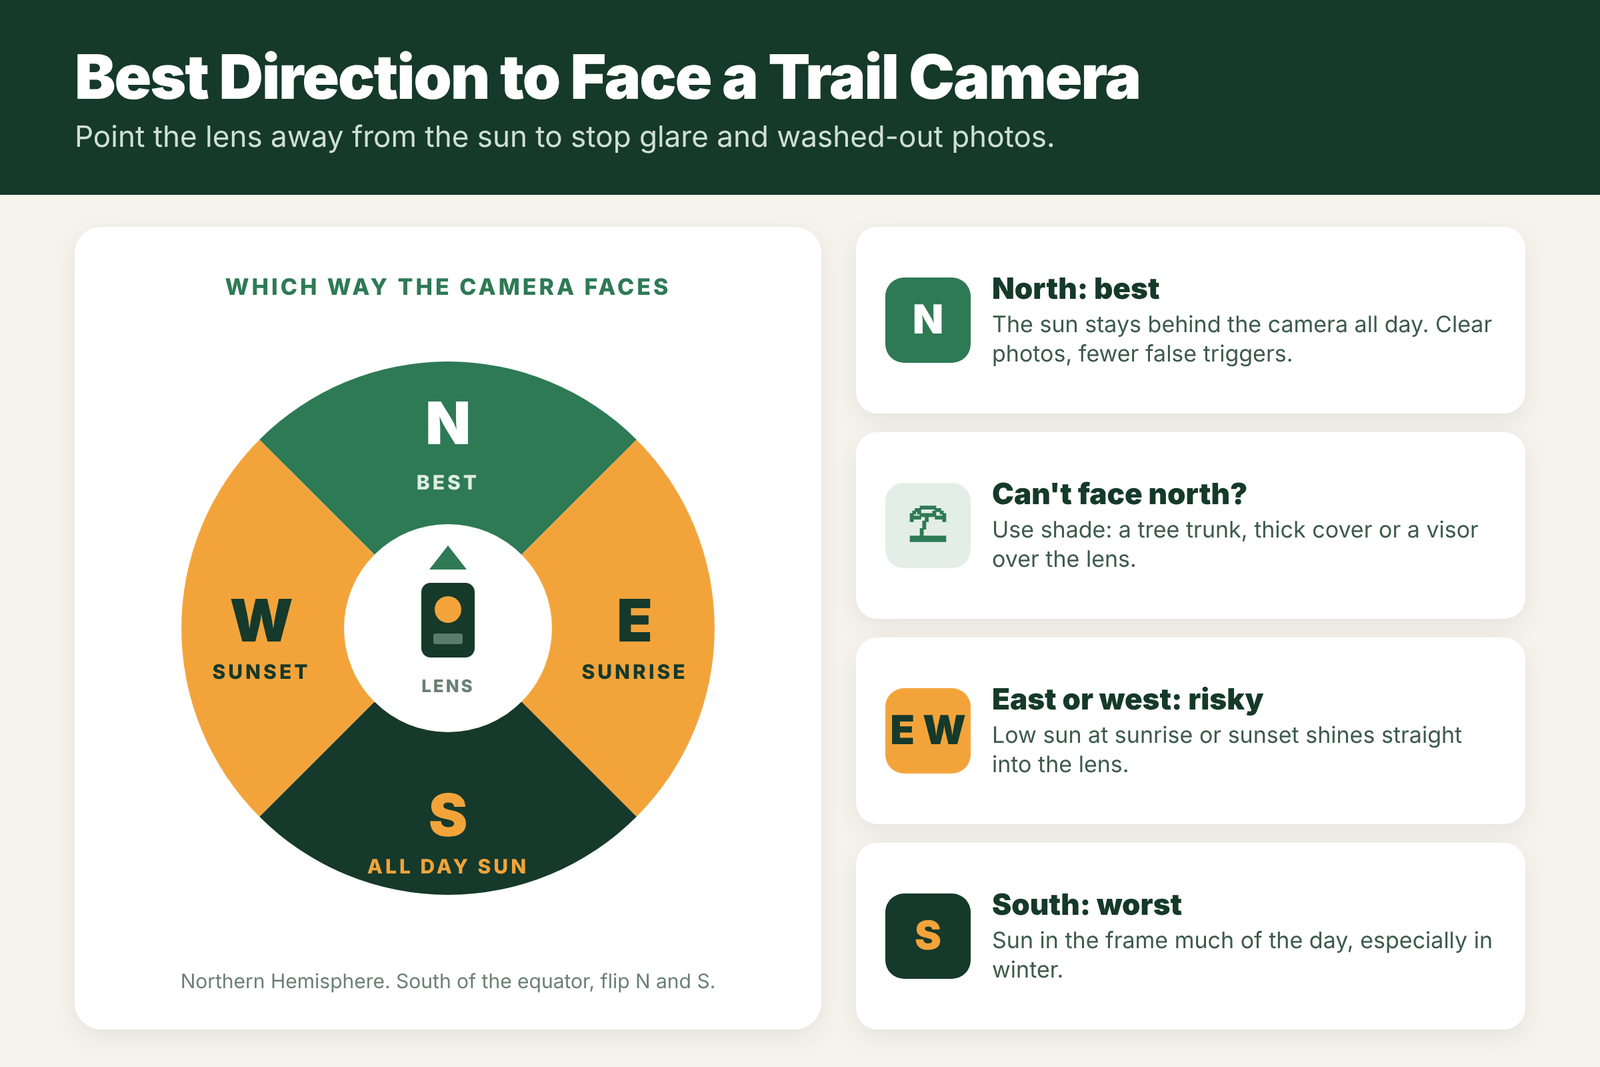
Washed-out daytime photos are usually caused by the sun shining into or near the lens. In the Northern Hemisphere, face your trail camera north so the sun stays behind it all day. Avoid facing east or west, where the low sun at sunrise and sunset shines straight in, and never face south, especially in winter. If you cannot face north, use shade from a tree trunk or cover, add a small visor over the lens, tilt the camera slightly down, and lower the PIR sensitivity to cut sun-triggered false photos.
- Best direction
- North (Northern Hemisphere)
- Risky
- East (sunrise) and west (sunset)
- Worst
- South
- Worst season
- Winter, when the sun is low
- Quick fix
- Shade, visor, tilt down
- Side effect
- Sun can cause false triggers
Why Direction Matters: The North-Facing Rule
In the Northern Hemisphere, the sun rises in the east, moves across the southern part of the sky, and sets in the west. A camera that faces north has the sun behind it or off to the side all day long, so the lens never looks into the light. That gives you:
- Even lighting on the animals, with no harsh backlight.
- No lens flare or hazy, white photos.
- Fewer false triggers from sun heating the ground and brush in front of the camera.
If you live in the Southern Hemisphere, the rule flips: face south. Our guide on how to aim a trail camera covers height and angle too.
Sunrise and Sunset Glare
East- and west-facing cameras often work fine at midday, then fail right when deer are most active:
- East-facing: the rising sun shines straight into the lens in the first hour or two after sunrise. Photos come out washed out or as dark silhouettes.
- West-facing: the same thing happens in the last hour before sunset, which is prime time for deer.
- Winter makes it worse. The sun stays low in the southern sky all day, so even a camera facing southeast or southwest can catch glare for hours.
If a field edge only works with an east or west view, angle the camera a little toward north (northeast or northwest), so the sun is off to the side.
Shade and Visor Tricks
- Use the tree itself. Mount the camera on the side of the trunk where the tree blocks the sun at the worst time of day.
- Pick a shaded backdrop. Aim at a trail with trees or brush behind it, not at open sky or a bright field.
- Add a short visor. A small hood or overhang above the lens cuts glare from high sun. Keep it out of the frame and clear of the PIR sensor. See our guide to a trail camera rain hood.
- Tilt slightly down. Pointing the camera a little toward the ground keeps the bright sky out of the top of the frame.
- Keep the lens clean. Dust, pollen and water spots scatter light and make flare much worse.
Sun-Triggered False Photos
The PIR sensor looks for heat that moves. When sun hits the ground, rocks, grass or branches in front of the camera, they warm up. A passing cloud or a breeze moving sunlit leaves can make those warm spots seem to move, and the camera fires. Signs of sun false triggers:
- Lots of empty photos in the middle of sunny days.
- Few or no empty photos on cloudy days or at night.
- Bursts of photos as shadows move across the frame.
Read more in why your trail camera takes pictures of nothing.
Settings That Help
- Lower PIR sensitivity at sunny, open sites.
- Add a trigger delay so a few false triggers do not fill your card.
- Use the right resolution. Higher settings do not fix glare, but a camera with good dynamic range handles bright scenes better.
- Set operating hours if your camera has them, to skip the hour when the sun hits the lens.
- Check photo quality after each move. Our guide on how to get better images from a trail camera has more tips.
Camera Direction and Glare Risk
Here is how each direction usually performs in the Northern Hemisphere. In the Southern Hemisphere, swap north and south.
| Camera faces | Glare risk | When problems show up | Verdict |
|---|---|---|---|
| North | Lowest | Rarely; maybe very early or late in midsummer | Best choice |
| Northeast or northwest | Low to medium | Sunrise or sunset in summer | Good with some shade |
| East | High | Sunrise, all year | Avoid, or shade the lens |
| West | High | Sunset, the hours deer move most | Avoid, or shade the lens |
| South | Highest | Midday, worst in winter when the sun is low | Avoid if possible |
How the Seasons Move the Sun
The sun’s path changes through the year, which is why a camera that worked in summer can suddenly start taking washed-out photos in fall. In summer, the sun rises in the northeast, climbs high, and sets in the northwest. Even a north-facing camera can catch a little sun at the very start and end of the day. In winter, the sun rises in the southeast, stays low in the southern sky, and sets in the southwest. A camera facing south gets the low winter sun straight in the lens for much of the day. If you set a camera in August and run it through December, check it again in October when the sun angle changes.
Step-by-Step: Fixing a Glare Problem in the Field
- Look at the time stamps. If bad photos cluster at sunrise, the camera faces east. At sunset, it faces west. At midday in winter, it faces south.
- Check the direction with a phone compass while standing behind the camera.
- Move the camera to the other side of the trail so it looks north across the same spot. This often solves it without changing your setup.
- If you cannot move it, add shade: a short visor, a nearby trunk or a branch left above the lens.
- Tilt the camera down slightly so less sky is in the frame.
- Walk-test and check a day’s photos on your next visit.
Field Examples
The field-edge camera: a hunter sets a camera on the east side of a food plot facing west. Every evening, right when deer come out, the photos are bright orange and washed out. Moving the camera to the south edge of the plot, facing north, gives clear photos of the same deer.
The winter feeder: a feeder camera that took great photos in September turns white in December. The low winter sun now shines straight in from the south. A small visor and a slight downward tilt fix it.
Sun false triggers: a camera facing a bare, sunny rock shows dozens of empty photos each afternoon. The warming rock and moving shadows fool the PIR sensor. Re-aiming at a shaded trail ends it.
Glare Mistakes to Avoid
- Aiming across water or snow that reflects sunlight into the lens.
- Leaving lots of sky in the frame. Bright sky makes the camera darken everything else.
- Placing the camera in a sunny gap where light flickers through leaves; dappled light causes both glare and false triggers.
- Forgetting the lens cover. Scratches and dirt scatter light and make flare worse. See how to clean a trail camera lens.
When You Have to Face the Sun
Sometimes the only good spot faces east or west, such as a narrow funnel or a gate. In that case, use every trick together: mount the camera in the shade of a big trunk, angle it down, add a visor, and choose a model with good backlight handling if you are buying. Accept that a few photos at sunrise or sunset will be poor, and rely on the rest of the day and night.
Glare at Night: Flash Reflections
Glare is not only a daytime problem. At night, the camera’s infrared flash can bounce back from close objects and wash out the photo. A branch, a feeder leg or tall grass a few feet in front of the lens reflects the flash and makes the background look black while the near object glows white. Shiny surfaces like a metal gate, a reflective sign or a puddle do the same. Before you leave a camera, check what sits in the first 5 to 10 feet in front of it. Clear small branches and grass, angle away from shiny metal, and keep the animal you want to photograph at least 10 feet away. If your camera has a flash power setting, try low or auto for close setups. Our guide to trail camera night pictures whiteout fix covers this in more detail.
Quick Checklist Before You Leave the Camera
- Camera faces north, or is shaded from the sun
- Little or no sky in the frame
- No water, snow or shiny metal reflecting into the lens
- Nothing within 5 to 10 feet to bounce the night flash back
- Lens cover clean and unscratched
- Walk-tested at the distance deer will pass
Frequently Asked Questions
Which direction should a trail camera face?
North in the Northern Hemisphere, so the sun is behind the camera all day. In the Southern Hemisphere, face it south.
Why are my trail camera photos white or washed out?
The sun is shining into or near the lens. Face the camera north, add shade or a visor, tilt it slightly down and keep the lens clean.
Is it bad to face a trail camera east?
It can be. An east-facing camera looks into the rising sun, so photos at sunrise, when deer are active, are often washed out or show only silhouettes.
Can the sun trigger a trail camera?
Yes. Sun warms the ground and brush, and moving shadows or sunlit leaves can trigger the heat sensor. Lower the sensitivity and face the camera north.
How do I stop lens flare on my trail camera?
Keep the sun out of the frame by facing north, use a short visor over the lens, aim at a shaded backdrop and clean dust and water spots off the lens.
Does the sun affect trail camera photos in winter more than summer?
Often, yes. The winter sun stays low in the southern sky, so south, east and west-facing cameras get more direct glare.
Can I use a lens hood on a trail camera?
A short visor or hood can help, as long as it does not block the PIR sensor or flash, or show up in the photo.
What if my only good camera spot faces east?
Shade the camera with a tree trunk, angle it down, add a visor and expect some poor sunrise photos.