
How to Clean a Trail Camera Lens Safely (Outdoor Camera Lens Guide)
A trail camera lives outside in dust, pollen, rain, spider webs and snow. Over a season, a thin film builds up on the lens and the clear covers in front of the IR flash and motion sensor. Photos slowly turn soft and hazy, night shots get foggy, and the camera may even miss animals. Knowing how to clean an outdoor camera lens the right way takes two minutes and can make your photos sharp again, without scratching the plastic.
To clean a trail camera lens, first blow or brush off loose grit so it does not scratch, then wipe gently with a clean microfiber cloth in small circles from the center out. For stuck-on spots, put a drop of lens cleaning solution on the cloth, not on the lens. Clean the IR flash cover and PIR sensor window the same way. Never use your shirt, paper towels, glass cleaner or strong alcohol sprays. Dry everything, check the door seal, and add a fresh silica gel pack to stop fog.
- Best tool
- Clean microfiber cloth
- First step
- Blow or brush off grit
- Cleaner
- Lens solution, on the cloth
- Never use
- Shirt, paper towel, glass cleaner
- Also clean
- IR cover and PIR window
- How often
- Every card check, or when photos look soft
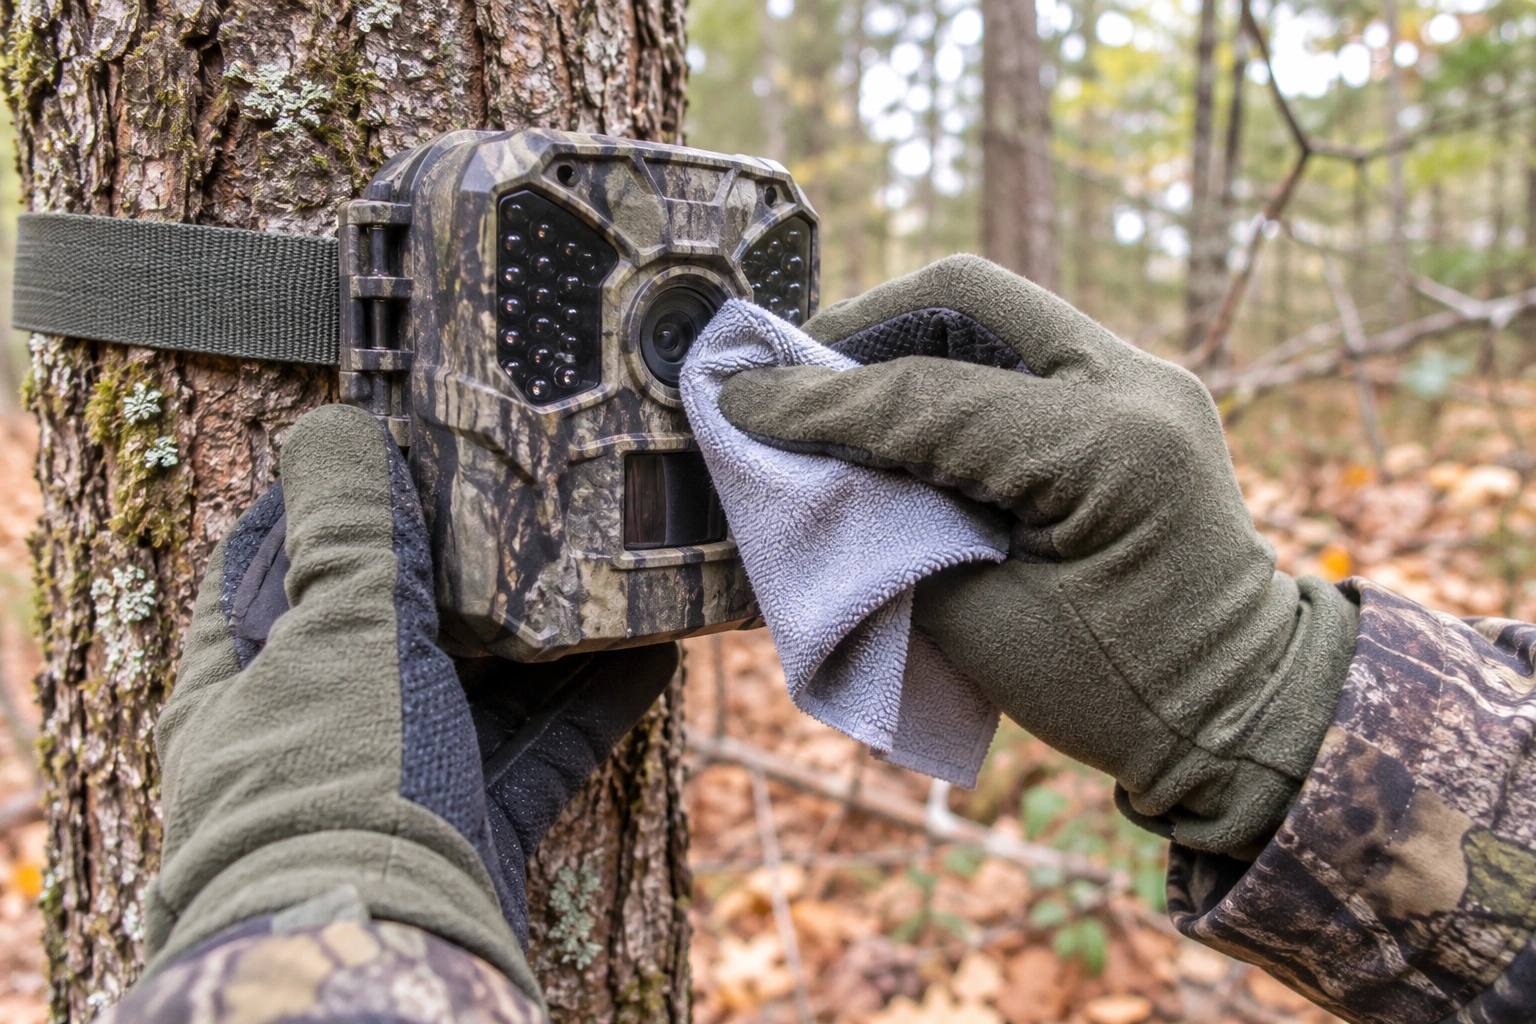
Signs Your Lens or IR Cover Is Dirty
- Soft or hazy daytime photos that used to be sharp.
- Glowing haze or bright spots in night photos, often from dust or water spots on the IR flash cover reflecting light back.
- Dark corners or blurry patches in the same place on every photo.
- Missed animals or fewer triggers, which can mean the PIR sensor window is covered in dirt or webs.
- Fog or droplets that do not go away, which may be moisture inside the case.
If cleaning does not fix blurry photos, see how to fix blurry trail camera photos for other causes.
What to Use (and Never Use)
Use:
- A clean microfiber cloth made for glasses or camera lenses. Keep it in a zip bag so it stays clean.
- A bulb blower or soft lens brush to remove grit before you wipe.
- Lens cleaning solution or pre-moistened lens wipes.
- Cotton swabs for the edges of the case and the rubber gasket.
Never use:
- Your shirt, glove, a paper towel or a napkin. They hold grit and leave fibers and scratches.
- Household glass cleaner or strong alcohol sprays, which can cloud or crack some plastics and damage coatings.
- Spit or your breath on a cold lens. It adds moisture that freezes or leaves spots.
- Creek water or bottled water, which leave minerals behind.
- Hard pressure. Many trail camera lenses are plastic and scratch easily.
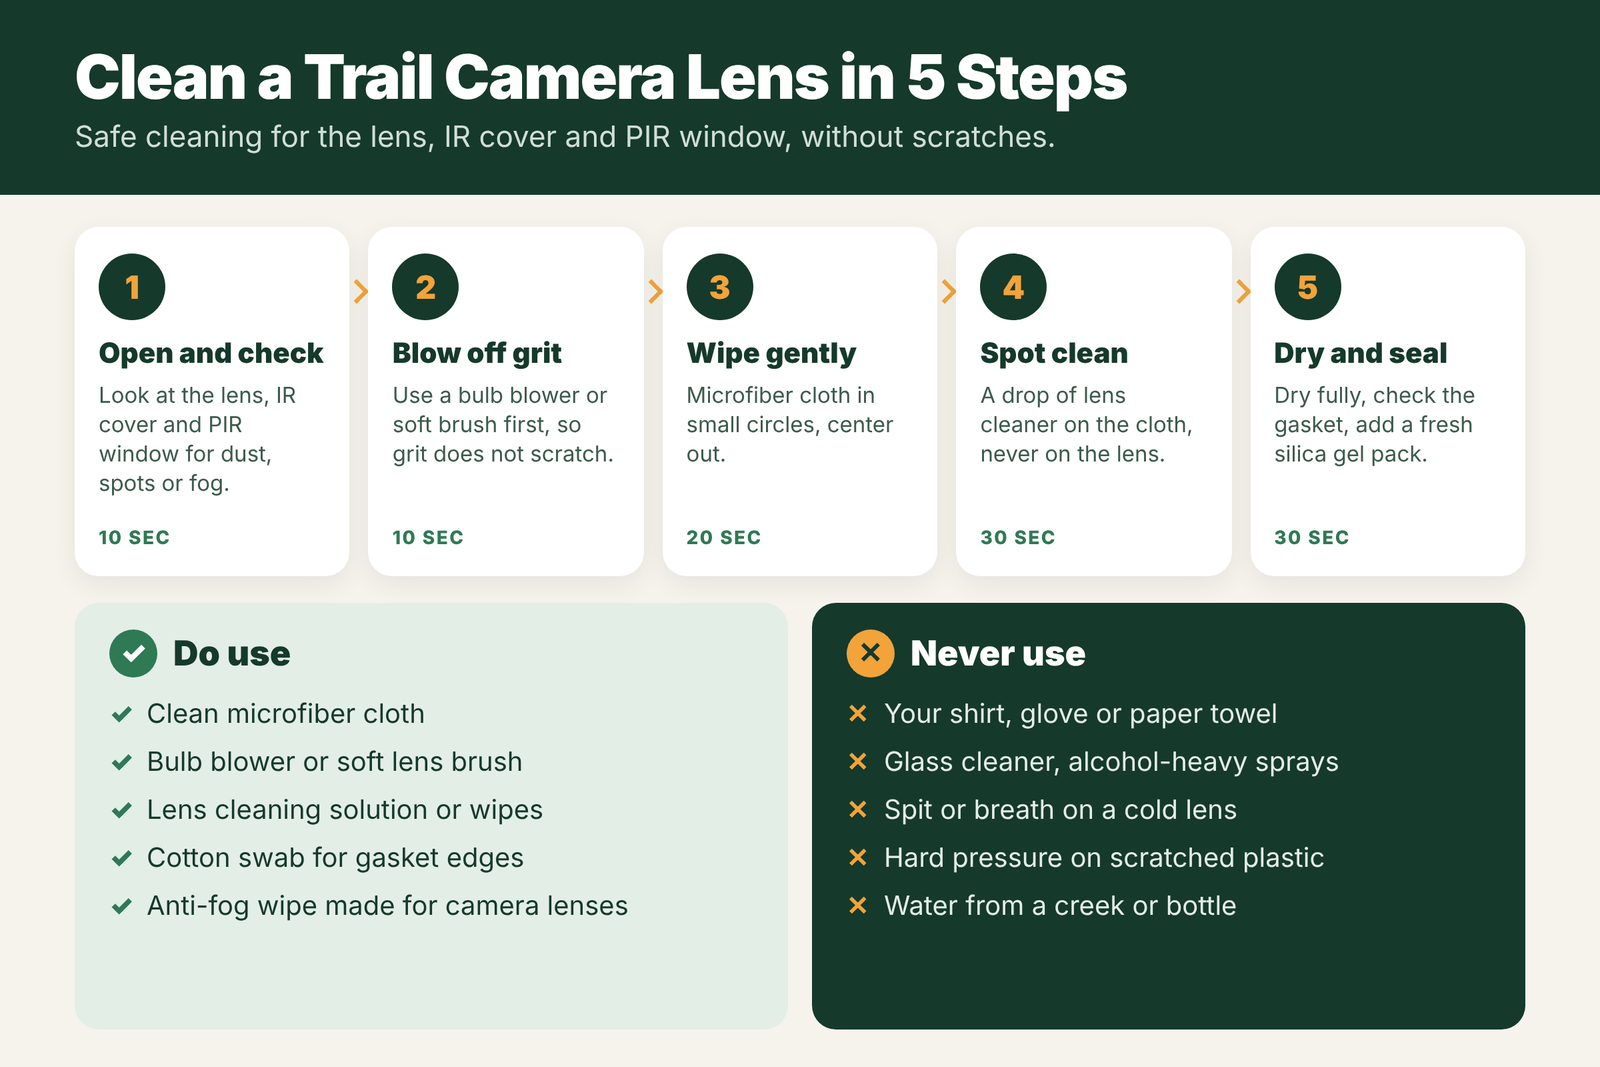
Step-by-Step Cleaning
- Open and check. Look at the lens, IR flash cover and PIR sensor window in good light. Note dust, spots, webs or fog.
- Blow off grit. Use a bulb blower or soft brush to remove sand, dust and pollen. Wiping grit around is what causes scratches.
- Wipe gently. With a clean microfiber cloth, wipe in small circles from the center out, using very light pressure.
- Spot clean. For sap, mud or water spots, put a drop of lens cleaning solution on the cloth (not on the lens), wipe, then buff dry with a clean part of the cloth.
- Dry and seal. Make sure everything is dry. Wipe the rubber gasket with a swab, check for cracks, and close every latch tight.
Cleaning the PIR Sensor Window
The PIR sensor sits behind a small, ridged (Fresnel) plastic window. If it is covered in dirt, webs or a film, the camera may miss animals or trigger late.
- Blow off dust first, then use a soft brush to clean between the ridges.
- Wipe gently with a slightly damp microfiber cloth. Do not scrub.
- Remove spider webs and insect nests around the sensor, since moving webs can also cause false triggers.
Anti-Fog After Cleaning
- Add a fresh silica gel pack inside the case to soak up moisture.
- Let the camera adjust to outside air before closing it, especially when bringing it from a warm vehicle into the cold.
- Use an anti-fog wipe made for camera lenses if fog keeps coming back. See the best anti-fog for trail cameras.
- Check the seal if fog appears inside the lens. Read how to keep a trail camera from fogging up.
What to Use: Safe vs Unsafe Cleaners
| Item | Safe? | Why |
|---|---|---|
| Microfiber lens cloth | Yes | Soft, lint-free, made for lenses |
| Air blower or soft brush | Yes | Removes grit before you wipe |
| Lens cleaning solution (on the cloth) | Yes | Lifts oily spots without harsh chemicals |
| Lens wipes made for glasses or cameras | Usually | Check they are alcohol-light or for coated lenses |
| Paper towels or tissues | No | Wood fibers can scratch plastic covers |
| Your shirt sleeve | No | Carries grit that scratches |
| Glass cleaner with ammonia | No | Can damage coatings and plastic |
| Strong solvents or high-alcohol sprays | No | Can cloud or crack plastic lens covers |
A Simple Cleaning Routine
| When | What to do | Time needed |
|---|---|---|
| Every card check | Quick look; blow off dust; wipe the lens if spotted | 1 minute |
| Every month in the field | Clean lens, IR cover and PIR window; check the seal | 5 minutes |
| After rain, snow or pollen season | Full clean, dry the case, swap silica gel | 5 to 10 minutes |
| Off-season storage | Full clean, remove batteries, store dry | 15 minutes |
Field Kit for Camera Cleaning
- Two microfiber cloths in a zip-top bag, so they stay clean
- A small air blower or soft lens brush
- A small bottle of lens cleaning solution
- Cotton swabs for corners and the PIR window edges
- Spare silica gel packs
- Spare SD card and fresh lithium batteries
Keep it all in one pouch in your pack, and you can clean every camera in a couple of minutes during your normal card checks.
Field Examples
Hazy night photos: a hunter notices night photos have a gray haze while daytime photos look fine. The IR flash cover is coated with dust and pollen, which scatters the light. Cleaning the flash cover, not just the lens, brings back sharp night photos.
A soft spot in every photo: one blurry patch in the same place on every image usually means a smudge or water spot on the lens cover. A drop of solution on the cloth removes it.
Missed deer after summer: a camera that triggered fine in spring misses deer in August. A spider web and dust film over the PIR window are reducing its sensitivity. Cleaning the window fixes it.
Cleaning Mistakes That Ruin Lenses
- Wiping before removing grit. Always blow or brush first, or you will drag sand across the cover.
- Spraying liquid directly on the camera. It can run into the seal or onto the PIR sensor. Put solution on the cloth.
- Pressing hard. Light pressure and small circles are enough.
- Cleaning in the rain. You will add more water spots than you remove.
- Ignoring scratches. A deeply scratched lens cover will never look clear. Some makers sell replacement covers.
Preventing Dirt in the First Place
A short visor keeps rain, snow and falling debris off the lens. Angle the camera slightly down so water runs off. Mount it where cattle, horses and deer cannot rub against it. Away from dusty roads, the lens stays cleaner for longer. And a security box with a lip shades the lens and keeps curious animals from licking it, which happens more often than you might think.
Lens vs Lens Cover: What You Are Actually Cleaning
On most trail cameras, you never touch the real camera lens. It sits behind a clear plastic or glass window that keeps out water and dust. That cover is what gets dirty, scratched or foggy. Plastic covers scratch more easily than glass, which is why soft cloths and gentle pressure matter so much. If fog shows up on the inside of the cover, the problem is moisture in the case, not dirt on the outside. In that case, open the camera in a dry room, let it air out for a few hours, add fresh silica gel, and check the door seal before you close it again. If the inside fogs again quickly, the gasket may be worn or the case cracked.
How Dirty Lenses Affect Photos
A thin film of dust may only soften daytime photos a little, but at night it scatters the infrared flash and makes everything look hazy. Pollen, which coats cameras in spring, is one of the worst offenders. Water spots and smudges show up as soft, blurry patches in the same place on every photo. Mud splashed from rain can block part of the frame entirely. Insects, especially spiders, love the warm, sheltered spot above a camera, and a single web across the lens can trigger the camera over and over as it moves in the breeze. Regular cleaning prevents all of these and keeps your photos sharp all season.
Frequently Asked Questions
How do I clean an outdoor camera lens?
Blow or brush off loose dust first, then wipe gently with a clean microfiber cloth. For stubborn spots, put a drop of lens cleaner on the cloth, not on the lens, and buff dry.
Can I use glass cleaner on a trail camera lens?
No. Household glass cleaners and strong alcohol sprays can cloud or damage plastic lenses and coatings. Use lens cleaning solution made for cameras or glasses.
Why are my trail camera night photos hazy?
Dust, water spots or film on the IR flash cover or lens reflect the infrared light. Clean the lens and IR cover, and check for moisture inside the case.
How often should I clean my trail camera lens?
Check it every time you pull the card, and clean it whenever photos look soft or hazy. Dusty, pollen-heavy or wet seasons may need cleaning more often.
Should I clean the PIR sensor too?
Yes. A dirty or web-covered PIR window can cause missed animals or late triggers. Brush it gently and wipe with a slightly damp microfiber cloth.
Can I use eyeglass cleaner on a trail camera lens?
Usually yes, if it is a gentle cleaner made for coated lenses. Put it on the cloth, not the lens.
Why is there a blurry spot in all my trail camera photos?
Most often a smudge, water spot or scratch on the lens cover in that spot. Clean it gently; a deep scratch may need a new cover.
Do I need to clean the IR flash cover?
Yes. Dust and pollen on the flash cover scatter the light and make night photos hazy.