
Trail Camera Rain Hood: Do You Need One?
Most trail cameras are sold as “weatherproof” or “waterproof,” yet many hunters still find blurry photos after a storm, foggy lenses, or a camera that quit after a wet season. That makes people wonder if a trail camera rain hood or cover is worth adding. The honest answer: most cameras do not need one to survive rain, but a simple hood can give you clearer photos in bad weather. Here is how to decide.
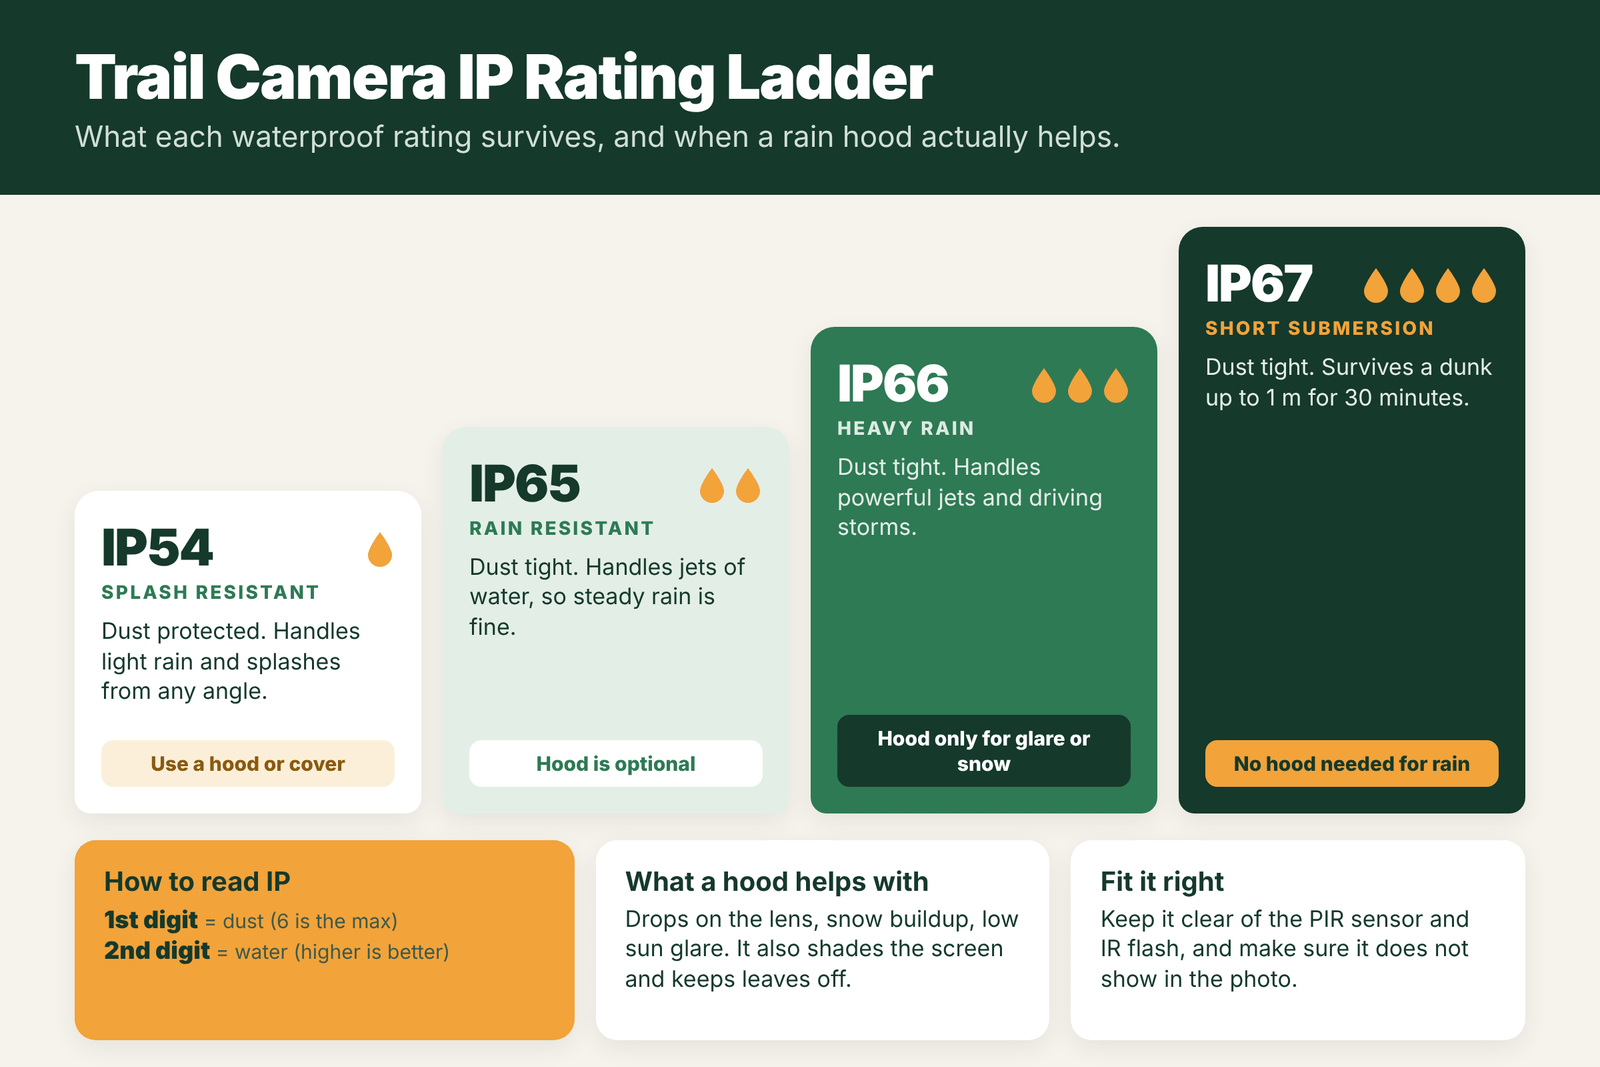
A trail camera with an IP65, IP66 or IP67 rating is built to handle rain on its own, so a rain hood is not needed to keep water out. A hood is still useful because it keeps raindrops and snow off the lens, cuts sun glare, and protects older or lower-rated cameras (like IP54). If you use one, make sure it does not block the PIR sensor or IR flash and does not show up in your photos. Check the seal, latches and battery door, since most water damage comes from a bad seal, not from rain hitting the case.
- Good rain rating
- IP65 or higher
- IP66
- Heavy rain and powerful jets
- IP67
- Short dunk, up to 1 m for 30 min
- Hood helps with
- Drops on lens, snow, glare
- Biggest risk
- Worn seals and open latches
- Fitting rule
- Keep PIR and flash clear
IP Ratings Explained
An IP (Ingress Protection) rating tells you how well a device keeps out dust and water. It has two numbers:
- The first number is for dust and solids, from 0 to 6. A 6 means dust tight.
- The second number is for water, from 0 to 9. Higher numbers handle more water.
Common ratings on trail cameras:
- IP54: dust protected and resists splashing water from any direction. Fine for light rain, but a hood or cover is a good idea in wet climates.
- IP65: dust tight and resists jets of water. Handles steady rain well.
- IP66: dust tight and resists powerful jets of water. This is the most common rating on good trail cameras and handles heavy, driving rain.
- IP67: dust tight and can survive being under 1 meter of water for up to 30 minutes. Great for flood-prone spots or creek bottoms.
Some cameras only say “weather resistant” with no IP number. Treat those like IP54 or lower. See our list of the best waterproof trail cameras if you need a tougher model.
What Rain Does to Lenses and Sensors
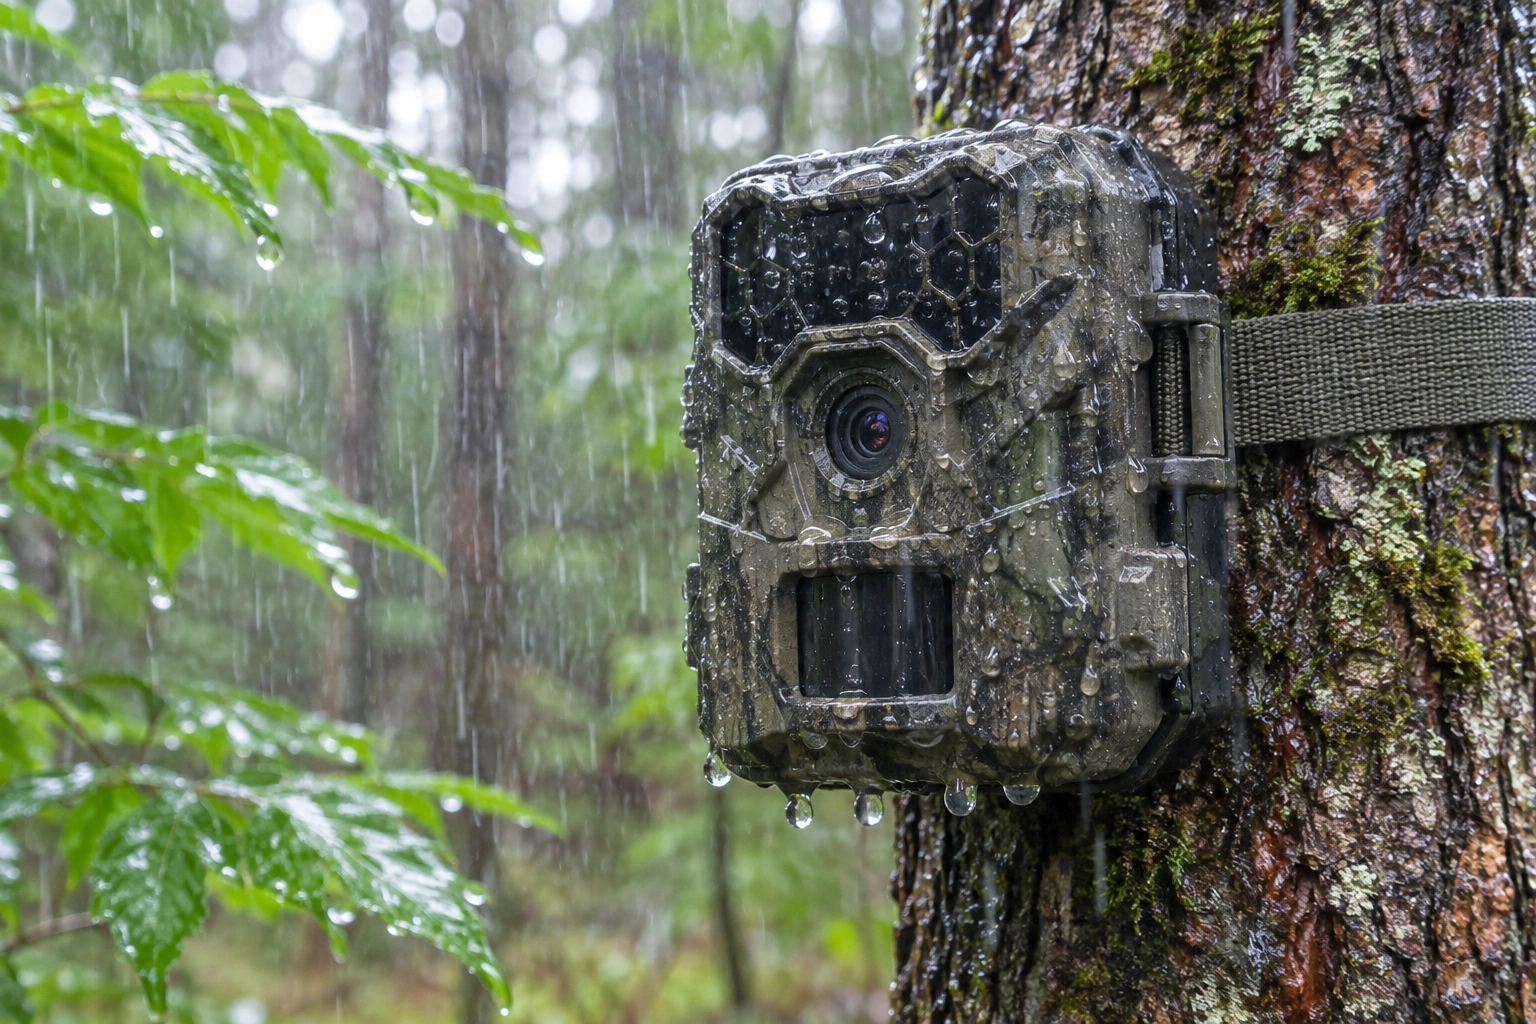
Even a well-sealed camera can give you bad results in the rain:
- Drops on the lens blur photos, especially at night when the IR flash lights up each drop like a small white spot.
- Falling rain close to the lens reflects the IR flash and can cause hazy night photos.
- Water on the PIR sensor cover can make the sensor less reliable, leading to missed triggers.
- Condensation inside forms when warm, humid air is sealed in and the temperature drops. The lens fogs from the inside. Read how to prevent condensation in a trail camera.
- Leaks usually come through a worn or dirty gasket, a latch not fully closed, or a cracked battery door, not through the case itself.
Rain Hood vs DIY Cover
- Store-bought hoods or visors: some cameras have an optional brim or hood made to fit. They clip on, look neat, and are shaped to stay out of the lens view.
- Lock boxes and security cases: a steel box with a small overhang above the lens works as a rain hood and protects against theft and bears at the same time.
- DIY covers: a small piece of PVC pipe cut in half, a plastic lid, or a short strip of aluminum flashing above the lens can work well. Paint or wrap it to match the camera.
- Natural cover: mounting the camera under a thick branch or on the sheltered side of a tree trunk keeps a lot of rain off for free.
Avoid wrapping the whole camera in a plastic bag. It traps moisture, blocks the sensor and flash, and makes condensation worse.
How to Fit a Hood Without Blocking the PIR
- Keep the overhang short, just enough to shade the lens. Usually 1 to 2 inches is plenty.
- Leave the PIR sensor and IR flash fully open. Anything in front of them will cause missed triggers or bright reflections at night.
- Take test photos day and night. Make sure the hood does not show at the top of the frame and does not reflect the flash.
- Angle it slightly forward so water runs off away from the lens.
- Use dark or camo colors so the hood does not make the camera easier to spot.
When You Don’t Need One
- Your camera is IP66 or IP67 and you are happy with its rainy-day photos.
- The camera is mounted under natural cover or in a lock box with an overhang.
- You mainly run cameras in dry seasons or dry climates.
In those cases, focus on basic care instead: keep the gasket clean, close every latch, add a silica gel pack, and check the camera after big storms. Our guide on how to keep a trail camera from fogging up covers the rest.
IP Ratings and Rain: What They Really Cover
| Rating | What it is tested for | What it means in the woods |
|---|---|---|
| IP54 | Splashing water from any direction | OK under cover; a hood helps in hard rain |
| IP65 | Low-pressure water jets | Handles most rain if the seal is clean |
| IP66 | Powerful water jets | Handles driving rain and storms well |
| IP67 | Short immersion, about 1 meter for 30 minutes | Survives brief flooding; still keep it off the ground |
The rating describes a new camera with a clean, closed seal. A dirty gasket, a cracked case, a latch left loose or a missing rubber plug on a power jack can let water in no matter what the box says.
Step-by-Step: Rain-Proofing Any Trail Camera
- Inspect the gasket every time you open the door. Wipe off dirt, sand and hair with a soft cloth.
- Close every latch fully and check the door is flush all the way around.
- Seal the ports. Make sure rubber plugs over the USB, power jack and antenna base are seated.
- Add a silica gel pack inside the case to soak up moisture that gets in when you open it.
- Angle the camera slightly down so water runs off the lens cover instead of pooling.
- Add a small hood or visor if rain or snow keeps landing on the lens.
- Open it only in dry weather, or under cover such as a truck cab or your coat.
DIY Hood Ideas That Work
- Cut plastic bottle or container: a short section of a wide plastic bottle, cut in half lengthwise, makes a light visor. Fix it with zip ties above the lens.
- Small piece of PVC gutter or pipe: sturdy and cheap; paint it a dull color.
- Bark or a slab of wood: blends in well and adds camo.
- Security box with a built-in lip: many steel boxes already shade the lens.
Whatever you use, keep it short. A long hood can appear in the frame, block the PIR sensor or reflect the IR flash back into the lens at night.
What to Do If Water Gets Inside
- Turn the camera off and remove the batteries and SD card right away.
- Open the case and let it dry indoors at room temperature for at least 24 to 48 hours. Do not use a hair dryer on high heat.
- Check the battery contacts for corrosion. Clean them gently with a pencil eraser or a cotton swab and a little isopropyl alcohol.
- Copy the SD card to a computer before you reuse it.
- Replace the gasket if the maker sells one, and test the camera before you put it back in the woods.
Common Rain Mistakes
- Wrapping the camera in a plastic bag. It traps moisture, fogs the lens and blocks the PIR sensor.
- Mounting in a low spot that floods. Even an IP67 camera should not sit in standing water for long.
- Swapping cards in the rain. Every drop that falls inside adds moisture. Do it under cover.
- Forgetting the lens cover. Water spots and dried mud make photos blurry. Clean it on each visit. See how to clean a trail camera lens.
Rain and Your Photos: Field Examples
Blurry daytime photos after a storm: water spots dried on the lens cover leave a soft haze. A gentle wipe with a microfiber cloth fixes it.
Foggy night photos every morning: moisture inside the case condenses on the cool lens overnight. A fresh silica gel pack and a dry-day card swap usually stop it.
Hundreds of empty frames on rainy nights: raindrops on the lens can reflect the IR flash and fool the camera. A short visor keeps drops off, and lowering sensitivity one step helps on stormy nights.
A camera that dies after a wet week: often a leaking battery door or corrosion on the contacts, not a broken camera. Dry it out, clean the contacts and test it with fresh lithiums before you buy a new one.
Frequently Asked Questions
Do trail cameras need a rain hood?
Not to stay waterproof if the camera is rated IP65 or higher. A hood is still useful to keep drops and snow off the lens, reduce glare and protect lower-rated cameras.
Are trail cameras waterproof?
Most are weatherproof, not fully waterproof. IP66 cameras handle heavy rain. Only IP67 or higher cameras are made to survive brief submersion.
What IP rating is best for a trail camera?
IP66 is a good standard for most hunters. Choose IP67 if the camera may face flooding or very wet conditions.
Can I put a plastic bag over my trail camera?
It is not a good idea. A bag traps moisture, causes condensation, blocks the PIR sensor and reflects the IR flash. Use a small hood or overhang instead.
Why is my trail camera blurry after rain?
Water drops on the lens or fog inside the case cause blurry photos. Wipe the lens, check the seal, add silica gel, and consider a short hood above the lens.
Can I leave my trail camera out in the rain?
Yes, if it has a good seal and an IP65 or better rating. Keep the door latched and check the gasket on each visit.
What should I do if my trail camera gets wet inside?
Remove the batteries and card, open the case and let it dry indoors for a day or two, then clean any corrosion on the contacts.
Does rain cause trail camera false triggers?
Heavy rain can trigger some cameras, especially when drops land on the lens or branches move. A hood and lower sensitivity help.