
Trail Camera Field of View Explained (Detection Angle vs Lens Angle)
Trail camera specs often list a field of view, a detection angle and a detection range, and they rarely explain how the three fit together. That is a shame, because understanding the trail camera field of view explains a lot of common problems: empty photos, deer cut off at the edge of the frame, or animals that walk right past without triggering the camera. Here it is in plain terms.
A trail camera has two different angles. The lens angle (field of view) is how wide the photo is. The detection angle is how wide the motion sensor looks. Most trail cameras have a lens angle of about 40° to 60°, and wide-angle models go to about 100° or more. When the two angles match closely, animals that trigger the camera are in the photo. If the sensor is wider than the lens, you get empty photos. If it is narrower, animals at the edges show up in view but never trigger the camera.
- Lens angle
- How wide the photo is
- Detection angle
- How wide the sensor looks
- Typical lens angle
- About 40° to 60°
- Wide angle
- About 90° to 120°
- Best setup
- Angles closely matched
- Placement
- About 45° to the trail
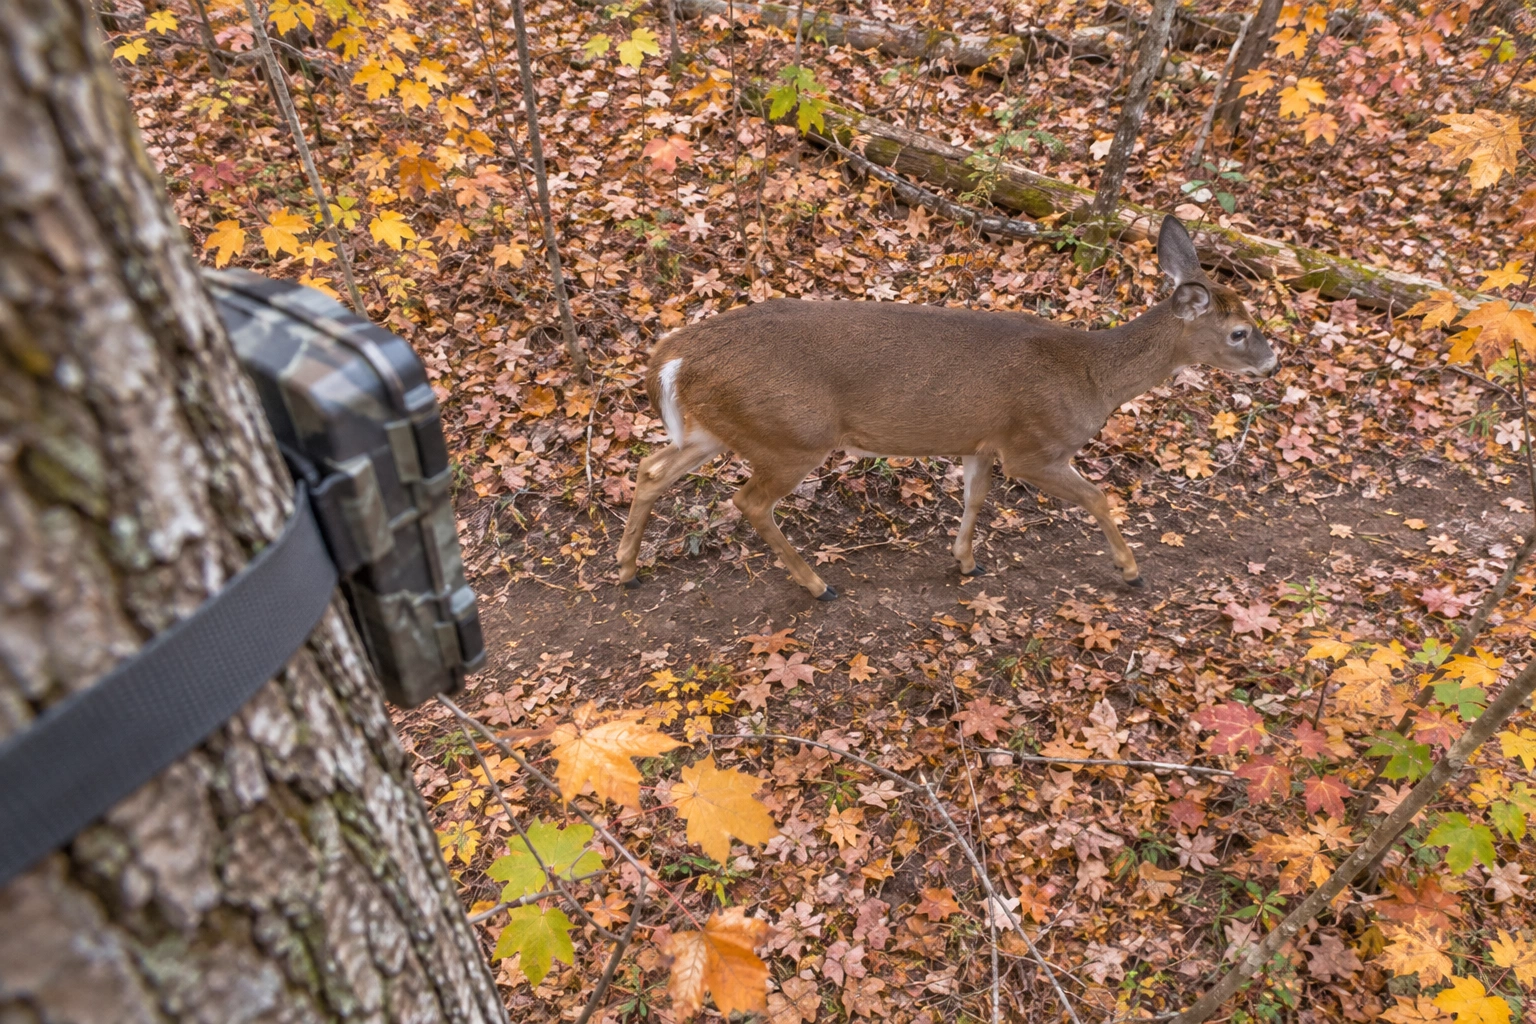
Lens Angle vs Detection Angle
- Lens angle (field of view or FOV): the width of the scene the camera captures in a photo or video, measured in degrees from one edge of the frame to the other.
- Detection angle: the width of the area the PIR (passive infrared) sensor watches for heat and motion. This is what decides when the camera fires.
- Detection range: how far out the sensor can pick up an animal, often 40 to 100 feet depending on the camera, the animal’s size and the temperature. See how far away trail cameras pick up motion.
Think of the camera as having two cones coming out of it: one for the picture and one for the sensor. The best results come when the two cones line up.
Why a Mismatch Causes Empty Photos
- Detection angle wider than the lens: the sensor sees an animal at the side before it is in the frame. By the time the photo is taken, the animal may still be outside the picture, or it may never walk into it. Result: empty photos.
- Detection angle narrower than the lens: animals walking along the edges of the frame are in view but outside the sensor zone, so they never trigger the camera. Result: missed animals and photos where the deer is only in the center.
- Slow trigger speed makes either problem worse, because the animal keeps moving while the camera wakes up. Read trail camera trigger speed vs recovery time.
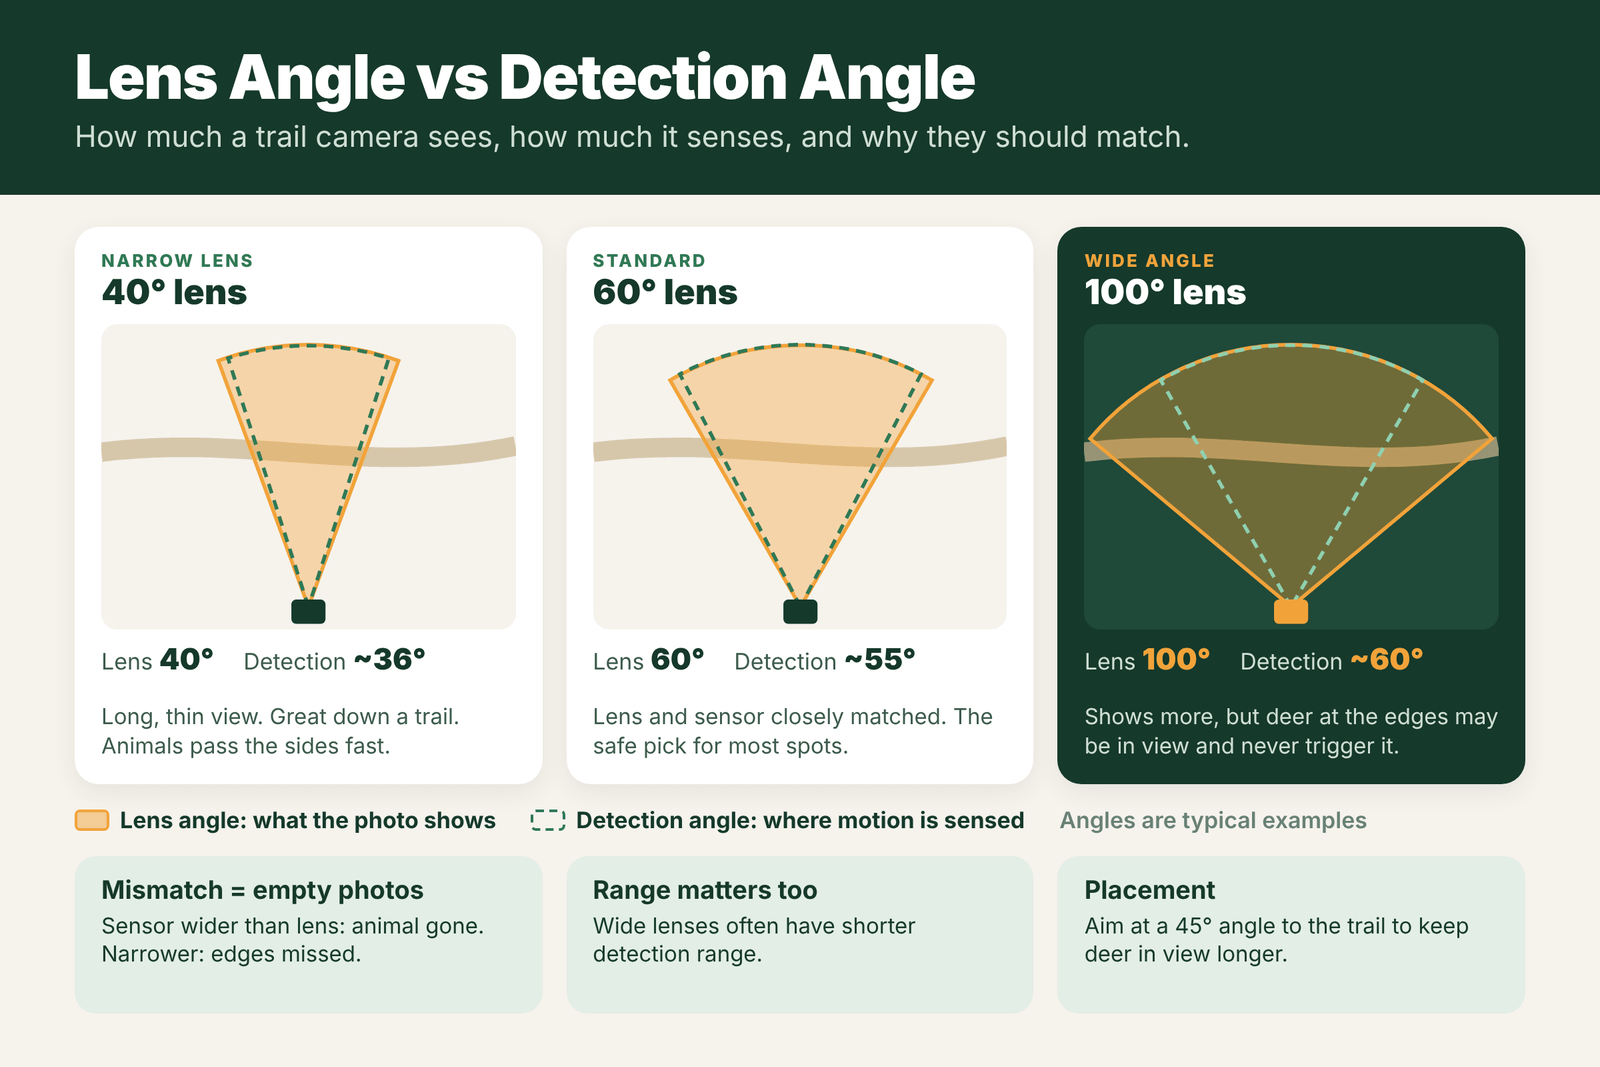
Typical Field of View Numbers
- Narrow (about 35° to 45°): a long, thin view. Good for watching down a trail or across a long food plot. Animals crossing the frame pass through quickly.
- Standard (about 50° to 60°): the most common range. Usually well matched to the sensor, and a safe choice for most spots.
- Wide (about 90° to 120°): shows a large area, like a whole field edge or feeder site. Detection range is often shorter, and animals at the edges can look small or stretched.
Manufacturers measure these numbers in different ways, so treat them as a rough guide. Real-world tests, or setting up the camera and walking past it, tell you more.
Wide-Angle Pros and Cons
Pros:
- Covers more ground, so you see more deer in each photo.
- Great for feeders, food plot corners and field edges.
- Some wide models use several sensors to cover the wider view.
Cons:
- Animals look smaller, so it is harder to judge antlers at distance.
- Edges of the image can be distorted.
- If the sensor is not as wide as the lens, edge animals may not trigger the camera.
- Night flash range may not reach the edges of a very wide view.
Compare models in our list of the best wide angle trail cameras.
Placement Tips
- Aim at about a 45° angle to the trail, not straight across it. Deer stay in the frame longer, and the sensor has more time to react.
- Set the camera 10 to 20 feet from the trail for most standard cameras. Too close and deer fill the frame; too far and they may not trigger the sensor.
- Mount at about waist height, roughly 3 feet, angled slightly down, so the sensor zone covers a deer’s body.
- Do a walk test. Many cameras have a test mode with a light that blinks when you are detected. Walk across the view to see where the zone really starts and ends.
- Clear the frame of brush that can block the view or move in the wind.
For more on distance, see how far a trail camera can see.
Field of View and Distance: How Much Ground You Cover
The wider the lens, the more ground the photo covers, but each animal looks smaller. This table shows roughly how wide the photo is at different distances.
| Lens angle | Width at 10 ft | Width at 20 ft | Width at 40 ft |
|---|---|---|---|
| 40 degrees | About 7 ft | About 15 ft | About 29 ft |
| 55 degrees | About 10 ft | About 21 ft | About 42 ft |
| 70 degrees | About 14 ft | About 28 ft | About 56 ft |
| 100 degrees | About 24 ft | About 48 ft | About 95 ft |
These are approximate numbers from simple geometry. Your camera’s real coverage depends on its lens and sensor.
How to Test Your Camera’s Detection Zone
- Turn on walk test or test mode if your camera has one. A light blinks each time the sensor detects motion.
- Stand at the edge of the frame about 20 feet out, then walk slowly toward the center. Note where the light starts blinking.
- Repeat from the other side and at different distances.
- Compare with the photo frame. Take test photos and see whether your detection edges match the edges of the image.
- Mark the sweet spot. The area where both the sensor and lens see well is where you want deer to pass.
Choosing a Field of View by Location
| Location | Better choice | Why |
|---|---|---|
| Narrow trail or funnel | Standard (40 to 60 degrees) | Bigger deer in frame, fewer empty photos |
| Scrape or licking branch | Standard | Close, detailed photos for judging bucks |
| Food plot or field edge | Wide angle, or time-lapse | Covers more ground where deer spread out |
| Feeder | Standard | Deer stay in one spot |
| Driveway or gate | Wide angle | Catches vehicles and people from more angles |
Field Examples
Empty photos on a trail: a camera’s motion sensor reaches wider than its lens. Deer walking at the edge of the zone trigger it, but by the time the photo is taken they are outside the frame. Turning the camera so deer walk toward it, along the trail, puts them in the center of the zone.
Tiny deer on a wide-angle camera: a 100-degree camera on a food plot shows the whole field, but deer at 60 yards look like dots. Adding a standard camera at the main entry trail gives close-up photos of the bucks.
Mistakes With Field of View
- Assuming wider is always better. Wide lenses make animals smaller and can increase false triggers from moving brush at the edges.
- Aiming at a trail at 90 degrees. Deer cross the narrow part of the frame quickly. Angle along the trail instead.
- Leaving clutter at the edges. Branches at the edge of the detection zone wave in the wind and trigger the camera.
- Mounting too close. At 5 feet, even a wide lens sees only a few feet of trail. Most setups work best at 10 to 20 feet.
Detection Range vs Field of View
Field of view says how wide the camera sees. Detection range says how far the motion sensor reaches, often 40 to 100 feet on the box. Real-world range is usually shorter, especially in warm weather when animals stand out less against the background. A camera with a wide lens and a short detection range will capture a big scene but only fire when something comes close. Match both to your spot. See also trail camera false triggers.
Height, Tilt and the Detection Zone
Field of view is not just side to side. The camera also has a vertical angle, and how you mount it decides which part of that zone covers the ground where deer walk. A camera mounted at 3 feet and aimed straight ahead puts much of its upper frame on sky and treetops at longer distances, and the sensor may look over small animals up close. A camera mounted higher, at 5 to 7 feet, and tilted down covers more of the ground in the middle distance and is harder for people and deer to spot. The trade-off is that it sees deer from above, which can make antlers harder to judge. For most deer setups, start at about 3 to 4 feet with a slight downward tilt, check a few test photos, and adjust so the deer’s body sits in the middle third of the frame at the distance you expect them to pass. See what is the best height for a trail camera.
Frequently Asked Questions
What is field of view on a trail camera?
Field of view is how wide the camera’s photo is, measured in degrees. Most trail cameras are about 40° to 60°, and wide-angle models can be 100° or more.
What is the difference between detection angle and field of view?
Field of view is how wide the photo is. Detection angle is how wide the motion sensor looks. They should be close to each other for the best results.
Why does my trail camera take empty pictures?
One common cause is a detection angle wider than the lens, so the camera fires before the animal is in the frame. Wind, sun and slow trigger speed are other causes.
Is a wide angle trail camera better?
It is better for covering big areas like feeders and field edges. For trails and judging antlers at distance, a standard field of view is often better.
How should I angle a trail camera to a trail?
Aim the camera at about a 45° angle to the trail, about 10 to 20 feet away, so deer stay in view longer and the sensor has time to trigger.
How far can a trail camera see?
It depends on the model. Detection range is often listed at 40 to 100 feet, but real-world range is usually shorter, especially in warm weather.
How do I test my trail camera’s detection zone?
Use walk test or test mode, walk across the frame at different distances, and note where the sensor starts to detect you.
What field of view is best for a food plot?
A wide angle camera or time-lapse mode covers more ground. Add a standard camera on the main entry trail for close photos.