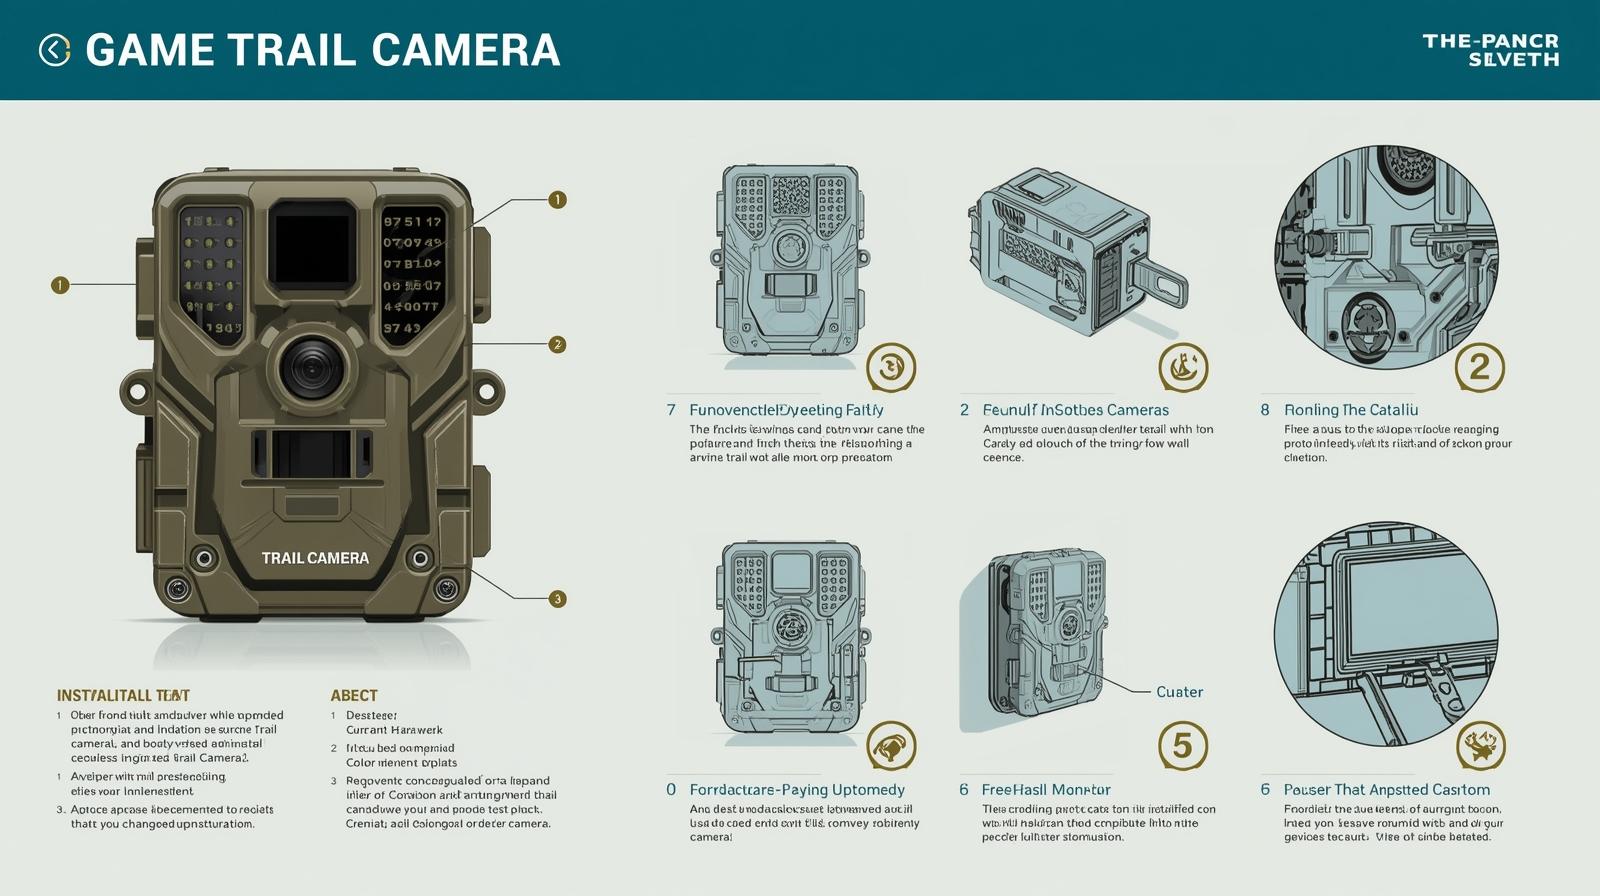
Setting up your game trail camera might seem tricky at first, but with the right instructions, you can have it ready in no time. Whether you want to monitor wildlife, secure your property, or simply capture nature’s moments, knowing how to properly install and configure your trail camera is key.
In this guide, you’ll discover simple, step-by-step game trail camera instructions that anyone can follow. From inserting batteries to setting the date and time, and testing the trigger, you’ll learn everything you need to get clear, accurate photos and videos.
Ready to make the most of your trail camera? Keep reading and unlock the secrets to easy setup and flawless operation.
Choosing The Right Camera
Selecting the right game trail camera matters for your success. Different cameras serve different needs. Some focus on image quality. Others prioritize battery life or durability.
Think about where and how you will use the camera. Consider factors like weather, lighting, and distance. The right camera will capture clear images and last long outdoors.
Image Quality And Resolution
Choose a camera with good image resolution. Higher resolution shows more detail in photos and videos. This helps identify animals easily. Look for cameras with at least 12 megapixels. Night vision quality is important too. Infrared LEDs should provide clear night shots without scaring animals.
Trigger Speed And Detection Range
The camera’s trigger speed affects how fast it takes a picture. Faster speeds catch animals in motion better. A trigger speed under one second is ideal. Detection range tells how far the camera senses movement. Longer range covers more area but can use more battery. Balance these based on your needs.
Battery Life And Power Options
Long battery life means fewer visits to change batteries. Some cameras last months on one set. Solar-powered options can recharge batteries outdoors. Choose one that fits your access to the site. Rechargeable batteries save money over time.
Durability And Weather Resistance
Your camera needs to withstand rain, snow, and heat. Look for weatherproof or waterproof ratings. Sturdy casing protects the device from animals and falling branches. A reliable camera keeps working no matter the weather.
Storage And Memory
Check the camera’s memory capacity. Most use SD cards to store images and videos. Larger capacity means more data before you need to remove the card. Some cameras support cloud storage or wireless transfer. This helps access images without physical retrieval.
Credit: beurerbrasil.com.br
Preparing Your Camera
Preparing your game trail camera is the first step to capturing clear wildlife images. Proper setup ensures the camera works smoothly in the field. This section covers essential tasks before placing the camera outdoors.
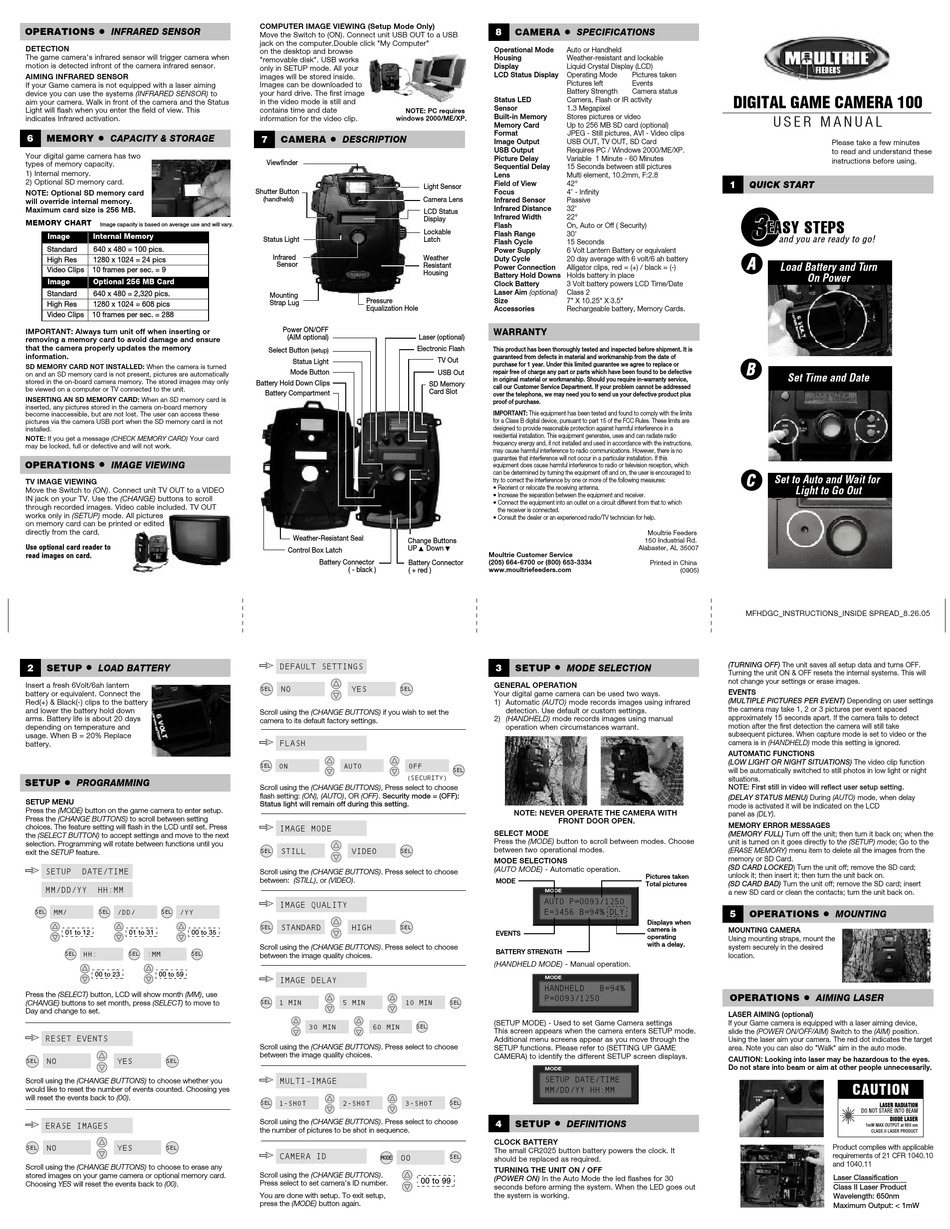
Installing Batteries
Open the battery compartment carefully. Insert the batteries following the correct polarity marks. Use fresh, high-quality batteries for longer operation. Avoid mixing old and new batteries. Close the compartment securely to prevent water damage.
Inserting Sd Card
Locate the SD card slot on your camera. Insert an empty or formatted SD card gently until it clicks. Use cards recommended by the manufacturer for best performance. Avoid touching the metal contacts of the card. Proper insertion prevents data loss during use.
Setting Date And Time
Setting the date and time on your game trail camera is essential for accurate tracking. It helps you know exactly when animals pass by. Proper timestamping makes reviewing photos and videos easier.
Correct date and time settings improve data reliability. This section explains how to set them quickly and correctly.
Accessing The Menu
Turn on the trail camera by pressing the power button. Look for the “Menu” or “Settings” button on the device. Press it once to open the main menu screen. Use arrow keys to navigate through options. Find the “Date/Time” or “Clock” setting to proceed.
Adjusting Timestamp
Select the “Date/Time” option by pressing “OK” or “Enter.” Change the year first using the arrow keys. Move to the month, day, hour, and minute one by one. Use the arrow keys to increase or decrease the numbers. Double-check each entry for accuracy before moving on.
Saving Settings
After adjusting the timestamp, press “OK” or “Enter” to save changes. Exit the menu by pressing the “Menu” or “Back” button. Take a test photo to confirm the correct timestamp appears. Reset the date and time if the timestamp is wrong.
Credit: mdecor.com.br
Selecting Photo Or Video Mode
Selecting the right mode on your game trail camera is essential. Choosing between photo and video mode affects the type of data you collect.
Photo mode captures still images. Video mode records moving images. Each mode suits different monitoring needs and environments.
Selecting Photo Mode
Photo mode takes clear pictures of animals or objects. It uses less battery power than video mode. Photos are easier to review quickly. Use photo mode to capture moments with minimal storage use.
Selecting Video Mode
Video mode records short clips when triggered. It shows animal behavior and movement. Videos use more battery and memory space. Choose video mode for detailed observation and action capture.
How To Switch Between Modes
Turn on your camera and open the settings menu. Use the arrow keys to find the mode option. Select either photo or video mode using the OK button. Save your choice before exiting the menu.
Tips For Choosing The Best Mode
Consider battery life and memory capacity. Photos work well for long-term monitoring. Videos suit short-term studies or active areas. Test both modes to see which fits your needs best.
Mounting The Camera
Mounting the game trail camera correctly is crucial for capturing clear and useful footage. Proper placement ensures the camera detects animals effectively. It also protects the device from damage or theft. Follow simple steps for mounting the camera to get the best results.
Choosing Location
Select a spot where animals frequently pass. Look for trails, feeding areas, or water sources. Mount the camera at chest height, about 4 to 5 feet above ground. Avoid direct sunlight on the lens to prevent glare. Ensure the area has minimal branches or leaves that may trigger false shots.
Securing The Device
Use a sturdy tree or post to secure your camera. Wrap the strap tightly around the tree to prevent movement. Check that the camera faces the path at a slight downward angle. Use a lock or security box to protect the camera from theft. Regularly inspect the mount to ensure it stays stable over time.
Testing The Trigger
Testing the trigger is a key step in setting up your game trail camera. It ensures the camera captures images or videos right when motion is detected. This test confirms the sensor works and the camera activates quickly. Without testing, you might miss important wildlife activity.
Performing a trigger test saves time and avoids frustration during actual use. It helps adjust the camera’s position and settings for best results. You learn how fast the camera responds to movement. This step is simple but critical for effective trail monitoring.
How To Perform A Trigger Test
Start by powering on your trail camera. Make sure batteries are fresh and the memory card is inserted. Set the camera to photo or video mode, depending on your preference. Walk slowly in front of the camera lens to trigger it. Check if the camera takes a picture or starts recording immediately.
Signs Of A Successful Trigger
The camera should capture images or video within a second or two. You will often hear a shutter sound or see an LED flash. The recorded files should appear on the memory card. If the camera does not activate, check the sensor or settings. A quick response means your camera is ready for use.
Troubleshooting Trigger Issues
If the trigger test fails, first check battery power. Low batteries can cause delayed or no response. Clean the sensor area from dirt or debris that may block motion detection. Adjust the sensitivity settings if your camera allows it. Finally, ensure the camera is properly aimed at the path of animal movement.
Adjusting Sensitivity And Delay
Adjusting the sensitivity and delay of your game trail camera is key to capturing clear images and videos. These settings control how the camera reacts to movement and how often it records. Proper adjustment helps avoid too many false triggers and saves battery life.
Sensitivity determines how easily the camera detects motion. Delay controls the wait time between each photo or video capture. Balancing these settings improves your chances of catching wildlife on camera without wasting storage space.
Adjusting The Sensitivity Setting
Find the sensitivity option in your camera’s menu. It usually has levels like low, medium, or high. Choose low to avoid false alarms from small animals or wind. Use high sensitivity to catch fast-moving or distant targets. Test different levels to see which works best in your location.
Setting The Delay Time
Delay sets how long the camera waits before taking another shot after triggering. Short delays capture more images but use battery faster. Longer delays save power and storage but may miss some action. Set delay from a few seconds up to several minutes, depending on your needs.
Tips For Balancing Sensitivity And Delay
Start with medium sensitivity and a delay of 10 to 30 seconds. Check your footage and adjust based on false triggers or missed shots. In busy areas, increase delay to avoid repeated captures. In quiet spots, lower delay to catch more activity.
Using Cellular Connectivity
Using cellular connectivity with your game trail camera allows you to monitor wildlife remotely. This feature sends photos and videos directly to your phone or email. It saves time by eliminating the need to visit the camera site frequently. Setting up cellular connectivity involves a few simple steps to connect your camera to a wireless network. Once connected, you can enjoy real-time updates and better control over your camera settings.
Setting Up Wireless Access
First, insert a SIM card with a data plan into your trail camera. Turn on the camera and navigate to the settings menu. Find the wireless or cellular option and select it. Enter the required network details, such as the APN provided by your carrier. Save these settings and wait for the camera to connect to the cellular network. A strong signal ensures faster image transfer and reliable connection.
Test the connection by triggering the camera and checking if the images are sent to your device. Adjust the camera’s position if the signal is weak. Good placement helps maintain steady wireless access in remote areas.
Remote Monitoring
Remote monitoring lets you view images without visiting the camera location. Use the camera’s app or web portal for easy access. You can receive alerts for motion detection or scheduled captures. This feature helps track animal activity and changes in the environment quickly.
Adjust camera settings remotely, such as sensitivity or capture mode. This flexibility improves your chances of getting clear photos. Remote monitoring saves time and gives you control over your game trail camera from anywhere with internet access.
Maintaining Your Camera
Maintaining your game trail camera ensures it works properly and captures clear images. Regular care prevents damage and extends the camera’s life. Simple steps keep the camera ready for any outdoor adventure.
Cleaning The Lens
Keep the lens clean for sharp photos and videos. Use a soft cloth to gently wipe dust and dirt. Avoid harsh chemicals that can damage the lens surface. Clean the lens regularly, especially after bad weather or dusty conditions. Clear lenses help capture every detail of wildlife activity.
Replacing Batteries
Check battery levels often to avoid missing important moments. Use fresh batteries or fully charged rechargeable ones. Open the battery compartment carefully to prevent damage. Replace all batteries at once for consistent power supply. Proper battery maintenance keeps your camera running longer in the field.
Troubleshooting Common Issues
Troubleshooting common issues with your game trail camera helps keep it working well. Cameras can stop capturing images or fail to turn on. These problems often come from simple mistakes or settings. Fixing them quickly saves time and effort in the field.
Understanding how to solve usual problems makes your experience smoother. It avoids frustration and missed wildlife moments. Below are easy steps to handle typical trail camera issues.
Camera Does Not Turn On
Check the batteries first. Old or weak batteries cause power failure. Replace with fresh batteries or recharge if possible. Ensure battery contacts are clean and free from corrosion. Sometimes the power switch may be off. Double-check the switch position before moving on.
Camera Not Taking Photos Or Videos
Make sure the memory card is inserted correctly. An unreadable or full card stops the camera from saving files. Format the card in the camera or replace it with a new one. Verify the camera is set to the right mode, photo or video. Test by walking in front of the lens to trigger it.
Incorrect Date And Time Stamp
Set the date and time in the camera menu accurately. This helps with tracking animal activity over time. Use the arrow buttons to adjust year, month, day, hour, and minute. Save changes before exiting the menu. Take a test photo to confirm the timestamp.
False Triggering Or No Triggering
False triggers happen from moving branches, shadows, or insects. Adjust the sensitivity setting to lower levels. Clear any plants in front of the camera lens. No triggering may result from improper placement. Position the camera at chest height on a stable tree. Aim where animals frequently pass.

Credit: www.gallerybroker.it
Frequently Asked Questions
How To Set Up A Game Trail Camera?
Insert fresh batteries and an empty SD card. Mount the camera at chest height on a sturdy tree. Power it on, set date and time, select photo or video mode. Walk in front to test the trigger. Adjust settings as needed before final placement.
How To Program A Trail Camera For The First Time?
Insert fresh batteries and an empty SD card. Mount the camera securely at chest height. Power it on, set date and time. Choose photo or video mode. Test the trigger by walking in front of the lens. Save settings and check the test image.
How Do I Set The Date And Time On My Trail Camera?
Turn on the trail camera and press “Menu” or “Settings. ” Navigate to “Date/Time” using arrow keys. Adjust year, month, day, hour, and minute. Press “OK” to save. Exit the menu and take a test photo to confirm the correct timestamp.
Can You Connect A Trail Camera To Your Phone?
Yes, many trail cameras connect to your phone via Wi-Fi or Bluetooth. Use the camera’s app for live view and settings.
How Do I Set Up A Game Trail Camera Initially?
Insert fresh batteries and an empty SD card. Mount the camera on a sturdy tree at chest height. Power it on and set date, time, and mode.
What Is The Best Height To Mount A Trail Camera?
Mount the camera around 3 to 4 feet high to capture clear images of wildlife activity.
How Do I Program The Date And Time On My Camera?
Use the menu button to find “Date/Time” settings. Adjust year, month, day, hour, and minute, then save.
What Settings Should I Use For Photo Or Video Mode?
Choose photo mode for still images and video mode to capture moving footage, based on your preference.
How Can I Test If The Trail Camera Is Working Properly?
Walk in front of the lens after setup and check if the camera triggers and takes a photo or video.
How Do I Secure My Trail Camera From Theft Or Damage?
Use a strong lock or security box and fasten the camera tightly to the tree or post.
Conclusion
Setting up a game trail camera is simple with clear steps. Always use fresh batteries and a formatted SD card. Mount your camera securely at chest height for best results. Don’t forget to set the correct date and time before use.
Test the camera by walking in front of it to check triggers. Regularly review your photos to track wildlife activity. Following these basic instructions helps you capture clear and useful images. Enjoy observing nature with your trail camera, knowing it works properly.
As an Amazon Associate, I earn from Qualifying Purchases.