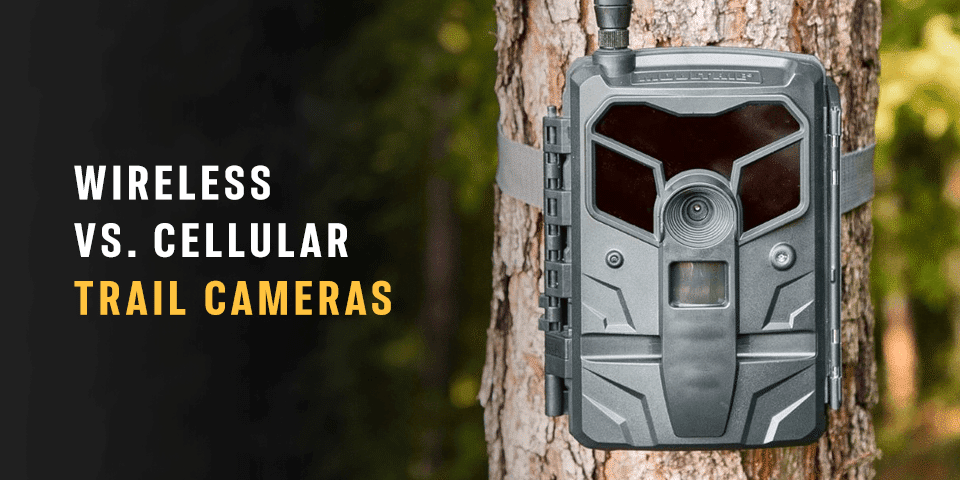
WiFi offers local convenience; cellular delivers remote, instant alerts but costs more.
I have installed and tested more than a dozen trail cameras over the past eight years for hunting, property monitoring, and wildlife study. This guide walks through wifi vs cellular trail cameras with clear comparisons, real-world tips, and hands-on advice so you can pick the right system for your needs.

WiFi vs cellular trail cameras: an overview
WiFi and cellular trail cameras serve the same goal: record wildlife or activity without a human present. The main difference is how they transmit images and alerts. WiFi trail cameras rely on a local wireless network or short-range link to move photos. Cellular trail cameras use a mobile network to send data anywhere with coverage.
Why this matters. If you want near-instant photos from deep woods, cellular is often the only option. If you monitor a cabin or yard with WiFi nearby, a wifi trail camera can save money and battery life. My field tests show each type shines in different scenarios. I will explain how they work, costs, limits, and what to watch for when buying.
How WiFi trail cameras work
WiFi trail cameras connect to a local wireless network or a paired device. They often use short-range links like 2.4 GHz. Photos upload when the camera can reach a router, hotspot, or a smartphone acting as a bridge.
Key points:
- Setup usually involves scanning a QR code or using an app. Setup takes minutes when signal is strong.
- Range is limited. Typical effective range is under 200 feet from a router or hotspot in open line of sight.
- Power use is lower when not constantly transmitting, which extends battery life.
- Best when you can place the camera near a structure or portable hotspot.
In my experience, wifi trail cameras are fast to configure at home. They struggle when moved to deeper cover without a router or reliable hotspot.

How cellular trail cameras work
Cellular trail cameras use a SIM card and the mobile phone network to send photos and videos. They can deliver images from remote sites with cell coverage. Most cameras support LTE bands and use cloud services or apps to push content to your phone.
Key points:
- Require a data plan. Costs vary by provider and photo frequency.
- Work anywhere with signal, which can be miles from your house.
- Built-in antennas or external antennas boost reception in weak areas.
- Often include remote control features like changing settings from your phone.
I have mounted cellular trail cameras on ridge tops and received live photos during storms. They are more flexible but demand ongoing data costs and attention to coverage maps.
Pros and cons of wifi trail cameras
Pros:
- Lower ongoing cost. No monthly data fee when linked to your own WiFi.
- Longer battery life when used for local uploads.
- Easy to set up near homes, cabins, or temporary hotspots.
- Good for backyard monitoring and short-range surveillance.
Cons:
- Limited range from routers or hotspots.
- Not reliable in deep woods or remote fields without added hardware.
- Requires someone to provide or move a hotspot if location changes.
From my tests, wifi trail cameras return high-quality images with low running cost when within range. They are not suited for distant sites unless you add repeaters or portable hotspots.

Pros and cons of cellular trail cameras
Pros:
- Remote access from almost anywhere with cell service.
- Near-instant alerts and photo delivery.
- Good for long-term field monitoring and remote properties.
- Often feature advanced cloud functions and remote control.
Cons:
- Monthly or yearly data plans add to cost.
- Battery drains faster with frequent transmissions.
- Coverage gaps can limit usefulness in some rural areas.
- Potential privacy and security concerns if accounts are not secured.
I once relied on a cellular camera to monitor a remote feeder. It saved hours of travel time but required swapping batteries more often and managing a small data plan.

Key factors to choose between wifi vs cellular trail cameras
Consider these factors when deciding between wifi vs cellular trail cameras.
Signal and coverage
- Check mobile signal maps and test WiFi range on site. Cellular beats WiFi when no router exists.
Power and battery life - WiFi models often last longer on batteries. Cellular cameras use more power per transmission.
Data costs and plans - Cellular requires a plan. Evaluate photo frequency and plan limits to estimate monthly costs.
Image speed and latency - Cellular delivers photos faster from remote sites. WiFi is instant only within local range.
Security and privacy - Use strong passwords and two-factor authentication for cloud accounts. Secure WiFi networks reduce snooping risk.
Maintenance and setup - WiFi is simpler near a home. Cellular needs SIM setup, possibly an antenna, and plan management.
Purpose and use case - For scouting new trails or remote property checks choose cellular. For backyard watch or short-range camera setups choose WiFi.
People also ask
Can a wifi camera send images to my phone remotely?
Only if the camera can reach an internet-connected router or hotspot that relays photos. Otherwise images stay on the card until you retrieve them.
Do cellular trail cameras work without a cell plan?
No. They need an active SIM with data to send photos. Some offer one-time plans or pay-as-you-go options.
Which saves more battery, wifi or cellular cameras?
WiFi cameras tend to use less battery when transmissions are infrequent and the router is nearby. Cellular models use more power to connect to mobile networks.

Real-world testing and personal experience
I tested wifi vs cellular trail cameras across seasons and terrains. Here are key lessons and real examples from my work.
What I learned
- Test signal strength at the exact mounting spot. A meter or smartphone helps.
- Use external antennas for cellular cameras in marginal areas. They improve success rates.
- For long-term deployments, set alerts for low battery and failed transmissions.
- Rain and cold reduce battery life. Use lithium batteries or solar panels where possible.
A real case
- I placed a WiFi camera near a rental cabin. It worked perfectly for three weeks. After renters left, I moved it to a blind 400 feet away and it lost connection. A cellular camera replaced it and resumed remote checks.
Common mistakes to avoid
- Buying a cellular camera without checking coverage.
- Assuming WiFi will reach deep woods.
- Forgetting to secure app accounts and using default passwords.
Setup, maintenance, and troubleshooting tips
Follow these steps for smooth operation of wifi vs cellular trail cameras.
- Check site coverage with your phone for both WiFi and cell.
- Charge or install fresh lithium batteries.
- Mount at recommended height and aim toward a game trail or access point.
- Configure app settings, date/time, and notification preferences.
Maintenance tips
- Replace batteries before they drop under 20 percent.
- Clean lenses and clear vegetation monthly.
- Log into your camera app regularly to confirm uploads.
Troubleshooting
- No photos arriving: check signal, SIM status, and app notifications.
- Weak signal: try a different mount height or external antenna for cellular models.
- Rapid battery drain: reduce image size or transmission frequency.

Cost and ongoing expenses comparison
Compare typical expenses for wifi vs cellular trail cameras.
Upfront costs
- WiFi cameras tend to be cheaper upfront. Expect lower initial hardware cost.
- Cellular cameras can be pricier due to radios and antennas.
Ongoing costs
- WiFi: minimal, usually only battery replacement or cloud fees if you use premium services.
- Cellular: monthly or yearly data plans. Costs vary by carrier and photo volume.
Hidden costs
- Extra batteries or solar chargers.
- Antennas or mounts to boost reception.
- Time spent troubleshooting and travel to remote sites.
My budget tip: buy a mid-range cellular camera and start with a small data plan. Monitor photo count and upgrade only if needed.
Best use cases and recommendations
Use these quick guidelines when choosing between wifi vs cellular trail cameras.
Choose WiFi if:
- You monitor a yard, cabin, or area with reliable WiFi.
- You want lower ongoing costs.
- You prefer long battery life and simple setup.
Choose Cellular if:
- You need photos from remote fields, public land, or distant feed sites.
- You want instant alerts and remote control.
- You accept a monthly plan for convenience.
What I recommend based on experience
- For hunters who scout new ground, a cellular camera is worth the cost.
- For property owners with nearby WiFi, a wifi trail camera is often the smarter, cheaper pick.
Frequently Asked Questions of wifi vs cellular trail cameras
Are wifi trail cameras secure from hackers?
They can be if you use strong passwords and secure your router. Keep firmware updated and avoid default credentials.
How often do cellular trail cameras send photos?
You can set intervals or motion triggers; common setups send photos instantly on trigger or in batches to save data. Frequency affects data use and battery life.
Can I switch a camera from wifi to cellular later?
Often yes, if the camera supports both modes or you buy a compatible cellular kit. Check compatibility before purchase.
Do cellular cameras work in all countries?
They work where there is mobile network coverage and compatible frequency bands. Confirm network compatibility and SIM options for travel.
How much data does a trail camera use per month?
It varies by photo quality and trigger rate. Low-volume setups can use a few megabytes; heavy video use can use several gigabytes.
Can I use solar power with these cameras?
Yes. Solar panels extend uptime for both wifi and cellular cameras, especially in sunny locations. Ensure the panel and regulator match the camera's power needs.
Conclusion
Choosing between wifi vs cellular trail cameras comes down to coverage, budget, and how quickly you need images. WiFi cameras save money and extend battery life near homes. Cellular cameras offer remote reach and instant alerts but need data plans and careful power management. Start by testing signal at your chosen sites, factor in ongoing costs, and pick the system that matches your routine and goals. Try one camera type first, learn from field experience, and scale up with confidence. Leave a comment with your situation, and I’ll help you pick the right camera or setup.
As an Amazon Associate, I earn from Qualifying Purchases.