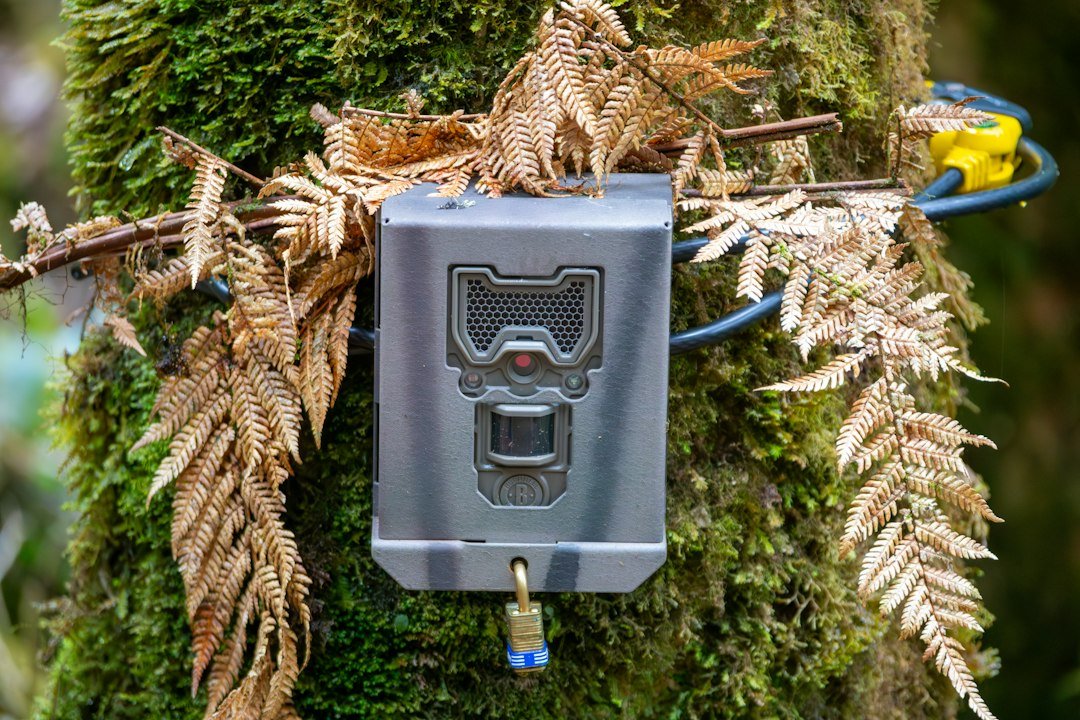
A trail camera security box is a steel enclosure that surrounds a compatible camera while leaving its lens, motion sensor, flash, antenna, and controls usable. It cannot make a camera theft-proof, but it can add a physical barrier against casual theft, vandalism, curious animals, falling branches, and impacts from equipment. The most important buying decision is not the color or thickness advertised on the front of the package. It is whether the box precisely fits your camera model and still allows the door, antenna, power cable, strap, and lock to work.
This guide explains how to choose and install a trail camera security box without overstating what it can do. The recommendations are based on current manufacturer information checked on October 15, 2026, including official products from Tactacam REVEAL, SPYPOINT, Browning Trail Cameras, and Cuddeback. Specifications and compatibility can change, so always compare the model number printed on your camera with the latest compatibility list before ordering or drilling into a tree or post.
What a trail camera security box actually protects
A metal box mainly protects the camera body. It makes it harder to open the battery door, remove the memory card, cut the mounting strap, or pull the entire camera from the tree. The enclosure can also take some of the scratching, biting, and pushing that would otherwise reach the plastic camera housing. SPYPOINT, for example, describes its FLEX-series SB-500S as a 16-gauge steel box intended to protect compatible cameras from theft or damage. Browning markets several sizes rather than one universal enclosure, which is a useful reminder that camera dimensions and control layouts differ.
A security box does not guarantee that the camera will stay in place. A determined person with time and tools may defeat the box, cable, padlock, tree, or mounting hardware. A box also does not prevent someone from covering the lens, damaging an exposed antenna, or stealing a post-mounted assembly. Think of it as one layer in a system that also includes thoughtful placement, suitable mounting hardware, a quality lock, accurate location records, and lawful use.
Start with exact camera compatibility
Begin with the camera’s complete model name and generation. “REVEAL,” “FLEX,” or “Browning cellular camera” is not always specific enough. Antenna location, case shape, latch position, external-power port, and the angle of the lens opening can change between generations. A box that appears close in size may block the infrared flash, limit the detection sensor, press a button, interfere with the antenna, or prevent the door from closing.
Tactacam currently separates protection for different REVEAL generations. Its official REVEAL lockable security box says it works with most REVEAL cameras, offers multiple mounting points, includes an antenna port, and has a padlock hole. Tactacam also continues to list a security box identified for Gen 3.0 and earlier cameras. “Most” is not the same as “all,” so the specific camera and box product pages should agree before purchase.
SPYPOINT also uses model-specific families. The official SB-500S page identifies compatibility with FLEX-series cameras. The SB-400 is described for certain 48-LED cameras, while the SB-200 is described for SPYPOINT 42-LED cameras, including specified solar units. These examples show why matching only the brand is risky. Count-based names such as 42 LED and 48 LED can refer to a physical platform, not merely a feature you can ignore.
Browning offers multiple security-box sizes and asks buyers to verify product compatibility on the relevant page. Cuddeback’s CuddeSafe is designed around Cuddeback equipment and supports the mounting system described in its documentation. When no current compatibility statement exists, contact the manufacturer with the exact model number rather than assuming a generic enclosure will fit.
Security-box features that matter
Openings and clearance
The front cutouts must align with the camera’s lens, passive infrared sensor, flash array, microphone, and status lights. A misaligned opening can reduce detection or produce reflections in night images. Cellular cameras also need clearance for their antenna. If the antenna bends against the metal or sits behind the enclosure, reception may be affected. External-power users should confirm that the cable can exit without being crushed and that the connector remains protected from strain.
Locking options
Many boxes provide a padlock hole, cable-lock path, or both. A compact padlock can keep the enclosure closed, while a cable lock can wrap around a tree or post. The weakest component limits the system: an excellent box combined with a thin, poorly routed cable is still vulnerable. Check shackle diameter and clearance before visiting the field. Manufacturer pages often state that the padlock or cable is sold separately.
Mounting pattern
Some enclosures can be screwed directly to a tree, bolted to a post, or held by a strap. Cuddeback’s current manual says CuddeSafe can be screwed or ratchet-strapped to a tree and is compatible with a padlock and cable lock. Tactacam describes multiple mounting points for positioning. The available method matters because rules differ on public land, leased ground, and private property. Some areas prohibit nails or screws in trees. Always follow the landowner’s requirements and the managing agency’s current regulations.
Steel and finish
Steel construction adds impact resistance, but the gauge, bends, welds, hinge design, and coating all influence durability. Powder coating can help protect the metal surface, yet scratches and cut edges may still need attention over time. Do not assume the word “weatherproof” means water cannot reach the camera. The enclosure normally has large functional openings and is not a sealed waterproof case.
Security box versus cable lock versus concealment
A security box protects the camera body and creates a rigid locking point. A cable lock anchors the assembly around a tree or post. Concealment reduces the chance that a person notices it. These measures work best together, but each has trade-offs.
- Box only: useful against animals and casual tampering, but the whole assembly may remain removable if it is attached only with an exposed strap.
- Cable only: faster and lighter, but it may leave the camera door, controls, antenna, and plastic case exposed.
- Concealment only: avoids obvious visual attention but offers no physical resistance after discovery.
- Layered setup: a compatible steel box, correctly routed cable, suitable lock, and unobtrusive placement usually creates more delay than any single measure.
For additional placement ideas, see our guide on how to hide a trail camera from thieves. If theft prevention is the wider goal, the separate trail camera theft-prevention guide covers records, positioning, and recovery planning. This article stays focused on choosing and installing the metal enclosure itself.
How to install a trail camera security box
- Test the camera first. Install batteries or the approved power pack, format or install the required memory card, update firmware if the manufacturer instructs it, and confirm that the camera captures and transmits correctly before enclosing it.
- Dry-fit everything at home. Place the camera in the box and check the door, latch, antenna, power port, lens, flash, and detection sensor. Insert the intended padlock and cable to confirm clearance.
- Choose a stable mounting surface. Avoid loose bark, dead trees, thin branches, and surfaces that sway in wind. A crooked box can point the sensor away from the intended detection zone.
- Confirm local rules. Get landowner permission. On public land, check whether screws, nails, permanent attachments, locks, identifying labels, or unattended cameras are restricted.
- Position the empty box. Mount the enclosure at the intended height and angle before inserting the camera. This reduces the chance of dropping or damaging the camera while tightening hardware.
- Use the approved fasteners. Follow the box manufacturer’s instructions. Do not substitute longer screws that could damage a tree, hidden cable, or the camera. Do not overtighten a strap until the enclosure bends or the camera no longer sits square.
- Insert and connect the camera. Route the antenna and external-power cable only through designed openings. Keep cables from crossing the lens, flash, seal, or door hinge.
- Lock the enclosure. Close the door, fit the padlock, and route the cable so it cannot simply slide over the mount. Keep the key or combination in a secure record.
- Run a field test. Walk through the detection zone during daylight and, when practical, review a night test. Confirm that the enclosure does not appear in the frame or reflect the infrared flash.
- Record the installation. Save the camera serial number, box model, lock information, approximate location, installation date, and a photo of the completed setup. Do not publicly share precise coordinates.
Camera performance checks after installation
Metal around a cellular camera can create concerns about antenna clearance and signal. Do not assume that every steel box affects every camera in the same way. Use the manufacturer-designed antenna opening, keep the antenna in its intended orientation, and compare signal or successful transmission before and after installation. If performance changes, inspect placement and compatibility rather than immediately adding an unapproved antenna.
Night images deserve a separate test. A box edge, cable, fresh metal scratch, or nearby branch can reflect infrared light into the lens. The result may look like haze or a bright white foreground. Move reflective objects outside the flash path and verify that the front opening is centered. For broader property monitoring advice, our guide to using a trail camera for security explains coverage and placement considerations.
Trigger detection should also be checked after the box is mounted. The enclosure must not cover any portion of the motion sensor. Walk across the detection area instead of directly toward the camera, because lateral movement is often easier to use for a repeatable field check. Treat the result as a setup test, not as proof that every person or animal will trigger the camera under all weather conditions.
Common mistakes to avoid
- Buying by brand alone: a box for one generation may not fit another generation from the same brand.
- Blocking the antenna: forcing an antenna against steel can create physical stress and may affect communication.
- Ignoring the battery door: some boxes require the camera to be removed for battery or card access; plan maintenance before locking it.
- Using only the original fabric strap: a visible strap can remain an easy target even when the camera body is covered.
- Mounting in plain sight: a shiny padlock or straight cable line may attract attention. Reduce glare without painting lenses, sensors, labels, or antennas.
- Overpromising security: no consumer box should be described as theft-proof. Its realistic job is to deter, delay, and protect.
- Forgetting tree growth: straps and cables can tighten as a tree grows. Inspect long-term installations and adjust them responsibly.
Maintenance schedule
Inspect the enclosure whenever you service the camera. Look for loosened fasteners, corrosion, bent openings, animal damage, worn cable coating, debris around the hinge, and a lock that no longer operates smoothly. Remove leaves, spider webs, snow, and mud from the sensor and flash openings without scratching the camera. After severe weather, a fallen limb or shifted mount can change the aim even when the box appears intact.
Recheck fit when you replace the camera. A new camera may physically enter the old box while its lens or sensor sits in the wrong position. Also review the manufacturer’s current compatibility page because accessories and camera generations change. A correct box-camera match is more reliable than improvising spacers that could move, retain water, or press against controls.
Frequently asked questions
Will a security box stop all trail camera theft?
No. It can deter casual theft and make removal more difficult, but no box, cable, lock, tree, or post is undefeatable. Combine the enclosure with discreet placement, accurate records, lawful mounting, and periodic checks.
Can I use a universal trail camera security box?
Only when the manufacturer explicitly lists your camera’s dimensions and control layout as compatible. “Universal” should still be verified for lens, sensor, flash, antenna, door, and power-port clearance.
Can the box reduce cellular signal?
Results depend on camera design, antenna position, network conditions, and the enclosure. Use the designed antenna port and test transmission after mounting. If the camera’s official accessory is available, it is generally easier to verify compatibility than an unlisted enclosure.
Should I screw the box into a tree?
Only when the landowner or managing authority permits it and the manufacturer supports that mounting method. Public-land and timber rules vary. A strap or approved post may be required where tree penetration is prohibited.
Does a security box protect against bears?
Steel adds a protective barrier and some manufacturers describe their boxes as protection from bears or animal damage. It does not guarantee survival against every animal encounter. Secure mounting and model-specific fit still matter.
Which lock should I buy?
Choose a weather-resistant padlock or cable lock that fits the box’s specified hole and clearance. Measure the required shackle diameter and path before purchase. The lock should not obstruct the antenna, camera door, lens, sensor, or flash.
Bottom line
The best trail camera security box is the one confirmed for your exact camera, installed with permitted hardware, and tested after mounting. Prioritize alignment, antenna and cable clearance, a usable lock path, and a stable attachment point. Steel construction can deter tampering and protect the camera body, but it should be presented honestly as one layer rather than a complete guarantee.
Before buying, compare your model with the latest official pages for the Tactacam REVEAL lockable security box, SPYPOINT SB-500S, Browning camera security boxes, or Cuddeback accessories, as appropriate. Manufacturer compatibility information is the deciding reference, and it may change after this guide’s October 15, 2026 verification date.
Featured image credit: Photo by Bernd Dittrich on Unsplash, used under the Unsplash License.
As an Amazon Associate, I earn from Qualifying Purchases.