Adjusting camera settings improves sharpness, exposure, and color for clearer, professional images.
I have spent years teaching photographers and testing gear, so I know how small tweaks can make big differences. This guide on Adjusting Camera Settings for Better Quality walks through the essentials, from exposure basics to real-world presets, so you can get cleaner, sharper, and more accurate images fast. Read on to learn practical steps, common mistakes to avoid, and simple workflows you can use today.
Understanding exposure: aperture, shutter speed, and ISO
Exposure is the foundation of Adjusting Camera Settings for Better Quality. Exposure tells how light or dark an image will be. It depends on three parts: aperture, shutter speed, and ISO.
Aperture controls depth of field. Use a wide aperture (small f-number) to blur backgrounds. Use a narrow aperture (large f-number) to keep more of the scene sharp.
Shutter speed controls motion. Use fast shutter speeds to freeze action. Use slow shutter speeds for motion blur or low light.
ISO controls sensor sensitivity. Lower ISO gives cleaner files. Higher ISO increases noise but can save an underexposed shot.
Practical tip from my shoots: set aperture for look, shutter for motion, then ISO for exposure. This simple order makes Adjusting Camera Settings for Better Quality easier and repeatable.

Source: reddit.com
Key camera settings explained
Knowing the settings helps when Adjusting Camera Settings for Better Quality. Here are the main controls and why they matter.
Aperture
- Aperture value that affects light and depth of field.
- Use wide apertures for portraits to isolate the subject.
- Use narrow apertures for landscapes to keep the whole frame in focus.
Shutter speed
- Shutter speed determines how movement appears.
- Match shutter speed to subject motion to avoid blur.
- Use a rule: shutter speed should be at least 1/focal length for handheld shots.
ISO
- ISO raises or lowers sensor sensitivity.
- Keep ISO low for best clarity and color.
- Increase ISO when you can’t add light or slow shutter speed.
White balance
- White balance sets color tone for accurate color.
- Use presets or custom white balance to match light.
- Adjust in raw processing when needed for best results.
Focus modes and metering
- Choose single point AF for precise focus on subjects.
- Use continuous AF for moving subjects.
- Metering modes help expose correctly for different scenes.
I often shoot raw and tweak white balance and exposure in post. That doubles down on quality when Adjusting Camera Settings for Better Quality.

Source: geometricgoods.com
Practical settings for common scenarios
Real scenes demand real settings when Adjusting Camera Settings for Better Quality. Below are tested starting points.
Portraits
- Aperture: f/1.8–f/4 for subject separation.
- Shutter speed: 1/125s or faster to avoid blur.
- ISO: 100–400 for clean skin tones.
- Focus: single point on the nearest eye.
Landscapes
- Aperture: f/8–f/16 for wide depth of field.
- Shutter speed: set for correct exposure; use tripod if needed.
- ISO: 100 for minimal noise.
- Focus: hyperfocal or focus stacking for maximum sharpness.
Low light and night
- Aperture: as wide as lens allows for more light.
- Shutter speed: slower values, unless freezing motion is needed.
- ISO: push carefully; use noise reduction in post.
- Use tripod and remote shutter to avoid camera shake.
Action and sports
- Aperture: f/2.8–f/5.6 to balance light and depth.
- Shutter speed: 1/500s or faster to freeze motion.
- ISO: increase as needed to maintain fast shutter.
- Use continuous AF and high frame rate.
Street and travel
- Aperture: f/4–f/8 for flexibility.
- Shutter speed: 1/250s to avoid blur from walking.
- ISO: 200–800 depending on light.
- Keep camera settings adaptable for quick changes.
These presets are starting points. I adjust them on the fly to match light and creative intent when Adjusting Camera Settings for Better Quality.
Source: alphauniverse.com
Tips for fine-tuning and troubleshooting
Small fixes often solve quality problems when Adjusting Camera Settings for Better Quality. Here are steps I use in the field.
Check exposure with histogram
- Use the histogram to avoid clipped highlights and shadows.
- Expose to the right slightly to minimize noise, then pull down in post.
Reduce noise
- Keep ISO as low as practical.
- Use in-camera noise reduction sparingly and clean up in raw processing.
Avoid motion blur
- Increase shutter speed or stabilize camera.
- Use image stabilization when handheld; turn it off on a tripod.
Sharpening and lens issues
- Use the right aperture to avoid diffraction (don’t stop down too far).
- Clean the lens and sensor often.
- Use lens profiles during raw processing to correct distortion.
White balance and color
- Use a gray card or custom white balance for accuracy.
- Shoot raw to recover color shifts safely.
When I first learned, I overcompensated with ISO. That added noise. Changing the order I set controls fixed many bad shots. Practicing these steps improves results when Adjusting Camera Settings for Better Quality.

Source: youtube.com
Advanced techniques and workflow
Once you know basics of Adjusting Camera Settings for Better Quality, add these advanced steps to level up.
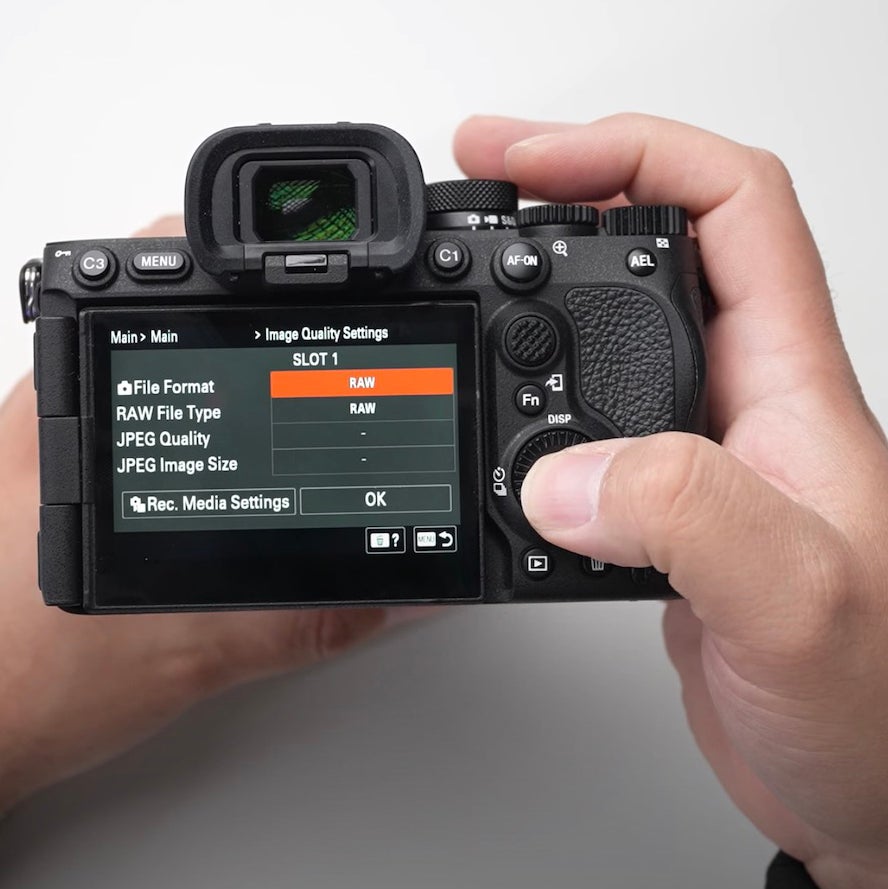
Shoot raw
- Raw files hold more detail and allow bigger corrections.
- They give you more headroom for exposure and white balance adjustments.
Bracketing and HDR
- Use exposure bracketing for high-contrast scenes.
- Combine exposures in post for balanced results without noise.
Focus stacking
- Use focus stacking for extreme depth of field in close-up shots.
- Merge multiple frames to get sharpness across the subject.
Custom camera profiles and calibration
- Calibrate your monitor for true color.
- Create custom camera profiles for accurate skin tones and color rendition.
Efficient workflow
- Use consistent file naming and presets.
- Batch-process images to save time while keeping quality high.
These techniques require practice. They helped me recover tough shots and consistently improve the output when Adjusting Camera Settings for Better Quality.

Source: belindashi.com
Frequently Asked Questions of Adjusting Camera Settings for Better Quality
What is the first setting I should change for better photos?
Start with aperture to set the depth of field you want. Then adjust shutter speed for motion control and ISO for proper exposure.
How can I reduce noise in low-light shots?
Keep ISO as low as possible, use wider apertures, and stabilize the camera with a tripod. Shoot raw and apply noise reduction in post for cleaner results.
Should I use auto mode when adjusting settings?
Auto mode is fine for quick snaps, but manual or priority modes give you control to improve image quality. Learning priority modes helps you master Adjusting Camera Settings for Better Quality faster.
How do I avoid blurry photos?
Use a fast enough shutter speed for the subject, stabilize the camera, and ensure proper focus. Also check your lens for cleanliness and use an appropriate aperture.
Is shooting raw always necessary for better quality?
Raw gives more flexibility and detail for editing, which often improves final quality. If you need quick JPEGs, use high-quality JPEG settings but raw is best for control.
Conclusion
Adjusting Camera Settings for Better Quality comes down to learning the three exposure controls, choosing settings for the scene, and refining with practice. Start with aperture for look, shutter for motion, and ISO for exposure, then fine-tune white balance and focus. Try the presets and tips here on your next shoot and compare results to see real improvement. If this helped you, try one setting change per session, subscribe for more guides, or leave a comment with your setup and questions.
As an Amazon Associate, I earn from Qualifying Purchases.