Hunting down for animals to capture wildlife photographs or hunting was tiring, time-consuming, and full of hassles. But then, trail cameras stepped in, and things got a lot easier. With a trail camera, hunting or wildlife photography became more relaxing yet fun.
Still, many users struggle with setting up or installing the trail camera. Most of them don’t even know where to install and which angle they should use.
That’s why led me to bring some trail camera placement tips for you all. Other than knowing about trail cameras, you will get to know many placement tips regarding this device.
What Is A Trail Camera?
A trail camera, also known as a game camera, is a device you set in areas you want to photograph animals or track movements. It is often called a remote camera as the user doesn’t need to be present in the camera area to take photographs.
How Does A Trail Camera Work?
Trail cameras work with their motion detection sensors. The device has sensors that pick motions from a specific range.
As soon as the sensor picks motion, the automatic trigger captures photos. The only difference between traditional and modern trail cameras is that users no longer need to go to the camera placement area to retrieve pictures.
Many trail cameras require wireless networks such as Wi-Fi or Bluetooth to send photos to the users. But in this case, the user has to be within the Wi-Fi range to receive data.
And then there are cellular trail cameras that run on cellular networks. The users of cellular trail cameras can control the camera and receive data from anywhere. For knowing the features of cellular trail cameras all users can view the page.
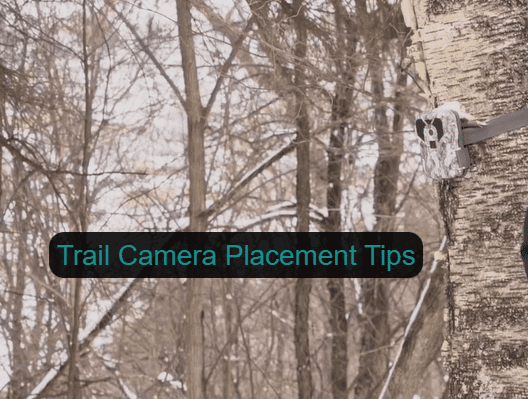
Trail Camera Placement Tips
If you are considering setting up your trail camera, I ask you to stop for a minute and consider a few things.
- What season is it?
- Where are you going to set the camera?
- Which angle or height will be better?
- What’s the possibility of animals crossing the area or how frequently?
Believe it or not, those things are necessary. Imagine setting up your camera somewhere and not receiving a single proper photograph. It will be a complete waste of your time and effort.
Based on season and locations, the placement will vary. So let’s check out the following trail camera placement tips.
Trail Camera Placement Tips: Based On Seasons
Animals move from location to location throughout seasons. Sometimes they move alone and sometimes in packs. So here’s how you can place your camera during different seasons:
Spring
It is the perfect season to set out with your trail camera. This is the time deers will come out in search of minerals. Try setting out mineral licks which can be the perfect bait to make the deers visit the area more often.
Not only will they attract the animals near your camera site, but also they will help them grow over the summer. A little observation can help you figure out the number of deers moving around the camera location.
Summer
Summer is the time before the hunting season starts. That’s why it is the most suitable time to watch deer movements to keep track of them.
During this time, you will also watch the deer antlers growing, which is a beautiful experience. You can also keep an eye on the herd. As for the camera placement, set it up near the baiting area.
The baiting area is where you keep food to attract the deers. Setting the camera near summer foods such as soybean fields can also be a suitable placement area.
Fall
By fall, the bucks have grown fully. So, it’s time to bring out the cameras to make sure you miss nothing. If you are going hunting, fall would be the right time to catch some big bucks.
Observing the deers during spring and summer has given you enough knowledge about their movements. So set your camera where you think they come often. But avoid checking on the cameras too often as it might alert the deers.
Winter
If you have missed deers during the fall, don’t worry. You’ve still got a chance in the winter.
This is the season when deers will start shedding their antlers. Some will shed one, while others will shed both. Moreover, many deers shed their antlers sooner than the others. So, this gives you a perfect chance to collect shed antlers.
Trail Camera Placement Tips: Based On Locations
Are you trying to monitor deers only because you want to photograph them? Or, are you hunting them?
I ask these questions because, depending on your purpose, your approach with the camera can be a little different. Besides, the same setup may not work everywhere. So, here are some tips on trail camera placement in different types of areas.
Meadows And Streams
Now, we’re talking about open areas. Areas like meadows, streams, or fields are perfect locations for animals passing in search of food. So what other place can be better than these?
Animals will always search for food and water in these places and set up the cameras on open areas give you vast photography subjects. They also tend to stay in such areas a little longer.
I would suggest you keep the photo mode short, not long. That’s because the animals may spend most of their time with their heads down in water or grass. You don’t want to waste your camera’s battery power for headless shots.
Mineral Licks
Mineral licks often work like magic to catch deers at their vulnerable moments. If you know which track the deers follow, you can spread some mineral licks.
Summer is the best season to attract deers towards these licks. And once you have spread them around the area, you will find the deers relaxing a bit while licking the minerals. That might be your moment to strike or your camera to snap photos.
Try not to set your camera within 20-30 feet from the licks. And place the camera facing downwards so that it would be directed towards the minerals.
Trails / Paths
If you think none of the meadow or mineral tips are working, you can place the camera right around the game trails. Trust me. Nothing works better than this trick.
Setting the camera on their trails gives you the advantage to capture photos or videos of the animals on their way to somewhere. It can be a magnificent sight and, if you are hunting, a better place to get your deer.
Setting Up A Trail Camera
Knowing when and where to set up your trail camera is fine. But knowing how to set up a trail camera is always an essential part.
You don’t need to be tech-savvy to do it. Just follow these instructions, and you will be able to set up the camera in 10-15 minutes.
- Set Up The Camera At Home: First thing first, you need to check on the settings. Do it at home before you set out with it because it will help you run checks on everything in a relaxed way. Make sure the batteries, SIM card (if needed), and memory card are inserted.
- Test Shots: Take a few shots to see if the motion detection and triggering time works accurately. Once you make sure everything is in place, set out with your trail camera to your desired location.
- Avoid Obstructions: While setting up the camera, make sure there aren’t any branches blocking the view or likely to block the view if the wind goes crazy. Having branches or obstacles in front of the lens will completely ruin photos.
- Right Angle: If you are going to install the camera higher on the tree, the camera angle should face down to catch movements. If you are not going for a higher area, the camera placement height should be three feet.
- Avoid Facing The Sun: The best way to get clear, non-blobby photos is to make sure the camera isn’t facing the sun. You can install it facing north or south where the sunlight won’t hit the camera directly.
The same goes for when you are using a solar panel. There’s no need to face the solar panel towards the sun to power it. It may cause reflection and blast the shot.
- Check The Strap: There will always be wind blowing in the outdoor areas. Besides, you never know if the animals will be bumping on the camera or not. And then, there is a possibility of getting your camera stolen.
That’s why the camera has to be tightened with the straps properly—trying bumping on the camera to see if it causes any problem. But don’t bump too hard.
- Final Check: Before you decide to walk away, don’t forget to check if everything is in order. Try walking in front of the camera a few times to see if it detects your movements and takes shots. Finally, you will be good to go.
Final Words
There was a time when hunting or doing wildlife photography without actually being near animals was impossible. And now it feels incredible to know how far we’ve come since that time.
However, this fantastic gadget can lead to frustrating results if you fail to understand how it needs to be placed and where. But I hope the trail camera placement tips will help you figure that out without any problem.
As an Amazon Associate, I earn from Qualifying Purchases.