
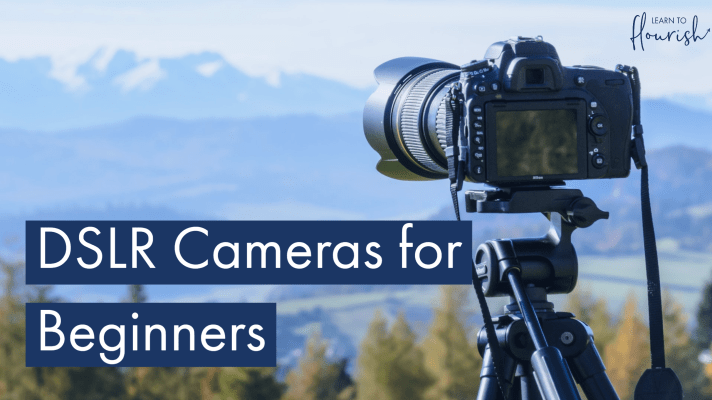
Learning to use a camera can be exciting. It opens a world of creativity.
For beginners, understanding camera basics can seem overwhelming. But with some guidance, you can start capturing beautiful photos quickly. This blog post will help you get familiar with your camera. We will discuss essential tips and tricks to make your photography journey enjoyable.
Whether you have a DSLR, mirrorless, or a point-and-shoot camera, this guide is for you. We will break down the key functions and settings you need to know. By the end of this post, you’ll feel more confident using your camera. Let’s dive into the basics and start taking amazing photos today!
Credit: www.learntoflourish.com
Choosing The Right Camera
Choosing the right camera is the first step to great photography. As a beginner, this decision can feel overwhelming. There are many options and features to consider. Let’s break it down and make it simple.
Types Of Cameras
There are several types of cameras to choose from. Point-and-shoot cameras are easy to use. They are compact and have built-in lenses. DSLRs are larger but offer better image quality. They come with interchangeable lenses. Mirrorless cameras are similar to DSLRs but smaller. They provide excellent image quality and versatility.
Each type has its pros and cons. Think about what you need. A point-and-shoot might be perfect for casual photos. If you want to learn more about photography, a DSLR or mirrorless camera might be better.
Budget Considerations
Budget is an important factor in choosing a camera. Cameras can range from affordable to very expensive. Set a budget before you start shopping. This will help narrow your options. Remember, you don’t need the most expensive camera to take great photos.
Look for a camera that fits your budget and meets your needs. Entry-level DSLRs and mirrorless cameras can be budget-friendly. Consider buying a used camera to save money. Make sure it’s in good condition.
Think about future costs too. Extra batteries, memory cards, and lenses can add up. Plan for these expenses in your budget.

Credit: www.youtube.com
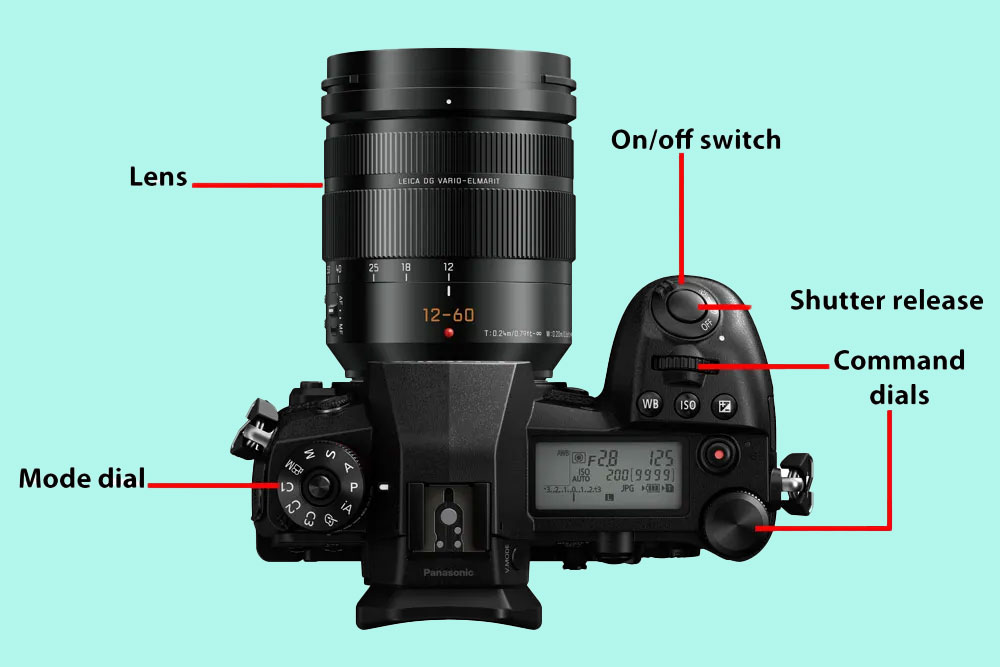
Understanding Camera Settings
Learning how to use a camera can seem daunting. But with a little patience, anyone can master the basics. Understanding camera settings is key to taking great photos. This guide will help you understand three important settings: Aperture, Shutter Speed, and ISO.
Aperture
Aperture controls the amount of light entering the camera. Think of it as the camera’s eye. A wide aperture (small f-number) allows more light in. This creates a blurry background, which is great for portraits. A narrow aperture (large f-number) lets less light in. This keeps more of the image in focus, perfect for landscapes.
Shutter Speed
Shutter speed is the amount of time the camera’s shutter is open. A fast shutter speed freezes motion. Great for action shots. A slow shutter speed captures movement, creating a blur effect. Ideal for night photography and light trails. Experiment with both to see different effects.
Iso
ISO measures the camera’s sensitivity to light. A low ISO (100 or 200) is best for bright conditions. It reduces grain and noise in photos. A high ISO (800 and above) is useful in low light. But it can make photos grainy. Always try to use the lowest ISO possible for clear images.
Mastering Focus Techniques
Learning how to use a camera can be fun. Understanding focus techniques is key. Good focus makes your photos clear and sharp. Let’s explore two main focus methods: manual focus and autofocus modes.
Manual Focus
Manual focus gives you full control. Turn the focus ring on your lens. Look through the viewfinder. Adjust until your subject is sharp. This method is great for still objects. It can also be useful in low light. Practice makes perfect. Manual focus can be slow at first. But it gets easier with time.
Autofocus Modes
Autofocus is faster. It uses the camera’s sensors. There are different autofocus modes. Single-shot autofocus is good for still subjects. The camera focuses once when you press the button. Continuous autofocus works best for moving subjects. The camera keeps adjusting focus. This mode is ideal for sports or wildlife photography. Try both modes. See which one you like best.
Composing Your Shots
Composing your shots is essential for capturing compelling photos. Good composition helps tell a story. It draws the viewer’s eye to the subject. It makes your photos more engaging and interesting. Let’s explore some basic rules to improve your composition.
Rule Of Thirds
The Rule of Thirds is a simple technique. Imagine your frame divided into nine equal parts. You have two horizontal and two vertical lines. Place your subject along these lines or at their intersections. This creates balance and interest. It draws the viewer’s eye naturally to the subject.
Many cameras have a grid overlay feature. Use it to help you apply the Rule of Thirds. Practice with different subjects and scenes. See how this rule changes the look of your photos.
Leading Lines
Leading lines guide the viewer’s eye through the photo. They can be roads, fences, or rivers. Use them to direct attention to your subject. They add depth and dimension. They make your photos more dynamic.
Experiment with different angles and perspectives. Find lines in your environment. Use them creatively. Leading lines can transform ordinary scenes into compelling compositions.
Lighting Basics
Understanding lighting is essential for beginner photographers. Good lighting can make a huge difference in your photos. Whether using natural or artificial light, knowing the basics will help you take better pictures.
Natural Light
Natural light comes from the sun. It changes throughout the day. Morning and late afternoon light is soft and warm. Midday light is harsh and can create strong shadows. Try to avoid direct sunlight. Use the shade for softer light. Cloudy days provide diffused light, which is great for portraits.
Artificial Light
Artificial light includes any light source that is not natural. This can be lamps, ceiling lights, or studio lights. It gives you more control. You can use it any time of day. Experiment with different light sources. Try using a desk lamp with a soft white bulb. Play with the direction and distance of the light. This will help you understand how it affects your photos.
Using Camera Accessories
Using camera accessories can significantly enhance your photography experience. They offer stability, versatility, and improved image quality. This section will guide you through two essential accessories: tripods and lenses.
Tripods
Tripods provide stability, which is crucial for clear, sharp images. They are especially useful in low-light conditions or for long exposure shots. Here are some key features to consider when choosing a tripod:
- Material: Aluminum tripods are sturdy and affordable. Carbon fiber tripods are lighter but more expensive.
- Height: Ensure the tripod’s height suits your needs. It should be tall enough to reach your eye level without you having to bend.
- Weight Capacity: Make sure the tripod can support the weight of your camera and lens.
Using a tripod can also help you frame your shots more precisely. It allows you to make fine adjustments to the composition without worrying about camera shake.
Lenses
Lenses are the eyes of your camera. They determine the perspective and quality of your photos. There are different types of lenses for various photography needs:
| Lens Type | Usage |
|---|---|
| Prime Lenses | Fixed focal length. Great for portrait and low-light photography. |
| Zoom Lenses | Variable focal length. Versatile for different types of shots. |
| Wide-Angle Lenses | Ideal for landscapes and architecture. |
| Telephoto Lenses | Perfect for wildlife and sports photography. |
Choosing the right lens depends on what you want to capture. For beginners, a standard zoom lens is often a good start. It covers a range of focal lengths, offering flexibility while you learn.
Post-processing Tips
Post-processing is an essential step for beginners in photography. It enhances the raw images taken with your camera. Learning basic editing skills can dramatically improve your photos. Here are some tips to get you started.
Basic Editing Software
Start with simple editing software. Adobe Lightroom is popular for beginners. It offers a user-friendly interface. You can easily adjust brightness, contrast, and saturation. Another good option is GIMP. It’s free and powerful for basic edits. Explore different tools to see what works best for you.
Color Correction
Color correction is crucial for vibrant photos. Pay attention to white balance. It ensures your colors are accurate. Use the temperature slider to adjust warmth. Cool down or warm up the image as needed. Experiment with tint to remove color casts. Your goal is a natural, balanced look.
Don’t forget about the hue, saturation, and luminance (HSL) panel. Adjust individual colors for a more polished result. Increase saturation for a pop of color. Decrease it for a more muted look. Play with these settings to find your style.
Common Mistakes To Avoid
Learning to use a camera can be exciting. Yet, many beginners make common mistakes. Knowing these can help improve your photography skills. Let’s explore some of the most frequent errors and how to avoid them.
Overexposure
Overexposure happens when your photo is too bright. This can wash out details. To prevent this, check your camera’s exposure settings. Use the histogram to see if your image is balanced. Try adjusting the shutter speed and ISO. Lower values can help reduce the light entering the lens.
Blurry Images
Blurry images are a common issue for beginners. This often occurs due to camera shake. To avoid this, hold your camera steady. Use both hands for better control. A tripod can also help stabilize your shots. Another tip is to use a faster shutter speed. This can capture the image quicker and reduce blur.
Credit: amateurphotographer.com
Frequently Asked Questions
How Do I Start Using A Camera?
Begin by reading the camera manual. Familiarize yourself with the main buttons and settings. Practice taking photos in auto mode first.
What Are The Basic Camera Settings?
The basic settings include ISO, aperture, and shutter speed. Adjust these to control light and depth of field.
How Do I Focus A Camera Properly?
Use the autofocus feature for ease. For manual focus, adjust the lens until the subject is sharp.
What Is The Best Mode For Beginners?
Auto mode is best for beginners. It helps you learn the basics without worrying about settings.
Conclusion
Mastering camera basics takes time and practice. Start with these simple steps. Experiment with different settings. Learn from your mistakes. Enjoy capturing moments. Photography is a journey, not a destination. Keep clicking. Stay curious. Your skills will improve. Soon, taking great photos will feel natural.
Happy shooting!
As an Amazon Associate, I earn from Qualifying Purchases.