Install batteries, insert an SD card, mount at 3–4 feet, set time, test with a short walk.
I have set up dozens of trail cams over the years. This guide shows exactly How to Set Up a Wildgame Innovations Trail Camera step by step. You will learn what to unpack, how to mount the camera for clear shots, how to tweak settings for crisp photos and videos, and how to troubleshoot common problems. Read on for hands-on tips, real-life mistakes to avoid, and simple checks you can do in the field.

Why choose Wildgame Innovations and what you need to gather
Wildgame Innovations makes cameras that balance price and features. Knowing how to Set Up a Wildgame Innovations Trail Camera helps you get reliable images fast. These cams are popular with hunters, researchers, and homeowners for wildlife monitoring.
Gather these items before you start:
- Wildgame Innovations trail camera
- 8 to 12 fresh AA batteries or rechargeable pack
- High-quality SD card, class 10 or higher, 16–128 GB
- Small screwdriver or hex tool if needed
- Mounting strap, bungee, or security box
- Clean cloth to wipe the lens
- Notebook or phone to record settings
Preparing ahead saves time and cuts errors. Organize parts on a clean table. Charge rechargeable batteries fully. Label the SD card for the camera. These small steps make the setup process smooth.

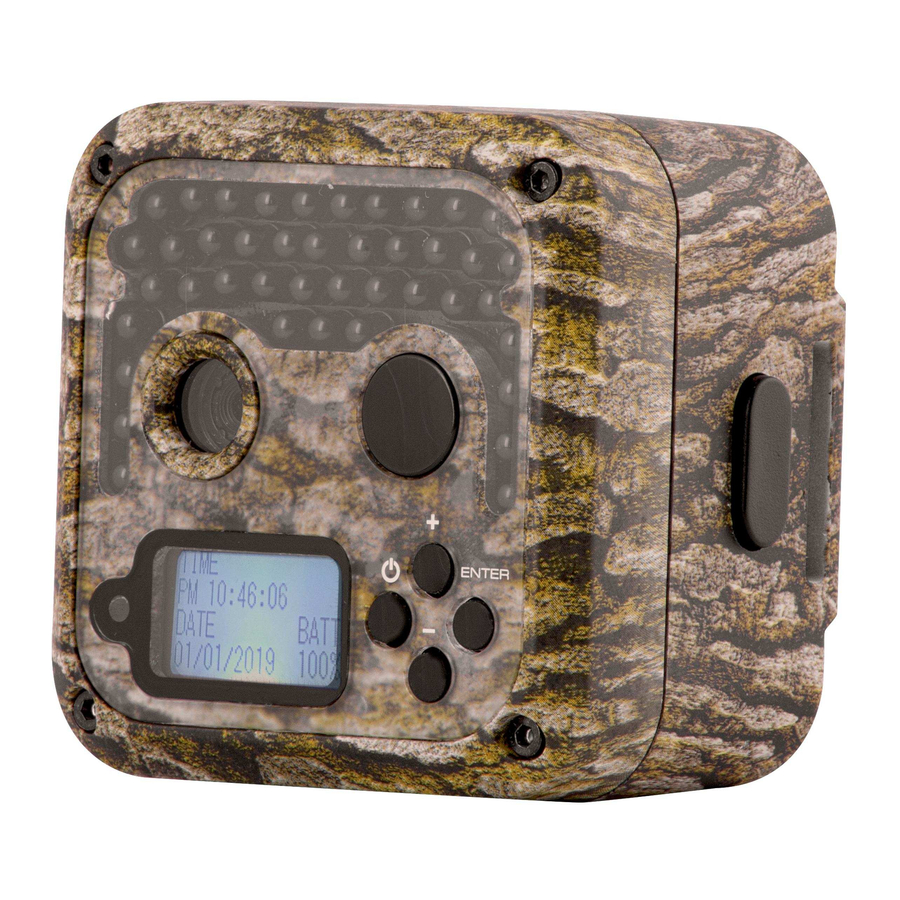
Unboxing and preparing the camera
Open the box slowly. Inspect the camera for damage. Read the quick start guide first.
Steps to prepare:
- Install batteries following polarity marks. Use fresh alkaline or lithium for better cold performance.
- Insert the SD card. Format it inside the camera if the menu offers formatting.
- Power on and set the date and time. Accurate timestamps matter for tracking.
- Set the camera code or PIN if the model supports it.
- Check the lens and motion sensor for dust. Clean gently with a cloth.
I learned early that swapping batteries in the field wastes time. Preinstall batteries and an empty SD card before leaving the house. That small habit cut my field visits in half.

Mounting and positioning for best results
Correct mounting is crucial when you learn How to Set Up a Wildgame Innovations Trail Camera. Good placement increases clear captures and reduces false triggers.
Mounting tips:
- Height: Place the camera 3 to 4 feet above the ground for deer and medium-sized animals.
- Angle: Aim slightly downward to cover a trail or feeding spot.
- Distance: Expect best captures between 10 and 40 feet. Closer gives more detail.
- Avoid direct sunlight at sunrise or sunset behind the camera. Backlight ruins images.
- Use a sturdy tree or post. Secure with a strap or use a locking security box for theft-prone areas.
Placement tips:
- Set the camera at a slight angle to the trail. This reduces false trips and captures side profiles.
- Clear small branches and tall grass in front of the lens. Keep the field of view neat.
- For a game trail, point the camera along the trail, not directly at it. This captures animals as they pass.
People Also Ask
- How far should you place a trail camera from a trail?
- Place it 10 to 40 feet away. Closer gives detail. Farther covers movement but lowers detail.
- Should a trail camera be level?
- Yes. Keep it level and slightly tilted down to capture natural movement and avoid sky triggers.
- How high should a Wildgame Innovations trail camera be?
- Mount at 3 to 4 feet for deer. Lower for small animals and higher for bigger views.

Settings and optimization
Learning settings is key when you learn How to Set Up a Wildgame Innovations Trail Camera. Small tweaks boost image quality and battery life.
Core settings to set:
- Mode: Choose Photo, Video, or Photo+Video based on your goals.
- Resolution: Use high resolution for detail. Lower resolution to save space.
- Trigger interval: Set 5–30 seconds between triggers to reduce repeats.
- PIR sensitivity: High for shy animals. Lower in high-traffic brush to reduce false triggers.
- Capture count: Set to 1–3 images per trigger depending on your need.
- Time-lapse: Use for long-term visibility or monitoring changes over days.
- Night flash: Choose between IR no-glow or low-glow depending on stealth needs.
Practical tip: Start with moderate settings in the field and adjust after a day of testing. I often shoot at medium sensitivity and high resolution then change based on results.

Testing, troubleshooting, and maintenance
Testing matters. Before you leave the site, test the camera. Walk in front of it and review captured images. This confirms angle and trigger speed.
Common problems and fixes:
- No images: Check battery polarity, SD card orientation, and power switch. Format the SD card if necessary.
- Lots of blank images: Reduce sensitivity or clear vegetation in the detection zone.
- Poor night photos: Clean the lens and check IR flash setting. Replace batteries if dim.
- Rapid battery drain: Use high-quality alkaline or lithium batteries. Disable video if not needed.
- Camera not powering on: Test with fresh batteries and another SD card to isolate the problem.
Maintenance checklist:
- Replace batteries seasonally or based on event count.
- Check the case seal and clean contacts to prevent moisture damage.
- Update firmware if the manufacturer releases a stable update.
- Label and catalog SD cards. Note the camera location, date set, and settings used.
I once left a camera with low batteries. It recorded only one week. Now I log battery installation dates. That small habit prevents lost data.
Advanced tips and real-life experience
If you want expert-level setups for How to Set Up a Wildgame Innovations Trail Camera, try these advanced tactics. They come from field testing and years of use.
Advanced tips:
- Use a solar panel or external battery on long-term stations. This reduces visits.
- Use camouflage tape for stealth. Match local bark or brush.
- Rotate cameras between sites every week to map animal routes.
- Use scent-free handling to limit human scent near the camera.
- Time your setup just before dusk for immediate testing on nocturnal activity.
Real-life lessons:
- I once angled a camera too high. Animals were only partial in-frame. Lowering it fixed the issue.
- Storing SD cards in labeled, anti-static sleeves saves time when processing images.
- A locking box saved one camera from theft after a month in public land.
Patience helps. Expect a day or two of tuning. Small adjustments yield big improvements in capture rate and image quality.
Frequently Asked Questions of How to Set Up a Wildgame Innovations Trail Camera
How do I activate a Wildgame Innovations trail camera?
Turn the power switch on, insert fresh batteries, and ensure the SD card is formatted. Set the date and time in the menu before mounting.
What batteries are best for Wildgame Innovations cameras?
Lithium or high-quality alkaline AA batteries work best, especially in cold weather. Rechargeable NiMH cells are fine but check voltage and capacity.
How do I prevent false triggers from moving branches?
Lower the PIR sensitivity and clear brush in the detection zone. Angle the camera slightly away from moving foliage.
Can I use a Wildgame Innovations camera for home security?
Yes. Use high-resolution settings and a visible placement for coverage. Consider a lock box and strong mounting for theft prevention.
How often should I check the camera?
Check once every 1–2 weeks for battery life and storage needs on active sites. Long-term solar setups can be checked monthly.
How do I format an SD card in the camera?
Insert the SD card and use the menu option to format. Formatting in-camera ensures compatibility and reduces file errors.
Conclusion
Setting up a Wildgame Innovations trail camera is a simple process when you follow clear steps. Install batteries, format the SD card, set the time, mount at 3–4 feet, and test the trigger. Use the settings and placement tips here to improve capture rates and reduce false triggers. Take small notes in the field and refine settings after the first day of captures.
Get out and test your camera today. Try one location and adjust based on the images you collect. If you found this guide helpful, leave a comment, share your setup story, or subscribe for more field-tested tips.
As an Amazon Associate, I earn from Qualifying Purchases.