
Hiding a trail camera can be tricky but essential for capturing wildlife. Proper placement ensures it remains undetected and captures the best footage.
Trail cameras are amazing tools for observing wildlife without disturbing them. But, if animals or trespassers notice the camera, it can defeat the purpose. The key is to hide the camera effectively. This involves choosing the right spot, blending it with the surroundings, and ensuring no signs give it away.
A well-hidden trail camera can provide valuable insights into animal behavior. In this guide, you will learn practical tips to hide your trail camera successfully. This will help you get the best results without alarming the subjects you want to study.

Credit: www.youtube.com
Choosing The Right Location
Choosing the right location for your trail camera is crucial. It ensures you capture the best possible wildlife images. Picking a spot with the right features can make all the difference. Here are some tips to help you find the perfect location.
Factors To Consider
Several factors can affect your trail camera’s performance. First, consider the animal’s habits. Knowing where they eat, drink, and rest can guide your choice. Next, think about the camera’s visibility. Make sure it blends with the surroundings. Also, avoid placing it in direct sunlight. Glare can ruin your photos. Lastly, ensure the camera is secure. High winds or curious animals can knock it over.
High-traffic Areas
High-traffic areas are great for capturing wildlife. Look for animal trails, water sources, and feeding spots. These locations usually have more activity. Set up your camera at a height that captures good angles. Position it facing the trail for the best shots. Remember to camouflage it well. Use natural covers like leaves and branches.
Credit: reolink.com
Camouflage Techniques
Camouflage techniques are essential for hiding trail cameras effectively. A well-hidden trail camera blends seamlessly into its surroundings. This reduces the chance of detection by both humans and animals. Using camouflage techniques ensures you capture the most natural behavior.
Natural Elements
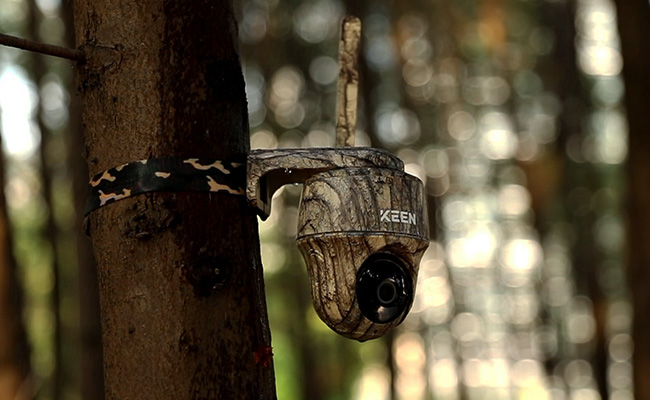
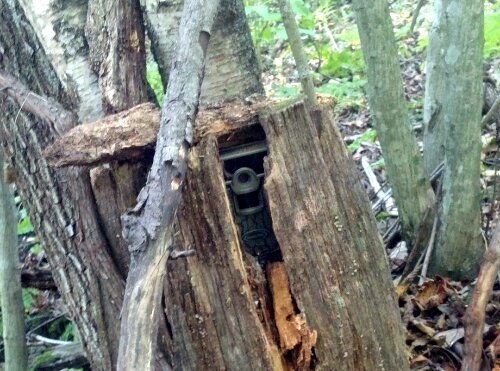
Utilize the natural surroundings to conceal your trail camera. Place the camera near tree trunks or bushes. Use branches and leaves to cover it. Ensure the color of the camera matches the environment. Dirt and mud can help blend the camera with the ground. Avoid disturbing the area too much. This keeps the camera hidden and the animals undisturbed.
Artificial Covers
Artificial covers can also be effective. Use camo tape or wraps to match the camera to its surroundings. Purchase camo skins designed for trail cameras. These skins fit perfectly and blend well. Another option is to use a camo net. Cover the camera and the surrounding area with it. Fake rocks or logs can also work well. These covers hide the camera completely. Choose covers that look natural in the environment.
Mounting Strategies
Mounting your trail camera correctly ensures you capture the best wildlife moments. Proper mounting helps keep your camera hidden and safe from theft or damage. Here are some effective strategies for mounting your trail camera.
Height And Angles
Mount your camera at a height of about 3-4 feet. This height captures animals at eye level. It also reduces the risk of being spotted by humans. Adjust the angle to face trails or feeding areas. Angling the camera slightly downward can help capture smaller animals too.
Avoid pointing the camera directly at the sun. This prevents glare and washed-out images. North-facing is often a good choice. Test the angles during setup. Make sure to check the field of view and adjust as needed.
Secure Fastening
Use sturdy straps or mounts to secure your camera. This helps prevent it from falling or being easily moved. Some cameras come with mounting brackets. These provide extra stability.
Consider using a security box or cable lock. This offers additional protection from theft. Camouflage the camera with natural elements. Use branches, leaves, or bark to blend it with the surroundings. Ensure the lens and sensors remain unobstructed.
Regularly check the mounting. Ensure it remains secure and undamaged. A well-mounted trail camera increases your chances of capturing great wildlife photos.
Credit: www.whitetailhabitatsolutions.com
Weatherproofing Tips
Weatherproofing your trail camera is essential for maintaining its longevity and functionality. Whether you are setting up your camera in a forest or near a water body, ensuring it is protected against harsh weather conditions is crucial. Below are some effective weatherproofing tips to keep your trail camera safe and operational.
Waterproof Materials
Choosing the right materials can make a huge difference in protecting your trail camera from water damage. Opt for waterproof enclosures made from sturdy plastic or metal. These materials can withstand heavy rains and moisture.
- Use silicone seals around the edges of the enclosure.
- Consider waterproof tape for extra sealing.
- Invest in a waterproof cover for extra protection.
Temperature Resilience
Trail cameras need to function in various temperatures. Choosing materials and designs that can handle both extreme heat and cold is important. Look for cameras with temperature-resistant components.
- Select a camera with wide operating temperature range.
- Use insulated covers for extreme cold.
- Ensure ventilation to prevent overheating.
By following these tips, you can significantly extend the life of your trail camera. Protecting your camera from water and extreme temperatures is key to getting the best results.
Avoiding Detection By Wildlife
Successfully hiding a trail camera involves more than just camouflage. Wildlife can detect unfamiliar objects easily. Avoiding detection by wildlife ensures you capture the best footage. This section covers essential tips to ensure your trail camera remains undetected by animals.
Scent Control
Animals have a keen sense of smell. To avoid detection, handle the camera with gloves. This keeps human scent off the device. Use scent-eliminating sprays on the camera. These sprays mask human odors. Also, store the camera in a scent-free bag when not in use. This prevents it from absorbing household or human scents.
Minimizing Noise
Wildlife is sensitive to noise. Ensure the camera is securely mounted to avoid movement. A loose camera can make noises. Also, check for any loose parts. Tighten screws and bolts to prevent rattling. Position the camera away from branches or leaves. Wind can cause these to rub against the camera, making noise.
Avoiding Human Detection
Trail cameras are essential for monitoring wildlife and security. Avoiding human detection is crucial for successful use. Here are effective techniques to hide your trail camera from human eyes.
Blending With Surroundings
Ensure your trail camera blends with its surroundings. Use natural elements like leaves, branches, or tree bark. Attach them to the camera to camouflage it. Choose a color that matches the environment. Brown or green works well in forests. Avoid shiny surfaces that reflect light.
Place the camera where it is less noticeable. High up in trees or among dense foliage are good spots. Avoid open areas where it is easy to spot.
Using Decoys
Decoys can divert attention away from the trail camera. Set up fake cameras in visible spots. This distracts potential intruders. They are less likely to find the real camera.
Use other objects as decoys. Birdhouses, feeders, or even small signs can work. Place them in the same area as the camera. This makes the real camera less noticeable.
| Technique | Description |
|---|---|
| Blending with Surroundings | Use natural elements and colors to camouflage the camera. |
| Using Decoys | Set up fake cameras or other objects to divert attention. |
Testing Camera Placement
Testing camera placement is a key step in setting up your trail camera. Proper placement ensures you capture the best images and videos of wildlife. Start by evaluating the area and determining the best spot.
Trial Runs
Begin with a trial run to see if the camera captures clear images. Set up the camera in your chosen spot. Leave it for a few days. Check the footage to see if the angle and height are right.
If the images are not clear, try a different spot. Move the camera slightly up or down. Adjust the angle as needed. It may take a few attempts to find the perfect placement.
Adjustments And Fine-tuning
Make necessary adjustments based on the trial runs. If the camera is too high, lower it. If it’s too low, raise it. Ensure it’s not obstructed by branches or leaves.
Fine-tuning is important for getting the best results. Adjust the settings on your camera for better clarity. Test the motion detection to ensure it’s working well.
Continue to refine the placement until you are satisfied with the images. With patience, you will get the perfect setup for capturing wildlife.
Maintenance And Monitoring
Proper maintenance and monitoring are crucial for the effective use of your trail camera. This ensures that your camera remains functional and captures high-quality images. Regular checks and battery life management are key aspects to focus on.
Regular Checks
Regular checks help you to ensure that your trail camera is working correctly. Check the camera’s position and make sure it is still well-hidden. Verify that the lens is clean and free from debris. Inspect for any signs of tampering or damage.
- Check camera position
- Clean the lens
- Inspect for tampering or damage
Battery Life Management
Proper battery life management is vital for continuous operation. Use high-quality batteries to ensure longevity. Monitor the battery level frequently and replace them as needed. Consider using solar-powered battery packs for extended use.
| Task | Frequency |
|---|---|
| Check battery level | Weekly |
| Replace batteries | As needed |
Frequently Asked Questions
How To Hide A Trail Camera Effectively?
To hide a trail camera effectively, place it at a height of 6-8 feet. Use natural foliage or camouflage covers. Avoid direct sunlight and place it in shaded areas.
Where Is The Best Place To Hide A Trail Camera?
The best place to hide a trail camera is in dense vegetation. Choose areas with minimal human activity. Mount it on a tree or post at a height of 6-8 feet.
What Materials Can Help Camouflage A Trail Camera?
Use natural materials like leaves, branches, and bark to camouflage a trail camera. Camouflage tape and covers are also effective. Ensure the materials blend well with the surroundings.
How Do I Protect My Trail Camera From Theft?
Protect your trail camera from theft by using security boxes, cable locks, and placing it high on trees. Use password protection and place it in less obvious spots.
Conclusion
Hiding your trail camera is crucial for effective wildlife monitoring. Use natural cover to blend the camera into the environment. Make sure to avoid direct sunlight to prevent glare. Placing the camera at a higher angle can also help. Always consider the animal’s line of sight.
Using scent control can keep animals from detecting the camera. Follow these tips to ensure your camera stays hidden. Happy monitoring and enjoy capturing those amazing wildlife moments!
As an Amazon Associate, I earn from Qualifying Purchases.