
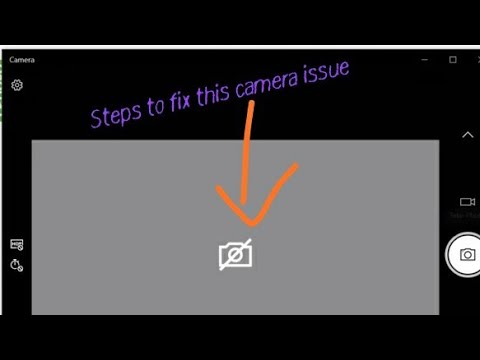
Is your Lenovo laptop camera not working? No worries, this guide can help.
A non-functioning camera can be frustrating, especially during important video calls or meetings. Many Lenovo laptop users face this issue. The good news is that it is often fixable with a few simple steps. In this blog post, we will guide you through troubleshooting your Lenovo laptop camera.
From checking the settings to updating drivers, we cover it all. By the end, you will have a working camera and be ready for your next virtual meeting. Let’s dive in and get your camera back on track!
Common Camera Issues
Experiencing camera issues on your Lenovo laptop can be frustrating. Common problems include no image display, poor image quality, and the camera not being recognized. This section will guide you through these common issues and how to fix them.
No Image Display
Sometimes, the camera may not display any image. First, check if the camera lens is blocked. Ensure nothing is covering it. Next, try restarting your laptop. It can help reset the camera. Also, make sure your camera is enabled. Go to your camera settings and verify it is turned on. If the issue persists, update your camera driver. Visit the Lenovo support website to download the latest driver.
Poor Image Quality
Poor image quality can make video calls difficult. Clean the camera lens with a soft cloth. Dirt or smudges can affect the image. Adjust the lighting in your room. Good lighting improves image quality. Also, check your camera settings. Adjust the resolution and quality settings for a better image. If the problem continues, update your camera driver.
Camera Not Recognized
Sometimes, your laptop may not recognize the camera. Check if the camera is disabled in the device manager. Enable it if it is off. Restart your laptop. This can help the system recognize the camera. Also, make sure the camera driver is up to date. An outdated driver can cause recognition issues. If the camera is still not recognized, reinstall the camera driver. Go to the Lenovo support website for the driver download.

Credit: support.zoom.com
Initial Checks
Experiencing issues with your Lenovo laptop camera can be frustrating. Before diving deep into complex solutions, perform some initial checks. These simple steps can often resolve the problem quickly. Let’s look at these initial checks.
Verify Camera Activation
Ensure your camera is active. Look for a physical switch or button on your laptop. Some models have a dedicated camera switch for privacy reasons. Check for any indicator light near the camera. If the light is off, your camera may be disabled.
Inspect Physical Connections
Ensure all physical connections are secure. If your camera is detachable, check the connection to your laptop. Sometimes a loose connection can cause the camera to malfunction. Reattach the camera securely and see if it works.
Check Privacy Settings
Open your laptop settings. Navigate to the privacy section. Ensure camera access is enabled for the apps you need. Sometimes, privacy settings can block camera access. Adjust the settings and test your camera again.
Update Camera Drivers
Updating camera drivers can fix many issues with your Lenovo laptop’s camera. Drivers ensure the camera works well with the operating system. Follow the steps below to update your camera drivers and troubleshoot any problems.
Access Device Manager
First, open Device Manager. This tool helps manage hardware drivers.
- Press Windows key + X on your keyboard.
- Select Device Manager from the menu.
- Expand the Imaging Devices or Cameras section.
- Right-click on your camera and select Properties.
Download Latest Drivers
Next, get the latest drivers for your camera. This ensures compatibility with the latest software updates.
- Go to the Lenovo support website.
- Enter your laptop’s model number.
- Navigate to the Drivers & Software section.
- Find the latest camera driver for your model.
- Download the driver to your computer.
Install And Reboot
Finally, install the downloaded driver. Restarting your laptop helps apply the changes.
- Double-click the downloaded driver file.
- Follow the on-screen instructions to install the driver.
- Once installed, restart your laptop.
After rebooting, open your camera application to check if the issue is resolved.
Adjust Camera Settings
Adjusting the camera settings on your Lenovo laptop can greatly improve your video quality. Many users are not aware of the settings they can tweak for better performance. Here, we will discuss some key adjustments you can make to your camera settings.
Resolution And Brightness
Resolution is key to a clear image. Higher resolution means more detail. Check your camera settings and choose the highest resolution available. This will ensure your video is as clear as possible.
Brightness affects how light or dark your video appears. If your video is too dark, increase the brightness. If it is too bright, decrease the brightness. Find a balance that looks natural.
Contrast And Saturation
Contrast controls the difference between dark and light areas. Adjusting contrast can make your image sharper. Increase contrast for a sharper image. Decrease it for a softer image.
Saturation affects how vivid the colors are. Higher saturation makes colors more vibrant. Lower saturation makes them more muted. Adjust the saturation to make the colors look natural.
Reset To Default
Sometimes, the best option is to reset to default settings. This can fix issues caused by previous adjustments. Look for a “reset” or “default” button in your camera settings. Click it to return to the original settings.
This can be a quick fix for many common camera problems. It is also a good starting point if you are unsure about making adjustments.
Test With Different Applications
Having trouble with your Lenovo laptop camera? Testing it with different applications can help. This method helps identify if the issue lies with the camera hardware or the software. Let’s explore this approach step-by-step.
Use Built-in Camera App
Start with the built-in camera app. Open the Camera app from the Start menu. Check if it shows a live feed. If the camera works here, the issue might be with other applications.
Try Third-party Software
Next, try using third-party software. Apps like Zoom, Skype, or Microsoft Teams are good options. Download and install one of these. Open the app and go to the video settings. See if the camera works in this app. This step helps check if the problem is specific to certain software.
Check Compatibility
Ensure the application you use is compatible with your Lenovo laptop. Some apps might not support all camera drivers. Visit the app’s support page to check compatibility. This step confirms if the app can communicate with your camera hardware.
Windows Troubleshooter
Experiencing issues with your camera on a Lenovo laptop can be frustrating. One of the easiest ways to diagnose and resolve the problem is by using the Windows Troubleshooter. This built-in tool helps identify and fix common issues on your device.
Run Hardware And Devices
To begin, run the Hardware and Devices troubleshooter. Follow these steps:
- Press Windows key + I to open Settings.
- Go to Update & Security.
- Click on Troubleshoot in the left panel.
- Select Hardware and Devices and click Run the troubleshooter.
Follow Recommended Steps
Once the troubleshooter starts, it will scan for issues. Follow these steps:
- The tool will detect hardware problems.
- Follow the on-screen instructions.
- Apply the recommended fixes.
These steps may include enabling the camera or updating drivers.
Analyze Results
After the troubleshooting process:
- Check the results displayed by the tool.
- Note any issues that were found and fixed.
- If the camera still doesn’t work, consider other troubleshooting steps.
Sometimes, a restart is needed for changes to take effect.
Check For Windows Updates
Checking for Windows updates is a key step in troubleshooting your Lenovo laptop’s camera. Many issues stem from outdated software. Follow these steps to ensure your system is up-to-date.
Navigate To Settings
First, open the Start menu. Click on the gear icon to open Settings. This is where you can adjust your system preferences.
Install Updates
In the Settings window, select “Update & Security.” Next, click on “Windows Update.” Here, you will see if there are any updates available for your system. Click “Check for updates” to make sure you have the latest patches.
Restart System
Once updates are installed, you need to restart your laptop. Go to the Start menu. Click on the power icon, then select “Restart.” This ensures that the updates are fully applied. Your camera might start working better after this.
Credit: www.youtube.com
Consult Lenovo Support
Consulting Lenovo Support is crucial when troubleshooting your laptop camera. They provide expert help to solve issues quickly. This section will guide you on how to use Lenovo Support effectively.
Access Online Resources
Lenovo offers a wealth of online resources. Visit the Lenovo Support website. It has troubleshooting guides and FAQ sections. Use the search bar to find camera-related articles. Follow step-by-step instructions to resolve common issues. The community forum can also be helpful. Other users share their solutions there.
Contact Support Team
If online resources don’t help, contact the Lenovo Support team. They can provide personalized assistance. Use the “Contact Us” page on their website. You can call, chat, or email them. Provide detailed information about your issue. This helps them diagnose the problem faster. Keep your laptop model and serial number handy.
Consider Professional Repair
Sometimes, issues can’t be fixed remotely. Professional repair may be needed. Lenovo has authorized service centers. They offer reliable repair services. You can find the nearest center on the Lenovo website. Book an appointment and take your laptop there. They will diagnose and repair the camera issue.

Credit: answers.microsoft.com
Frequently Asked Questions
How To Fix Lenovo Laptop Camera Issues?
First, check if the camera is enabled in Device Manager. Update or reinstall the camera driver. Ensure camera privacy settings allow apps to access the camera.
Why Is My Lenovo Camera Not Working?
Your camera might be disabled or driver outdated. Check Device Manager and update the camera driver. Ensure privacy settings are correct.
How To Update Lenovo Camera Driver?
Go to Device Manager, find your camera under “Imaging devices. ” Right-click and select “Update driver. ” Follow on-screen instructions.
Why Is My Lenovo Camera Showing A Black Screen?
A black screen could indicate a driver issue or camera obstruction. Update the driver and check for physical obstructions.
Conclusion
Fixing your Lenovo laptop camera can be simple with these steps. Start by checking the camera settings. Update the drivers if needed. Ensure no software conflicts. Restart the laptop to apply changes. Test the camera with different apps. Seek professional help if issues persist.
Regular maintenance helps prevent problems. Keep your system updated. Enjoy clear video calls and photos.
As an Amazon Associate, I earn from Qualifying Purchases.