
Yes, you can have multiple trail cameras on one plan. This setup allows you to monitor different locations without needing separate plans for each camera.
It saves money and simplifies management. Trail cameras are great for wildlife enthusiasts, hunters, and property owners. They offer a way to keep an eye on various areas. But managing multiple cameras with different plans can be a hassle. Combining them into one plan is more efficient.
It makes monitoring easier and more cost-effective. In this blog, we will explore how you can set up multiple trail cameras on one plan. We will discuss the benefits and steps to get started. So, if you want to streamline your trail camera setup, keep reading!
Maximizing Trail Camera Coverage
Maximizing trail camera coverage means setting up multiple cameras. This approach ensures you capture more wildlife activity. It also helps you monitor a larger area. Let’s explore the benefits and strategies for using multiple trail cameras.
Benefits Of Multiple Cameras
Using more than one trail camera has many advantages. Here are some key benefits:
- Increased Coverage: Multiple cameras cover more ground. This means you miss less activity.
- Better Insights: Different angles provide a fuller picture. You can track animal paths and behaviors.
- Redundancy: If one camera fails, others still work. This ensures continuous monitoring.
- Flexibility: You can reposition cameras as needed. This adaptability helps with changing wildlife patterns.
Strategic Camera Placement
Placing cameras strategically maximizes their effectiveness. Consider these tips for optimal placement:
- Identify Key Areas: Place cameras near water sources, food plots, and animal trails. These locations are high-traffic zones.
- Use Natural Cover: Hide cameras in bushes or trees. This keeps them out of sight and reduces the risk of theft.
- Avoid Direct Sunlight: Position cameras away from direct sunlight. This prevents glare and improves image quality.
- Adjust for Height: Mount cameras at the right height for your target species. For deer, place them about three feet off the ground.
- Check Angles: Ensure cameras capture a wide field of view. Angles should cover trails and feeding areas effectively.
By using these strategies, you can make the most of your trail cameras. This approach helps you gather valuable data on wildlife behavior and patterns.
Understanding Camera Plans
Trail cameras are essential for wildlife enthusiasts and hunters. Choosing the right plan can be confusing. Understanding camera plans helps in making the right decision.
Single Vs. Multiple Plans
There are two main types of camera plans: single and multiple camera plans.
| Plan Type | Number of Cameras | Features |
|---|---|---|
| Single Plan | One Camera | Basic Features |
| Multiple Plan | Multiple Cameras | Advanced Features |
A single plan covers one camera. It offers basic features. A multiple plan covers more than one camera. It includes advanced features. Choose based on your needs.
Cost-effectiveness
Cost is a big factor. Let’s compare the two plans:
- Single Plan: Lower initial cost. Limited features.
- Multiple Plan: Higher initial cost. More features. Better value for money.
Investing in multiple plans can save money in the long run. Consider your budget and needs carefully.
Understanding these plans can help you make the right choice. Happy camera planning!
Choosing The Right Camera
Choosing the right camera can be a daunting task. There are many options available, and each one has its own set of features. This section will guide you through the important factors to consider. It will also highlight some of the top camera brands on the market.
Features To Consider
When selecting a trail camera, certain features can make a big difference. First, consider the camera’s resolution. Higher resolution means clearer images and videos. Next, look at the detection range. A longer range can capture more distant wildlife. Battery life is also crucial. A longer battery life means less frequent changes. Lastly, consider the storage options. More storage allows for more photos and videos.
Top Camera Brands
Several brands are known for their quality trail cameras. Bushnell is a popular choice. They offer reliable cameras with good battery life and excellent resolution. Another top brand is Stealth Cam. Their cameras are known for their durability and long detection range. Browning also makes great trail cameras. They provide high-quality images and videos. Moultrie is another trusted brand. They offer cameras with easy-to-use features and great storage options.
Credit: www.bushnell.com
Setting Up Multiple Cameras
Setting up multiple trail cameras can enhance your wildlife monitoring experience. It allows you to cover larger areas and get more data. But, how do you set them up correctly? Here are some tips to ensure you get the best results.
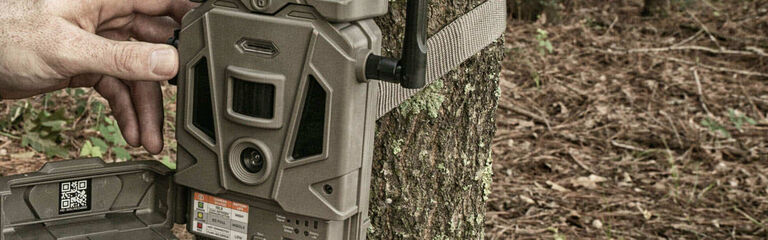
Installation Tips
Proper installation is key to successful monitoring.
- Choose the right spots: Place cameras in areas with high wildlife activity.
- Check the height: Mount cameras at a height of 3-4 feet.
- Aim correctly: Point cameras north to avoid sun glare.
- Secure your cameras: Use straps or mounts to keep them in place.
- Test the angle: Take test shots to ensure proper coverage.
Common Mistakes
Avoid these mistakes to ensure optimal performance.
- Incorrect placement: Don’t place cameras too high or low.
- Poor angle: Ensure the camera is level and aimed correctly.
- Ignoring weather: Protect cameras from harsh weather conditions.
- Overlooking settings: Adjust the settings for optimal capture.
- Not checking batteries: Regularly check and replace batteries.
Managing Your Cameras
Managing multiple trail cameras on one plan can seem daunting. By syncing your cameras and choosing the right data storage solutions, you can easily keep track of all your footage. This section will help you manage your trail cameras effectively.
Syncing Cameras
Syncing multiple trail cameras is essential for efficient management. Ensure all cameras are on the same network. This allows for real-time updates and data sharing. Use a central hub or app to monitor all cameras. This helps to streamline the process and saves time.
Many trail cameras come with built-in syncing features. Check the user manual for specific instructions. Here are some steps to get started:
- Set up a central hub or app on your smartphone.
- Connect each camera to the hub or app.
- Ensure each camera has a unique identifier.
- Test the connection to verify successful syncing.
Data Storage Solutions
Choosing the right data storage solution is critical. It ensures that you do not lose any valuable footage. There are several options available, each with its own advantages.
Here’s a quick comparison table:
| Storage Type | Capacity | Cost | Best For |
|---|---|---|---|
| SD Cards | 32GB – 128GB | Low | Short-term use |
| Cloud Storage | Unlimited | Medium | Long-term use |
| External Hard Drives | 1TB – 5TB | High | Backup storage |
SD cards are great for short-term use. They are easy to swap and cost-effective. For long-term storage, cloud solutions are ideal. They offer unlimited capacity and remote access. External hard drives are excellent for backup storage. They provide high capacity but are more expensive.
By syncing your cameras and selecting the right data storage, managing multiple trail cameras becomes simple. These tips will help you stay organized and ensure you never miss a moment of wildlife action.

Credit: www.moultrieproducts.com
Utilizing Camera Technology
Trail cameras have changed wildlife monitoring. Thanks to modern technology, these cameras offer more than just images. They provide real-time information and remote control.
Remote Access
Remote access lets you control your trail cameras from far away. You can adjust settings without being there. This feature saves time and reduces human scent in the area. It also means you can access your camera in hard-to-reach places.
Real-time Alerts
Real-time alerts keep you updated. When the camera detects movement, you get instant notifications. These alerts can be sent to your phone or email. This way, you know what’s happening without delay.
Analyzing Camera Data
Analyzing data from multiple trail cameras can be rewarding. It can help in understanding wildlife behavior and patterns. This can improve your wildlife tracking and monitoring efforts. Let’s dive into key aspects of analyzing camera data.
Tracking Wildlife Patterns
Tracking wildlife patterns involves looking at the data over time. You can identify migration routes, feeding times, and breeding seasons.
Here is a simple example of how you can track wildlife patterns:
| Time | Animal Type | Activity |
|---|---|---|
| 6 AM | Deer | Feeding |
| 6 PM | Fox | Hunting |
This simple table shows how animals behave at different times. By analyzing this data, you can plan your next steps better.
Improving Coverage
More cameras improve the coverage of your area. You can place cameras in strategic locations to cover blind spots. This ensures that no activity goes unnoticed.
Here are some tips for improving coverage:
- Place cameras at different heights.
- Use cameras with wide-angle lenses.
- Check camera placement regularly.
These tips can help you get the best out of your cameras.
Troubleshooting Common Issues
Having multiple trail cameras on one plan can be convenient. Yet, it can also lead to common issues that need troubleshooting. This section will guide you through some of these issues, providing solutions to ensure your trail cameras work efficiently.
Connectivity Problems
Connectivity issues are a frequent problem with multiple trail cameras. Ensure each camera has a strong signal. Place cameras in areas with good cellular reception. Avoid dense foliage or thick walls that can block signals. Check the cameras’ software for updates. Updated software can fix many connectivity problems.
- Place cameras in open areas.
- Check for software updates regularly.
- Ensure each camera has a strong signal.
Battery Life Management
Managing battery life is crucial for multiple trail cameras. Use high-quality batteries for longer life. Rechargeable batteries can save money and reduce waste. Monitor battery levels often. Replace batteries before they run out. This prevents downtime and missed captures.
| Tip | Description |
|---|---|
| Use high-quality batteries | Ensures longer battery life and better performance. |
| Rechargeable batteries | Cost-effective and eco-friendly option. |
| Monitor battery levels | Replace batteries before they run out to avoid downtime. |
In addition, consider using solar panels for your cameras. Solar panels can keep your cameras powered without frequent battery changes.

Credit: gardepro.com
Frequently Asked Questions
Can You Use Multiple Trail Cameras On One Plan?
Yes, you can use multiple trail cameras on one plan. Many providers offer multi-camera plans. Check with your service provider for details.
How Many Trail Cameras Can I Connect To One Plan?
The number of trail cameras you can connect depends on your service provider. Some providers allow unlimited cameras, while others have limits.
Do Multiple Trail Cameras Share Data On One Plan?
Yes, multiple trail cameras on one plan share the data allowance. Monitor your usage to ensure you stay within your data limits.
Is It Cost-effective To Have Multiple Trail Cameras On One Plan?
Having multiple trail cameras on one plan can be cost-effective. Bundling cameras often reduces costs compared to individual plans.
Conclusion
Having multiple trail cameras on one plan offers many benefits. It can improve your wildlife tracking. It also saves time and money. This setup is great for both beginners and experts. You can cover more ground and get better data.
Simply choose the right plan. Ensure your cameras are compatible. Enjoy the enhanced experience of monitoring wildlife with ease. Happy tracking!
As an Amazon Associate, I earn from Qualifying Purchases.