
You’ve got a treasure trove of videos sitting on your digital camera or cell phone. But how do you turn those clips into engaging blog content that people actually want to watch?
Whether you’re capturing everyday moments or creating something special, sharing your videos through a blog can connect you with an audience hungry for real stories and fresh perspectives. You’ll discover simple steps to blog your videos effectively, tips to make your content stand out, and how to choose the right device for filming.
Ready to transform your videos into a powerful storytelling tool? Let’s dive in and make your footage shine online.
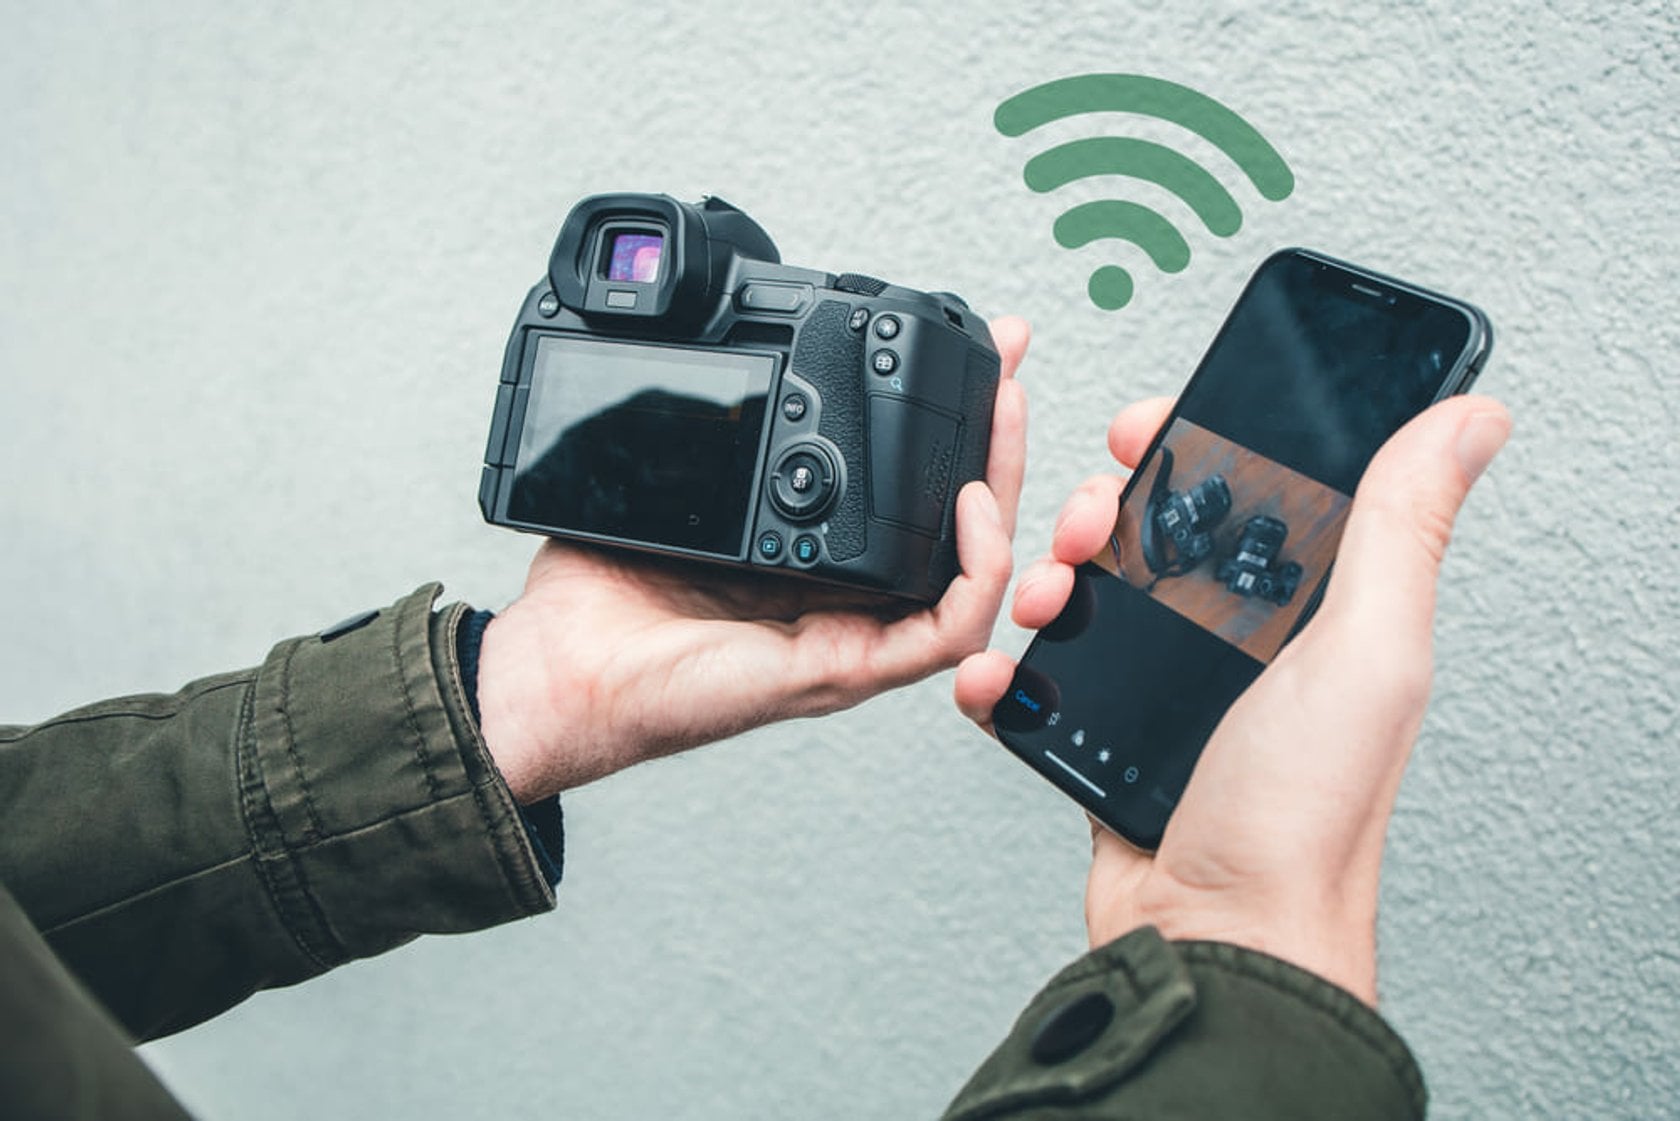
Choosing Between Phone And Camera
Choosing between using your phone or a digital camera to blog the videos you take is a common question. Both devices have unique strengths. Your choice depends on your goals, style, and convenience. Understanding these differences helps you create better video content.
Portability And Convenience
Phones are small and easy to carry everywhere. You can quickly start recording without setup. Cameras are bulkier and need extra gear. Phones fit in your pocket and allow spontaneous filming. Cameras require more preparation but offer stable handling.
Video Quality And Features
Cameras often deliver higher video quality with better lenses and sensors. They handle low light and zoom better than phones. Phones have improved and offer good quality for casual videos. Advanced cameras provide manual controls for focus and exposure. Phones mostly rely on automatic settings.
Editing And Sharing Ease
Phones allow instant editing and sharing through apps. This makes posting videos fast and simple. Cameras need transferring files to a computer before editing. Editing on a computer may offer more control and options. Phones suit quick blogging, while cameras fit detailed work.
Battery Life And Storage
Cameras usually have longer battery life for extended shooting. They support larger memory cards for more footage. Phones can run out of battery quickly with video recording. Storage on phones may fill up fast with high-quality videos. Cameras are better for long recording sessions.
Cost And Accessibility
Most people already own a smartphone, so no extra cost is needed. Cameras can be expensive and require extra accessories. Phones provide a budget-friendly option to start video blogging. Cameras offer value for those seeking professional results. Consider your budget and needs carefully.
Setting Up Your Device
Setting up your device is the first step in creating great video content. Proper setup ensures clear, stable, and well-lit videos that engage your audience. Taking time to prepare your camera or phone can improve your video quality significantly.
Adjusting basic settings helps capture the best footage. Check your device’s video resolution and frame rate. Higher resolution like 1080p or 4K offers sharper images. A frame rate of 30fps or 60fps delivers smooth motion for most videos.
Choose The Right Video Resolution
Set your device to record at the highest resolution available. Most phones and digital cameras support 1080p or 4K video. Higher resolution creates clear and detailed videos. Keep in mind, 4K files use more storage space.
Set The Frame Rate
Frame rate controls how smooth your video looks. Use 30 frames per second for regular videos. Choose 60 frames per second for fast-moving subjects. Avoid lower frame rates to prevent choppy video.
Adjust Focus And Exposure
Tap the screen or use manual focus to keep your subject sharp. Lock the focus if possible to avoid blurry shifts. Adjust exposure to brighten or darken the image. Proper lighting helps your camera auto-exposure perform better.
Use Stabilization Features
Enable image stabilization to reduce shaky footage. Most modern phones and cameras have this option. Use a tripod or stand for extra stability. Stable videos look more professional and keep viewers interested.
Prepare Your Storage And Battery
Make sure you have enough storage space before recording. Delete old files or insert a new memory card. Fully charge your device or bring extra batteries. Avoid interruptions during filming caused by low power.
Basic Filming Techniques
Capturing videos with a digital camera or cell phone is easy and fun. Use steady shots, good lighting, and clear audio to improve your footage. Simple framing and smooth movements make your videos look better for sharing online.
Steady Shots Matter
Keep your camera or phone steady while filming. Use both hands to hold the device firmly. Avoid shaky movements that distract viewers. For longer videos, consider using a tripod or resting your device on a stable surface. Steady shots make your videos look more professional and easier to watch.
Good Lighting Is Key
Film in well-lit areas to capture clear images. Natural light from windows works great for indoor videos. Avoid harsh backlighting that can darken your subject. If filming outdoors, shoot during early morning or late afternoon for soft light. Proper lighting improves video quality and highlights important details.
Focus On Your Subject
Make sure your subject is in clear focus. Tap the screen on your phone or adjust your camera settings to focus correctly. Blurry videos lose viewers’ interest quickly. Keep the subject centered or follow the rule of thirds for a balanced frame. Sharp focus helps viewers connect with your content.
Use Simple Camera Movements
Slow, smooth movements add interest without causing dizziness. Pan gently from side to side or tilt up and down. Avoid sudden zooms or fast pans that can confuse viewers. Practice moving your device steadily before recording. Simple moves create engaging videos that hold attention.

Credit: www.dreamstime.com
Lighting Tips For Clear Videos
Good lighting is key for clear, sharp videos. It helps your subject stand out and keeps the video bright. Poor lighting can make videos look dark and blurry. Using proper light improves video quality a lot. Here are some simple lighting tips to get clear videos with your digital camera or cell phone.
Use Natural Light Whenever Possible
Natural sunlight gives the best light for videos. Shoot near windows or outside during the day. Morning and late afternoon light is soft and nice. Avoid harsh midday sun that can cause strong shadows. Natural light makes skin tones look natural and bright.
Avoid Backlighting
Backlighting happens when the light source is behind your subject. It makes your subject look dark or like a silhouette. Position your subject so the light hits their front or side. This keeps faces clear and details visible in your video.
Use Soft, Even Lighting
Soft light reduces harsh shadows and bright spots. Use lamps with shades or cover lights with white cloth. You can also bounce light off a white wall or ceiling. This spreads light evenly and makes your video look smooth.
Control Indoor Lighting
Turn off mixed lighting sources that cause color shifts. Use daylight bulbs for a natural color tone. Place lights at a 45-degree angle from your subject. This setup highlights facial features and adds depth to your video.
Keep The Light Close And Bright
Bring lights closer to your subject for better brightness. Dim or distant lights make videos grainy and unclear. Bright light helps your camera focus better and capture details clearly.
Capturing Clear Audio
Clear audio is a key part of any good video. Without it, viewers lose interest quickly. Videos with poor sound feel unfinished and hard to watch. Capturing clear audio makes your videos more engaging and professional.
Good sound helps your message come through loud and clear. It creates a better experience for your audience. Even simple tips can improve the audio quality of your videos.
Choose A Quiet Location
Find a place with little background noise. Avoid busy streets or crowded rooms. Soft spaces like rooms with carpets or curtains reduce echo. This helps your voice sound clearer and cleaner.
Use An External Microphone
Built-in microphones often pick up unwanted noise. An external microphone captures sound closer and clearer. Lavalier mics clip to your shirt for hands-free recording. Shotgun mics focus on sound in front of the camera.
Keep The Microphone Close
Sound quality improves when the mic is near the source. Keep the microphone close to your mouth or the subject. This reduces background noise and makes voices louder and sharper.
Test Sound Levels Before Recording
Always check your audio before you start filming. Speak at the normal volume you plan to use. Listen through headphones to catch any problems early. Adjust the mic position or volume as needed.
Minimize Wind Noise
Wind can ruin outdoor audio. Use a windscreen or foam cover on your microphone. Shield the mic with your hand or body if needed. Try to film in a spot protected from strong wind.
Editing Your Footage
Editing your footage transforms raw videos into engaging stories. It helps remove mistakes and keeps viewers interested. Simple edits can make your videos look professional and clear. Focus on trimming, arranging clips, and adding effects that improve the flow.
Choosing The Right Editing Software
Select software that suits your skill level. Beginners can try free apps with easy tools. Advanced users might prefer programs with more features. Check if the software supports your video format and device.
Trimming And Cutting Clips
Cut out unwanted parts to keep your video concise. Trim clips to remove pauses or errors. Arrange clips in the right order for smooth storytelling. Short videos often hold attention better than long ones.
Adding Transitions And Effects
Use transitions to connect scenes smoothly. Avoid too many effects that distract viewers. Simple fades or cuts work well. Effects can highlight important moments or set the mood.
Improving Audio Quality
Clear sound is key to good videos. Remove background noise if possible. Add music or voiceovers to enhance your message. Adjust volume levels so audio is balanced and easy to hear.
Exporting And Sharing Your Video
Choose the right format for your platform. Common formats like MP4 work on most devices. Export videos in high quality but keep file size manageable. Share your video on blogs, social media, or email.
Adding Engaging Elements
Adding engaging elements to your videos makes them more interesting. These elements keep viewers watching longer. They also help your message stand out and be remembered. Simple additions can turn ordinary clips into captivating stories.
Think about what your audience likes and what fits your video style. Use visuals, sounds, and text to create a richer experience. This section explains easy ways to add engaging elements to your videos.
Using Captions And Text Overlays
Captions help viewers understand your video without sound. They also highlight key points and add context. Text overlays can introduce topics or emphasize important moments. Keep the text short and clear for easy reading.
Choose fonts that are simple and easy to read. Place text where it does not cover important parts of the video. Use colors that contrast well with the background. This makes your captions stand out and improve viewer engagement.
Incorporating Background Music
Background music sets the mood and adds energy to your videos. It makes your content feel more professional and polished. Select music that matches the tone of your video. Soft tunes work well for calm scenes. Upbeat tracks suit lively moments.
Adjust the volume so the music does not overpower your voice or main sounds. Use royalty-free music to avoid copyright issues. Music can make your videos more enjoyable and keep viewers interested.
Adding Simple Transitions
Transitions help your video flow smoothly from one scene to another. They prevent sudden jumps that can distract viewers. Use simple transitions like fades or cuts for a clean look. Avoid flashy effects that may take attention away from your content.
Keep transitions short to maintain the video’s pace. Consistent use of transitions creates a professional feel. They guide viewers through your story without confusion.
Including Call-to-actions
Call-to-actions encourage viewers to engage with your content. Ask questions, invite comments, or suggest sharing the video. Use clear and friendly language. Place calls to action at the beginning, middle, or end of the video.
These prompts build a connection with your audience. They increase interaction and help grow your blog’s community. Simple calls to action can boost your video’s success.
Credit: skylum.com
Optimizing Videos For Blogging
Optimizing videos for blogging improves viewer experience and boosts search engine visibility. Proper optimization helps videos load faster, look better, and reach more people. Simple steps make a big difference for video quality and audience engagement.
Choosing The Right Video Format
Select video formats that work well on most devices and browsers. MP4 is widely supported and offers good quality with smaller file sizes. Use formats that balance quality and speed to keep visitors watching without delays.
Compressing Videos Without Losing Quality
Compress videos to reduce file size while maintaining clear images. Smaller files upload quicker and use less bandwidth. Use free tools or software to compress videos before uploading to your blog.
Adding Descriptive Titles And Tags
Give each video a clear, descriptive title that includes keywords. Use relevant tags to help search engines understand your video content. Accurate titles and tags increase chances of your video being found by interested viewers.
Creating Engaging Thumbnails
Design attractive thumbnails to invite clicks. Use bright images and readable text to show what the video covers. Custom thumbnails make your blog more appealing and improve click-through rates.
Including Captions And Transcripts
Add captions or transcripts to make videos accessible to all viewers. Captions help non-native speakers and those with hearing difficulties. Search engines also use captions to index video content better.
Embedding Videos Correctly
Use proper embedding methods to ensure videos display well on all devices. Responsive video players adapt to screen sizes, improving user experience. Check that your blog theme supports video embedding without errors.
Sharing Videos On Platforms
Sharing your videos online helps reach more viewers and grow your audience. Uploading videos to popular platforms gives your content a bigger stage. Choose platforms that fit your style and audience for best results.
Each platform offers unique features and communities. Understanding these can improve how your videos perform and who sees them.
Youtube: The Video Giant
YouTube hosts billions of videos and attracts millions daily. It supports long videos and live streaming. You can create playlists and organize content well. YouTube’s search engine helps users find your videos easily. Use clear titles and descriptions to boost visibility.
Instagram: Quick And Visual
Instagram focuses on short videos and stories. It is perfect for quick updates and behind-the-scenes clips. Use hashtags and tags to connect with a wider audience. Instagram’s Reels feature allows short, engaging videos that can go viral. The platform’s mobile-friendly design suits smartphone users.
Facebook: Connect With Communities
Facebook supports video uploads and live broadcasts. It allows sharing in groups and pages tailored to your niche. Videos auto-play in news feeds, catching attention quickly. Use captions as many watch without sound. Facebook’s wide user base helps reach various age groups and interests.
Tiktok: Trendy And Fast-paced
TikTok is popular for short, creative videos. It offers editing tools and effects inside the app. Videos often go viral due to the platform’s algorithm. Use trending sounds and challenges to get noticed. TikTok appeals mostly to younger audiences but is growing fast.
Vimeo: For Quality And Professionals
Vimeo focuses on high-quality video hosting. It suits filmmakers and professionals showcasing their work. Vimeo has fewer ads and offers customizable video players. It supports privacy controls for sharing with select viewers. The community values creative and polished content.

Credit: www.millsjames.com
Measuring Viewer Engagement
Measuring viewer engagement is key to understanding how your videos perform. It shows what your audience likes and how they interact with your content. Tracking these details helps you improve future videos and grow your blog’s reach.
Engagement goes beyond just counting views. It includes comments, shares, likes, and watch time. These factors reveal how much your content connects with viewers and holds their attention.
Tracking Watch Time And Retention Rates
Watch time tells how long viewers stay on your video. Longer watch times mean your content is interesting and keeps attention. Retention rates show how many viewers watch until the end. High retention means your video is engaging throughout.
Analyzing Comments And Viewer Feedback
Comments give direct feedback from your audience. They show what viewers think and feel about your videos. Responding to comments builds a connection and encourages more interaction. Viewer feedback guides you to improve your content.
Monitoring Likes, Shares, And Social Interaction
Likes show approval and popularity. Shares increase your video’s reach to new audiences. Social interaction signals your content’s value and relevance. More interaction usually means better engagement and growth for your blog.
Frequently Asked Questions
Is It Better To Vlog With A Phone Or Camera?
Phones offer convenience and good quality for casual vlogging. Cameras provide superior image quality and lens options for professional content. Choose based on budget, portability, and video goals.
Which Device Is Best For Blogging?
The best device for blogging depends on your needs. Smartphones offer convenience and quality. DSLR or mirrorless cameras provide superior image control and professional results. Choose based on portability, budget, and content style.
Is A Digital Camera Better Than A Cell Phone Camera?
Digital cameras often offer better image quality, zoom, and manual controls than cell phone cameras. Phones excel in convenience and sharing. Choose based on your needs.
Can You Vlog With Your Phone?
Yes, you can vlog with your phone. Modern smartphones offer high-quality video, easy editing, and portability for effective vlogging.
What Is The Best Device For Blogging Videos: Phone Or Camera?
Phones are convenient and easy to use, while cameras offer higher video quality and control.
Can I Vlog Effectively Using Just My Cell Phone?
Yes, many vloggers use phones because they are portable and have good video features.
How Do I Upload Videos From My Camera To My Blog?
Transfer videos to your computer via USB, then upload them to your blogging platform.
What Video Formats Work Best For Blogging Platforms?
MP4 format is widely accepted and offers good quality with small file sizes.
Should I Edit My Videos Before Posting On My Blog?
Editing improves video flow and quality, making your blog content more engaging.
How Can I Improve Video Quality On My Phone Recordings?
Use natural light, steady your phone, and avoid zooming for clearer videos.
Conclusion
Sharing videos from your digital camera or cell phone adds life to your stories. Choose the device that suits your style and needs best. Keep videos clear and engaging to hold viewers’ attention. Regularly posting helps build your audience and improve your skills.
Enjoy capturing moments and turning them into memorable blog content. Simple steps can make your video blog stand out online. Start today and watch your creativity grow with every clip.
As an Amazon Associate, I earn from Qualifying Purchases.