
Is your laptop camera not working? You’re not alone.
Many users face this issue. In today’s digital world, a functional laptop camera is essential. Whether for work meetings, online classes, or catching up with family, a non-working camera can be a major inconvenience. Various reasons could cause this problem, ranging from software glitches to hardware failures.
Understanding these potential causes can help you troubleshoot and resolve the issue efficiently. This blog post will explore common reasons why your laptop camera might not be working and provide practical solutions to get it up and running again. Read on to find out how to fix your laptop camera and get back to your important video calls.
Common Causes
Is your laptop camera not working? You are not alone. Many users face this issue. Understanding the common causes can help fix the problem. Below, we explore some of the most frequent reasons.
Hardware Issues
Hardware problems can stop your laptop camera from working. Here are some common hardware-related causes:
- Loose Connections: Check if the camera is properly connected. A loose cable can prevent the camera from working.
- Physical Damage: Inspect the camera for any visible damage. A broken lens or internal component can be the culprit.
- Obstructed Lens: Ensure nothing is covering the camera. Even a small object can block the view.
- Faulty Hardware: Sometimes, the camera itself can be defective. In this case, a repair or replacement may be needed.
Software Problems
Software issues are another common reason for a non-working laptop camera. These problems are usually easier to fix:
- Outdated Drivers: Camera drivers need to be up-to-date. Old drivers may not be compatible with your system. Update them through the device manager.
- Disabled Camera: The camera might be disabled in your laptop settings. Enable it through the device manager or privacy settings.
- Conflicting Applications: Some apps can interfere with the camera. Close unnecessary applications. Restart your laptop to see if the issue resolves.
- Software Glitches: Bugs and glitches can cause the camera to malfunction. Restart your computer or update your operating system to fix these issues.
- Privacy Settings: Privacy settings might be blocking camera access. Check and adjust these settings to allow camera usage.
Understanding these common causes can help diagnose and fix your camera issue. Whether it’s a hardware or software problem, there’s usually a solution.
Initial Troubleshooting
Experiencing issues with your laptop camera can be frustrating. Before diving into complex solutions, it is often beneficial to perform some initial troubleshooting. This process can help identify the root cause and potentially resolve the issue quickly. Here are a few simple steps you can follow to troubleshoot your camera problems.
Restarting The Laptop
Restarting your laptop can often fix minor software glitches. This simple step can refresh your system and resolve temporary issues. Follow these steps:
- Click on the Start menu.
- Select Power.
- Choose Restart.
After your laptop restarts, check if the camera is working. Sometimes, a fresh start is all your system needs.
Checking Camera Settings
Incorrect camera settings can cause your camera to malfunction. Ensure your camera is enabled and has the necessary permissions. Here is how you can check:
| Step | Instructions |
|---|---|
| 1 | Open the Settings app. |
| 2 | Go to Privacy. |
| 3 | Select Camera from the left menu. |
| 4 | Ensure the camera access is turned on. |
| 5 | Check if the apps you use have camera permission. |
If the camera settings are correct and the issue persists, consider checking for software updates or reinstalling the camera driver. These steps can often resolve more persistent problems.
Driver Issues
Driver issues are one of the most common reasons for a camera not working on a laptop. A driver acts as a bridge between the hardware and the operating system. If the driver is outdated or corrupted, the camera won’t function properly. Let’s dive into some solutions to resolve driver issues.
Updating Drivers
Updating drivers can resolve many hardware problems. Follow these steps to update your camera driver:
- Press Windows + X and select Device Manager.
- Find and expand the Cameras section.
- Right-click on your camera device and select Update driver.
- Choose Search automatically for updated driver software.
Windows will now search for the latest driver and install it. Restart your laptop to ensure the changes take effect.
Reinstalling Drivers
If updating the driver doesn’t work, reinstalling it might help. Here’s how to reinstall your camera driver:
- Open Device Manager by pressing Windows + X.
- Expand the Cameras section.
- Right-click on your camera device and select Uninstall device.
- Confirm the uninstallation and restart your laptop.
- After restarting, open Device Manager again.
- Click on the Action tab and select Scan for hardware changes.
Windows will detect the camera and reinstall the default driver. This can fix many driver-related problems.
bold text highlights key actions and terms. The structure with ordered lists makes the steps easy to follow. The content is SEO-optimized with relevant keywords and subheadings.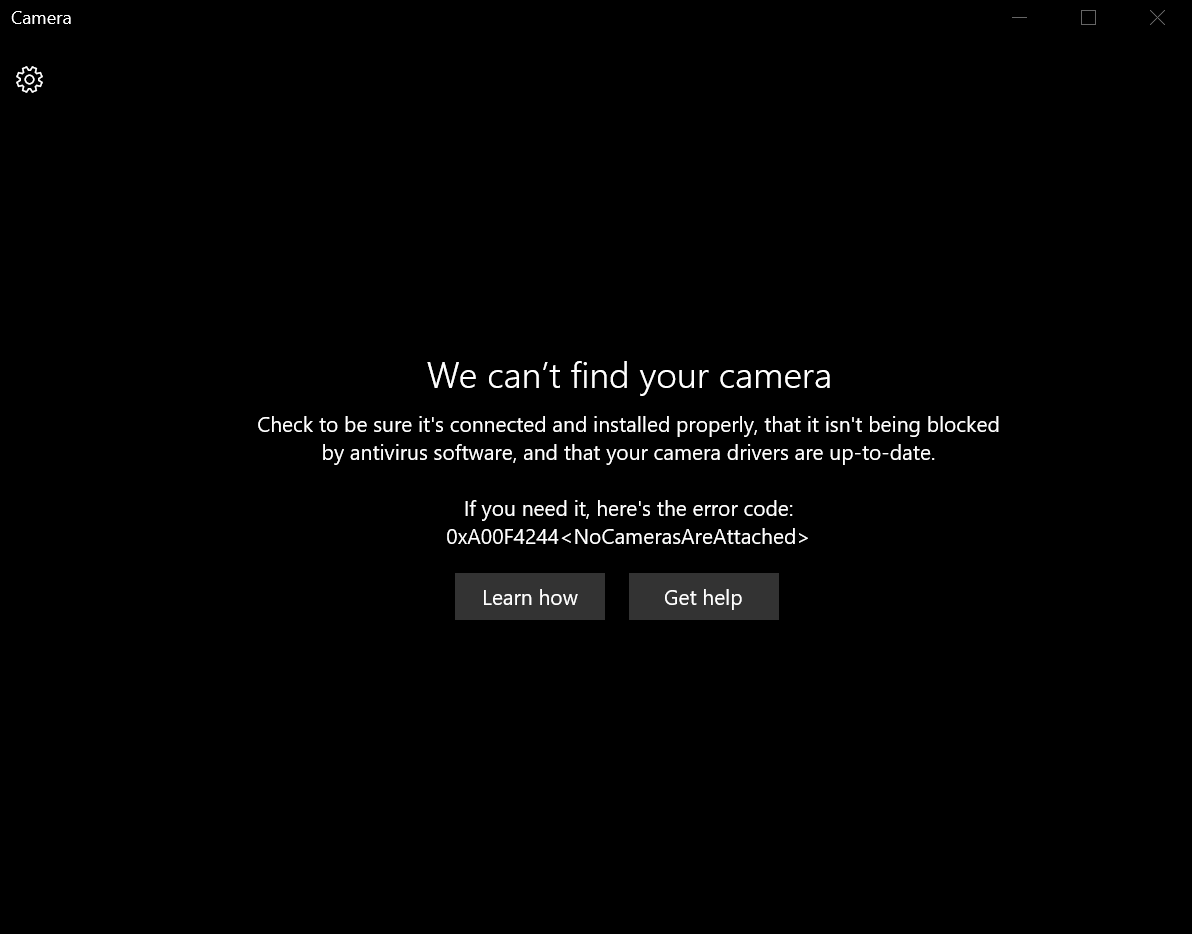
Credit: answers.microsoft.com
Privacy Settings
Privacy settings can block your laptop camera without you knowing. These settings protect your privacy, but sometimes they block apps from accessing your camera. To fix the issue, you need to check and adjust these settings. Let’s explore how to do this.
Checking App Permissions
First, make sure the app has permission to use the camera. Go to your laptop settings. Find the section for privacy or app permissions. Look for the camera option. See if the app you are using has permission. If not, turn it on. This simple step can solve the problem.
Adjusting Privacy Settings
Next, adjust your privacy settings. Go to the privacy section in your settings. Look for the camera settings. Make sure the camera is not blocked. Some laptops have a switch or button to block the camera. Check if this is turned off. If it is on, your camera will not work. Turn it off to use the camera again.
Software Conflicts
Software conflicts can often cause your laptop camera to stop working. This usually happens when two or more programs try to access the camera simultaneously. The result is a non-functional camera. Understanding how to identify and disable these conflicting software programs can help you resolve the issue and get your camera working again.
Identifying Conflicting Programs
First, you need to identify which programs might be causing the conflict. Open your Task Manager by pressing Ctrl + Shift + Esc. Look for any applications that might be using the camera. Common culprits include video conferencing apps like Zoom, Skype, or Teams. Also, check for background programs that might be accessing the camera.
Another way to identify conflicting programs is to check the camera’s settings. Go to the device settings and see which apps have permission to use the camera. Disable permissions for apps you don’t use often.
Disabling Conflicting Software
Once you’ve identified the conflicting software, you can disable it. In the Task Manager, right-click on the application and select “End Task.” This will stop the program from running and free up the camera for other applications.
Additionally, you can disable startup programs that might be causing conflicts. Open the Task Manager, go to the “Startup” tab, and disable unnecessary programs. Restart your laptop to apply these changes. This can help ensure that only essential programs run when your laptop starts.
Sometimes, antivirus software might also cause conflicts. Temporarily disable your antivirus software to see if the camera starts working. If it does, you may need to adjust the antivirus settings to allow camera access.
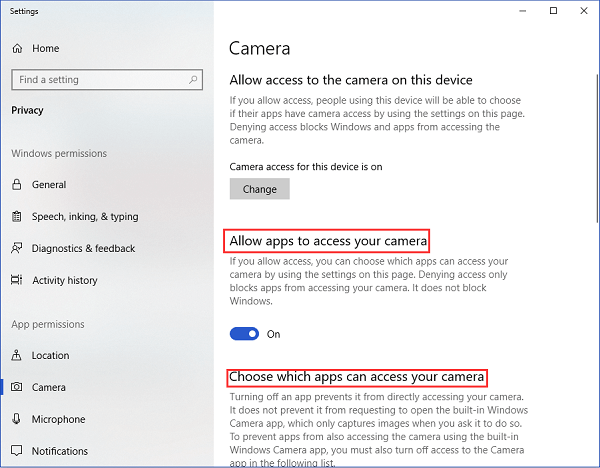
Credit: www.easeus.com
Hardware Checks
Experiencing issues with your laptop camera can be frustrating. Often, the problem may not be software-related. Hardware checks can help you identify and fix the issue. Let’s look at some essential hardware checks.
Inspecting The Camera
First, examine the camera lens. Dust or dirt can block the camera view. Clean the lens with a soft, dry cloth. Check if the camera is physically damaged. Cracks or breaks can affect performance. Ensure the camera is not covered by a shutter or privacy cover.
Next, check the camera connection. Some laptops have detachable cameras. Ensure the camera is connected securely. Wiggle it gently to ensure it is not loose. If it moves, reconnect it firmly.
Testing With External Camera
Try using an external USB camera. This helps determine if the issue is with the built-in camera. Connect the external camera to your laptop. See if it works.
If the external camera works, the built-in camera may be faulty. Consider getting it checked or replaced. If the external camera also fails, the problem may be with the laptop’s ports or drivers.
Always test with multiple external cameras if possible. This ensures a thorough check.
Operating System Updates
Operating system updates can sometimes affect the functionality of your laptop’s camera. These updates aim to improve the system’s performance and security. But they can also lead to compatibility issues. Understanding how to handle these updates can help you fix a non-working camera.
Installing Updates
Installing updates is crucial for keeping your operating system secure and efficient. Sometimes, an outdated OS can cause your camera to malfunction. Follow these steps to install updates:
- Open the Settings menu.
- Navigate to Update & Security.
- Click on Check for updates.
- If updates are available, click Download and install.
Make sure to restart your laptop after the installation. This ensures all changes take effect properly.
Rolling Back Updates
Sometimes, a recent update might cause your camera to stop working. Rolling back these updates can help. Here’s how you can roll back an update:
- Open the Settings menu.
- Go to Update & Security.
- Select View update history.
- Click on Uninstall updates.
- Choose the most recent update and click Uninstall.
After uninstalling the update, restart your laptop to see if the camera works again. This can resolve issues caused by new updates.
| Action | Steps |
|---|---|
| Installing Updates |
|
| Rolling Back Updates |
|
Advanced Solutions
Sometimes basic troubleshooting steps do not fix laptop camera issues. In such cases, advanced solutions might be necessary. These methods are more in-depth and can address underlying system problems.
System Restore
A system restore can fix camera issues. This process will revert your laptop to a previous state. This can undo recent changes that might have caused the camera to stop working. To perform a system restore, follow these steps:
- Go to the Start menu and type “System Restore”.
- Select “Create a restore point” from the results.
- Click on “System Restore” and follow the on-screen instructions.
Choose a restore point from before the camera issue started. This can help bring back your camera functionality.
Contacting Support
If the camera still does not work, contacting support is a good option. Your laptop manufacturer or operating system provider can offer assistance. They have the tools and knowledge to diagnose and fix deeper issues.
When contacting support, have your laptop model and serial number ready. Describe the problem clearly. This will help the support team understand your issue better.
They might guide you through additional troubleshooting steps. Or they might suggest sending your laptop for repair. This ensures that your camera issue gets resolved efficiently.

Credit: m.youtube.com
Frequently Asked Questions
Why Is My Laptop Camera Not Working?
Your laptop camera might not work due to outdated drivers. Ensure your camera drivers are updated. Check your privacy settings too.
How Do I Fix My Laptop Camera?
First, update your camera drivers. Then, check your privacy settings. Restarting your laptop might also help.
Why Is My Webcam Not Detected?
Your webcam might not be detected due to software issues. Update your drivers and ensure the camera is enabled.
Can A Virus Cause My Camera To Stop Working?
Yes, a virus can disrupt your camera’s functionality. Run a full system scan to check for malware.
Conclusion
Solving laptop camera issues can be simple. Start with basic checks. Ensure your camera is enabled. Update drivers regularly. Sometimes, software conflicts cause problems. Try restarting your laptop. If still broken, seek professional help. Remember, regular maintenance prevents future issues.
Your laptop camera should work well now. Happy troubleshooting!
As an Amazon Associate, I earn from Qualifying Purchases.