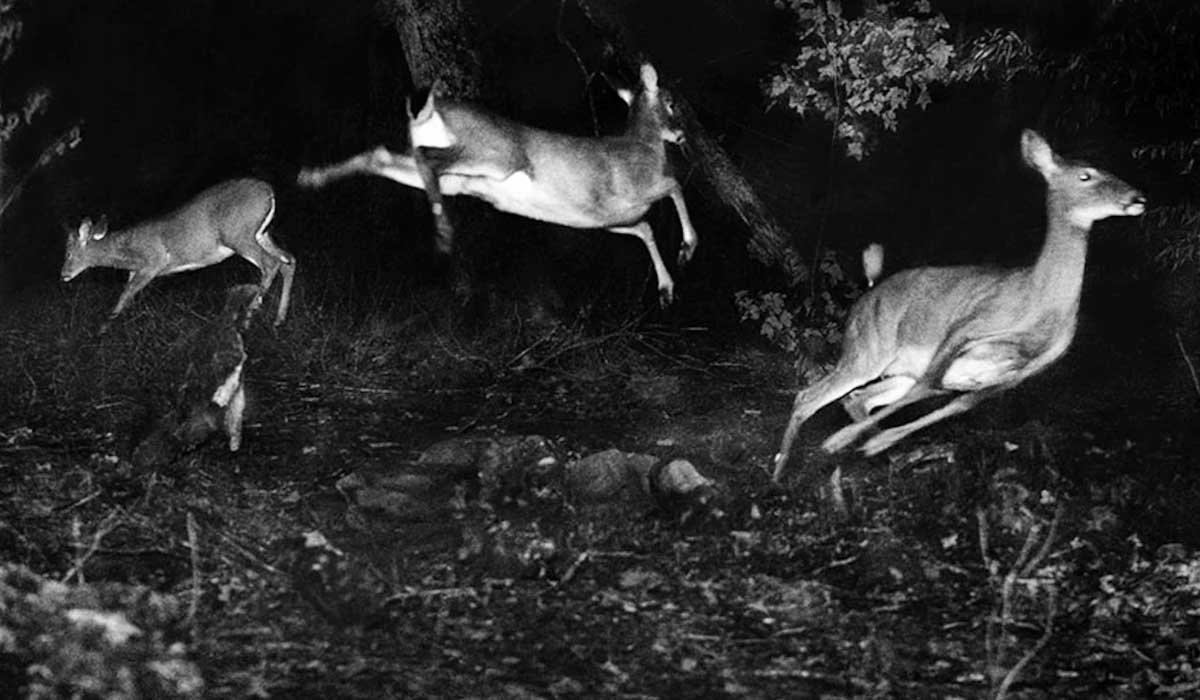
A trail camera is a specialized device used to capture images and videos of wildlife. It is often used by hunters, researchers, and nature enthusiasts.
But what exactly makes a trail camera unique, and why should you consider using one? Trail cameras are designed to be durable and weather-resistant, perfect for outdoor use. They help in monitoring wildlife without disturbing their natural behavior. These cameras are usually motion-activated, capturing photos or videos when animals pass by.
This makes them invaluable for studying animal habits, tracking game for hunting, or simply enjoying nature from a distance. Whether you’re a seasoned hunter or a curious nature lover, understanding trail cameras can open up a world of outdoor exploration. Let’s dive deeper into what makes these gadgets so fascinating and useful.
Credit: wildlife.utah.gov
Introduction To Trail Cameras
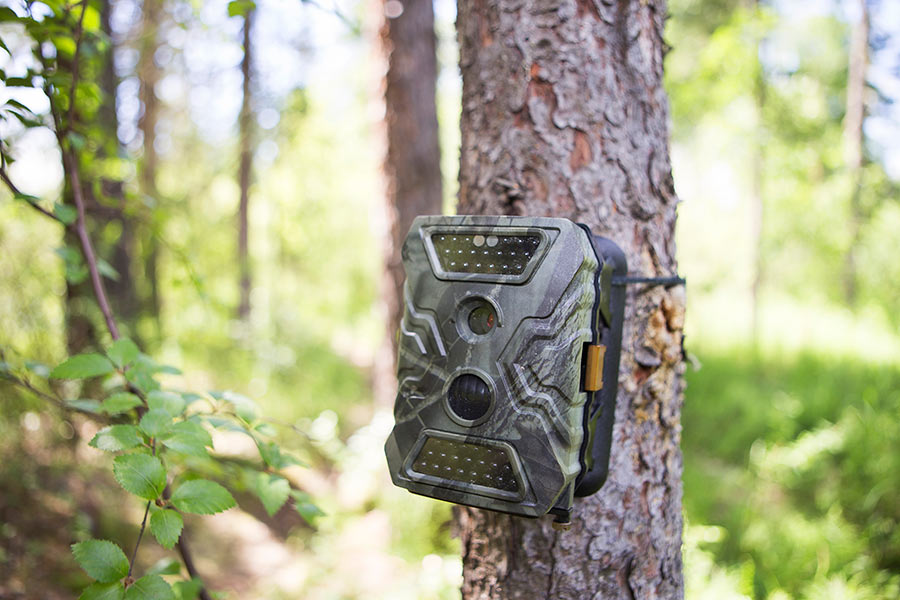
A trail camera captures images and videos of wildlife. It helps monitor animal activity in forests and natural habitats. Its motion sensors trigger the camera when animals pass by.
Trail cameras are devices used to capture images and videos of wildlife. They help in studying animal behavior and monitoring remote areas. Hunters, wildlife enthusiasts, and researchers use them frequently.Purpose And Benefits
Trail cameras serve multiple purposes. They allow users to observe wildlife without disturbing them. They help in tracking animal movements and patterns. This data is valuable for hunting and conservation efforts.The benefits of trail cameras are numerous. They provide a non-intrusive way to monitor animals. They offer insights into the habits of elusive creatures. These cameras operate in all weather conditions. They can work day and night, providing around-the-clock surveillance.Key Features
Trail cameras come with various features. One key feature is motion detection. This allows the camera to capture images when an animal is nearby. Another important feature is night vision. Infrared LEDs enable the camera to take clear pictures in the dark.Battery life is crucial for trail cameras. Long battery life ensures the camera can operate for extended periods. Many trail cameras also have a time-lapse mode. This feature allows users to capture images at set intervals.Some cameras come with wireless capabilities. This allows users to receive images in real time. High-resolution images and videos are also a common feature. Clear and detailed pictures help in better analysis and observation.Overall, trail cameras are essential tools for wildlife monitoring. They offer a unique way to study and understand the natural world. “`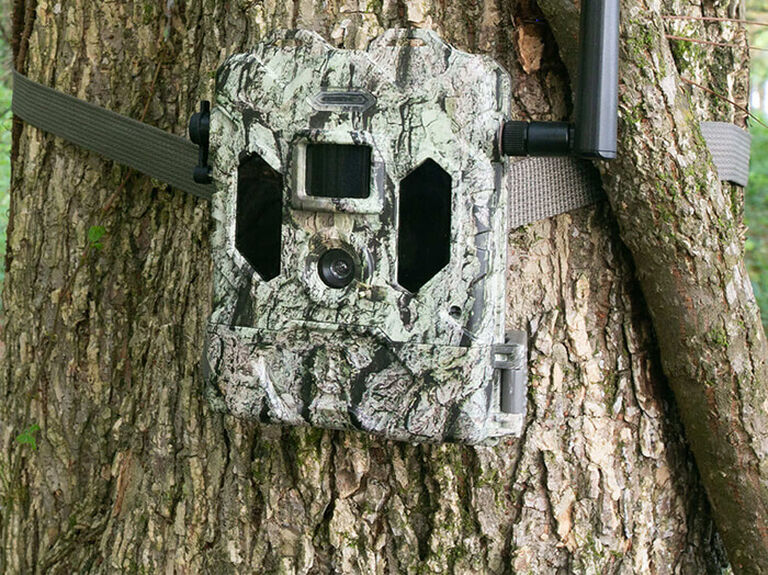
Credit: www.bushnell.com
Choosing The Right Trail Camera
Choosing the right trail camera can be an exciting process. There are many options available, making it crucial to understand the different types and specifications. This will help you make an informed decision.
Types Of Trail Cameras
Trail cameras come in several types. The most common are infrared and flash cameras. Infrared cameras use a low glow or no glow flash. This makes them less likely to scare away animals. Flash cameras use a bright flash. This can capture color images at night but may startle wildlife.
Another type is the cellular trail camera. These cameras send images directly to your phone or email. They are great for real-time monitoring. Lastly, there are WiFi trail cameras. These cameras connect to your home network. You can easily access images and videos from your computer or phone.
Important Specifications
When selecting a trail camera, pay attention to certain specifications. First, consider the resolution. A higher resolution means clearer images. Most cameras offer between 8 to 20 megapixels.
Next, look at the trigger speed. This is how quickly the camera takes a photo after detecting movement. Faster trigger speeds are better for capturing fast-moving animals.
Battery life is also crucial. Some cameras can last for months on a single set of batteries. This is important if you plan to leave the camera in the field for long periods.
Another key specification is the detection range. This is the distance at which the camera can detect motion. A longer range is useful for larger areas.
Finally, consider the storage options. Many cameras use SD cards to store images and videos. Check the maximum storage capacity supported by the camera.
Setting Up Your Trail Camera
Setting up your trail camera is crucial for capturing great wildlife photos. Correct setup ensures you get clear and interesting images. This section will guide you through the steps.
Location And Positioning
Choose a spot with high animal traffic. Look for tracks, droppings, or feeding areas. Position the camera at about knee height. This captures most animals well. Make sure the camera faces north. This avoids sun glare in photos.
Mounting And Security
Mount the camera on a sturdy tree or post. Use straps or screws to secure it tightly. Ensure it does not wobble. For security, use a lock or cable. This prevents theft or tampering.
Credit: www.trailcampro.com
Optimizing Camera Settings
Optimizing your trail camera settings can make a big difference in capturing high-quality images. By adjusting key settings, you can ensure your camera performs at its best in various conditions. Let’s dive into some essential settings you should focus on.
Resolution And Quality
Resolution affects the clarity of your images. Higher resolution means more detail. Most trail cameras offer multiple resolution settings. Choosing the right one depends on your needs.
- Low resolution (1-3 MP): Good for basic monitoring.
- Medium resolution (4-8 MP): Balanced detail and storage use.
- High resolution (9-20+ MP): Best for detailed images, but uses more storage.
Consider image quality settings too. Many cameras allow you to choose between standard, high, and super-high quality. Higher quality settings enhance image clarity but also increase file size.
Trigger Speed And Sensitivity
Trigger speed is the time it takes for the camera to capture an image after detecting motion. Faster trigger speeds are crucial for capturing quick movements.
| Trigger Speed | Best For |
|---|---|
| 0.1 – 0.5 seconds | Fast-moving animals |
| 0.6 – 1 second | Moderate movement |
| 1+ seconds | Slow-moving animals |
Sensitivity settings control how the camera detects motion. High sensitivity settings are great for detecting small or distant animals. Low sensitivity settings help avoid false triggers from branches or grass.
- High Sensitivity: Best for small or distant animals.
- Medium Sensitivity: Good balance for most conditions.
- Low Sensitivity: Reduces false triggers from non-animal movements.
Adjusting these settings based on your specific needs can significantly improve your trail camera’s performance.
Maintaining Your Trail Camera
To keep your trail camera in good condition, regular maintenance is key. Proper care ensures that it functions efficiently. This also prolongs its lifespan. Below, we’ll explore some crucial aspects of maintaining your trail camera.
Battery Life And Power
Battery life is essential for a trail camera’s operation. Use high-quality batteries for better performance. Rechargeable batteries can save money in the long run. Check battery levels frequently. Always carry spare batteries. This prevents your camera from dying in the field.
Weatherproofing And Durability
Trail cameras face harsh weather conditions. Ensure your camera is weatherproof. Look for features like waterproof seals and rugged exteriors. Clean the camera lens regularly. Dirt and water spots can affect image quality. Store your camera properly when not in use. Use a protective case to prevent damage.
Capturing Great Wildlife Photos
Trail cameras are amazing tools for capturing wildlife photos. They help you see animals in their natural settings. With the right techniques, you can get stunning photos. This section covers the best times to shoot and how to attract wildlife.
Best Times To Shoot
Shooting at the right time increases your chances of great photos. Wildlife is most active during dawn and dusk. The soft light during these times enhances the photos.
- Dawn: Animals start their day early. You can catch them waking up.
- Dusk: As the day ends, animals come out to feed. The light is perfect for photos.
Set up your trail camera before these times. This ensures you do not miss any action. Check the weather too. Clear days provide the best lighting conditions.
Attracting Wildlife
To capture wildlife, you need to attract them. Use these simple tricks to draw animals closer:
- Food: Place food near the camera. Apples, corn, or seeds work well.
- Scents: Use scent lures. They attract animals from far away.
- Water: Animals need water. A small water source can draw them in.
Position your camera near natural paths. Animals often follow the same routes. Avoid placing it too high or low. Aim for waist height for the best shots.
Analyzing And Managing Photos
Analyzing and managing photos from a trail camera is crucial for wildlife enthusiasts and hunters. Efficiently handling the images ensures that you do not miss important details. This section will explore how to store photos and the software and tools you can use.
Photo Storage Solutions
Storing images properly is essential. Here are some options:
- SD Cards: Most trail cameras use SD cards. Ensure you use high-capacity cards for more storage.
- External Hard Drives: Transfer images to an external hard drive. It helps in organizing and backing up your photos.
- Cloud Storage: Cloud services like Google Drive or Dropbox provide easy access and sharing. They also offer additional security.
Software And Tools
Various software and tools can help in managing and analyzing your trail camera photos:
- Photo Management Software: Tools like Adobe Lightroom and Picasa help in organizing and editing images.
- Wildlife-Specific Software: Programs like TrailCamViewer and ScoutLook are designed for trail camera users. They offer features like tagging and sorting by date or time.
- Image Recognition Tools: Some advanced tools can identify animals and label images automatically. This saves time and improves efficiency.
Use the right software and tools to streamline your photo management. It makes the process easier and ensures you get the most out of your trail camera.
Tips And Tricks For Success
Using a trail camera can provide a wealth of information about wildlife. Getting the best results requires some knowledge and practice. Below are some tips and tricks to ensure your trail camera captures the best possible images and data.
Common Mistakes To Avoid
Avoid placing your trail camera too high or too low. Position it at about knee height for most animals. Ensure the camera faces north to prevent sunlight from overexposing the images. Check that branches or tall grass do not obstruct the view.
Do not forget to test your camera settings before leaving it in the field. Double-check the batteries and memory card. Ensure they have enough capacity for the duration you plan to leave the camera. Regularly check the camera to prevent data loss.
Advanced Techniques
Use multiple cameras to cover different angles of the same area. This will increase the chances of capturing good images. Experiment with different settings like time-lapse or burst mode. These can capture more activity within a short period.
Use scent lures to attract animals to the camera’s location. This can be especially useful for shy or nocturnal creatures. Place the camera near natural features like trails, water sources, or feeding areas. This increases the likelihood of capturing wildlife.
| Technique | Benefit |
|---|---|
| Multiple Cameras | Increases coverage and chances of capture |
| Time-lapse Mode | Captures continuous activity |
| Scent Lures | Attracts more wildlife |
| Natural Features | Higher likelihood of animal activity |
Frequently Asked Questions
What Is A Trail Camera Used For?
A trail camera is used for capturing photos or videos of wildlife. It’s often used by hunters, researchers, and nature enthusiasts.
How Does A Trail Camera Work?
A trail camera works by using motion sensors to detect movement. When triggered, it automatically captures images or videos.
Are Trail Cameras Weatherproof?
Yes, most trail cameras are weatherproof. They are designed to withstand various weather conditions, including rain and snow.
Can Trail Cameras Take Night Photos?
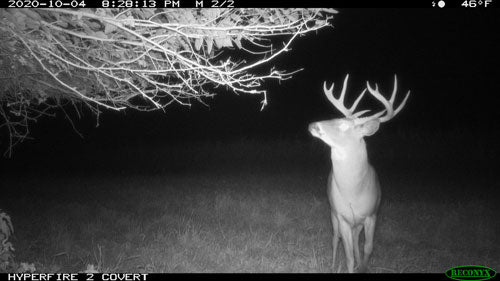
Yes, trail cameras can take night photos. They typically use infrared technology for clear images in low light conditions.
Conclusion
Trail cameras offer great value for nature lovers and hunters alike. They help you monitor wildlife activity easily. These cameras are durable and can handle various weather conditions. Installation is quick and straightforward. With a trail camera, you can capture stunning images and videos of animals.
Whether for hobby or research, a trail camera is a useful tool. Consider adding one to your gear for a better outdoor experience. Enjoy the benefits of observing nature up close and personal.
As an Amazon Associate, I earn from Qualifying Purchases.