
Setting up a Wildgame Innovations Trail Camera is easy. First, unpack the camera.
Next, follow the steps to get it ready for use. Wildgame Innovations trail cameras are great for capturing wildlife in their natural habitat. Whether you’re a seasoned hunter or a nature enthusiast, having one can offer incredible insights. The setup process is straightforward but requires attention to detail.
In this guide, we will walk you through each step. You will learn how to install batteries, insert the memory card, and configure settings. By the end, you’ll be ready to start capturing amazing wildlife moments. Let’s get started!
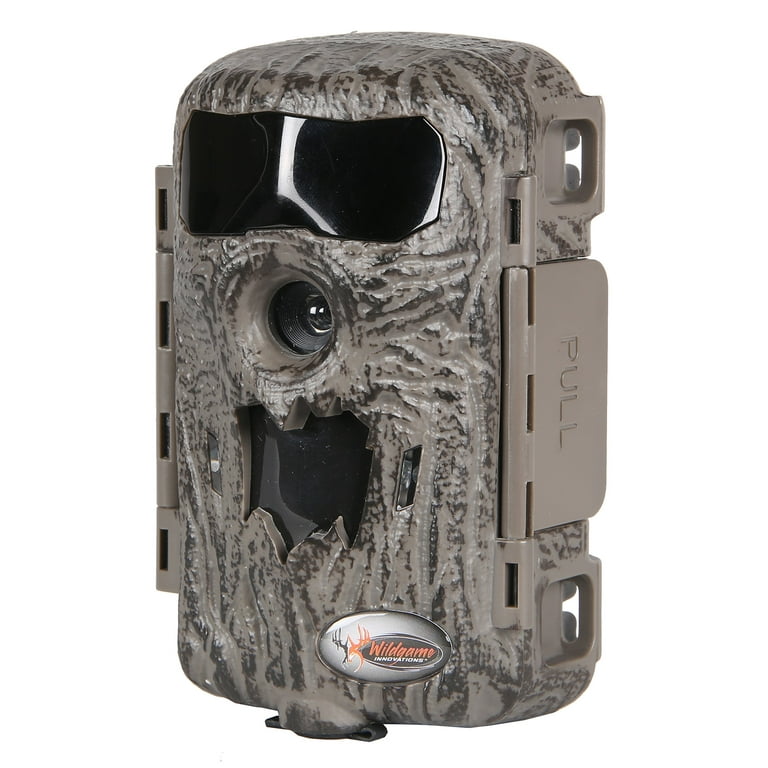
Credit: www.walmart.com
Choosing The Right Trail Camera
Setting up a Wildgame Innovations trail camera is exciting. But it starts with choosing the right one. Not all trail cameras are the same. Each model offers different features. Understanding these can help you make the best choice.
Different Models
Wildgame Innovations offers several models. Each has its own strengths. Here are some popular options:
- Terra Extreme: Great for beginners. It offers basic features at an affordable price.
- Cloak Pro: Ideal for intermediate users. It has improved resolution and battery life.
- Silent Crush: Best for advanced users. It provides high resolution and fast trigger speed.
Each model serves different needs. Consider your experience level and requirements. This will help you pick the right camera.
Key Features To Consider
When choosing a trail camera, focus on key features. These features impact the camera’s performance and usability. Here are the main ones:
| Feature | Importance |
|---|---|
| Resolution | Higher resolution means clearer images. Look for at least 10MP. |
| Trigger Speed | Faster trigger speed captures more action. Aim for 0.5 seconds or less. |
| Battery Life | Long battery life is crucial. Look for cameras that last at least six months. |
| Detection Range | A longer range covers more ground. Choose cameras with at least 60 feet range. |
| Storage Capacity | More storage means more pictures. Opt for cameras that support 32GB SD cards. |
These features can make a big difference. They help ensure you capture the best images and videos. Choose a camera that meets your specific needs.
Unboxing And First Steps
Setting up your Wildgame Innovations Trail Camera starts with unboxing. This is an exciting moment. You’ll get familiar with your new gear. The first steps are crucial for a smooth setup. Let’s break it down.
What’s Included
Open the box carefully. Inside, you will find the trail camera. There are also mounting straps. These help secure the camera in place. You should see a user manual. This provides detailed instructions. Batteries are often included. Check for a USB cable. This helps with data transfer. Ensure all parts are present.
Inspecting The Camera
Take a close look at the camera. Check for any damage. Ensure the lens is clean. Look at the battery compartment. Make sure it opens and closes smoothly. Check the ports for USB and SD card. Ensure they are intact. Inspect the mounting straps. Make sure they are not damaged. Confirm the camera door seals well. This keeps the camera waterproof.
Installing Batteries And Sd Card
Setting up your Wildgame Innovations Trail Camera starts with installing the batteries and SD card. These are crucial steps for ensuring your camera functions correctly. Proper battery installation and SD card insertion are necessary for capturing high-quality images and videos.
Battery Types
Wildgame Innovations Trail Cameras typically use AA batteries. You can use either alkaline or lithium batteries. Lithium batteries last longer, especially in cold weather. Always check the camera manual to confirm the recommended battery type. Proper battery selection ensures optimal performance and longevity.
Inserting The Sd Card
Choose an SD card with sufficient storage capacity. A 32GB SD card is a good starting point. Make sure the SD card is formatted correctly before use. Insert the SD card into the designated slot on the camera. Ensure it clicks into place to avoid connection issues. A properly inserted SD card ensures your camera saves all captured data.
Basic Camera Settings
Setting up your Wildgame Innovations Trail Camera involves configuring the basic camera settings. These settings are vital for capturing clear and accurate images. You need to adjust the date and time and the image resolution. Let’s dive into each of these settings.
Date And Time
First, set the date and time on your trail camera. This step ensures your photos are timestamped correctly. Accurate timestamps help you track animal activity patterns. To set the date and time, navigate to the settings menu. Select the date and time option. Use the arrow buttons to adjust the values. Confirm the settings to save the changes.
Image Resolution
Next, choose the image resolution. Higher resolution means clearer images, but it uses more storage. Lower resolution saves space but reduces image clarity. Find the resolution settings in the menu. You may see options like 8MP, 12MP, or 16MP. Select the resolution that fits your needs. For general use, 12MP is a good balance. Confirm the setting to apply the changes.
Advanced Camera Settings
Setting up a Wildgame Innovations trail camera can be exciting. Advanced camera settings help you capture the best shots. These settings fine-tune your camera for different environments. Let’s explore some key features like trigger speed and detection range.
Trigger Speed
Trigger speed is crucial for capturing fast-moving animals. A faster trigger speed ensures you don’t miss any action. Wildgame Innovations cameras offer adjustable trigger speeds. Choose a speed that matches the activity level of your game.
Set the trigger speed to low for slow-moving animals. Increase the speed for fast-moving subjects. This setting helps you capture clear and timely images. Fine-tuning trigger speed improves your chances of getting the perfect shot.
Detection Range
Detection range determines how far the camera can sense movement. A longer range helps cover more ground. Wildgame Innovations cameras allow you to adjust the detection range. This is useful for different hunting environments.
Set a shorter range for densely wooded areas. Increase the range for open fields or large spaces. Adjusting the detection range helps in capturing more wildlife activity. It also reduces false triggers from irrelevant movements.
Fine-tuning these advanced settings will enhance your trail camera experience. You will get better photos and videos of your target game.
Mounting The Camera
Setting up your Wildgame Innovations Trail Camera correctly ensures you capture the best wildlife photos. A crucial step is mounting the camera. Proper mounting ensures clear images and videos. Here’s how to do it right.
Choosing The Location
Select a spot where animals frequent. Trails, water sources, and feeding areas are ideal. The location should have minimal human activity to avoid disturbance. Position the camera at a height of 3 to 4 feet for the best angle. This height is ideal for capturing various wildlife.
Mounting Techniques
Mount the camera securely to a tree or post. Use the provided straps or a mounting bracket. Ensure the camera is stable to avoid blurry images. Angle the camera slightly downward. This prevents sunlight from affecting the lens and captures animals more clearly. Test the camera’s field of view by walking in front of it. Adjust as needed to cover the desired area.
Testing And Troubleshooting
Setting up a Wildgame Innovations Trail Camera is simple. Insert batteries and an SD card. Next, adjust the settings to match your preferences. Position the camera in a suitable spot for capturing wildlife photos.
Setting up your Wildgame Innovations Trail Camera involves more than just mounting it. Testing and troubleshooting ensure your camera works flawlessly in the field. This section covers performing test shots and addressing common issues.
Performing Test Shots
After setting up your camera, perform test shots. Turn on the camera and walk in front of it. Check the camera’s view to ensure it captures the desired area. Review the photos to check image quality and angle. Adjust the camera if needed. Test different times of the day for lighting changes. This step helps confirm your settings are correct.
Common Issues And Fixes
Sometimes, issues arise with your trail camera. Battery life can be a problem. Ensure batteries are fully charged or new. Memory card errors may occur. Format the card before use. Ensure it is the correct type and size. Poor image quality is another issue. Clean the lens and check settings. Adjust the resolution if needed. If your camera fails to trigger, check the motion sensor. Ensure it is not obstructed. Testing and troubleshooting can solve most common issues.

Credit: www.youtube.com
Maintenance Tips
Keeping your Wildgame Innovations Trail Camera in top shape ensures it works perfectly. Regular maintenance can extend its life and improve performance. Follow these simple tips to keep your camera running smoothly.
Cleaning The Camera
Regular cleaning is essential for your trail camera’s performance. Follow these steps to clean your camera:
- Use a soft cloth to wipe the camera’s exterior. Avoid harsh chemicals.
- Clean the lens with a lens cleaning solution and microfiber cloth. This ensures clear images.
- Check the battery compartment for corrosion. If present, clean it with a dry cloth.
- Remove any dirt or debris from the camera’s casing. This prevents damage and improves functionality.
Storing Properly
Proper storage is crucial for extending your trail camera’s life. Follow these guidelines:
- Store the camera in a cool, dry place. Avoid extreme temperatures.
- Remove the batteries if storing for a long period. This prevents leakage.
- Keep the camera in a protective case. This shields it from dust and moisture.
- Ensure the SD card is removed and stored safely. This protects your data.
By following these maintenance tips, your Wildgame Innovations Trail Camera will stay in excellent condition. Regular cleaning and proper storage ensure it captures high-quality images and videos for a long time.
Credit: www.wildgameinnovations.com
Frequently Asked Questions
How Do I Turn On My Wildgame Innovations Trail Camera?
To turn on your Wildgame Innovations trail camera, insert the batteries and SD card. Next, locate the power button, usually found on the front or side of the camera. Press and hold the button until the display screen lights up, indicating that the camera is powered on and ready for use.
How Do I Set The Date And Time?
To set the date and time, access the camera’s menu using the control buttons. Navigate to the “Date/Time” settings and use the arrow keys to adjust the date and time. Confirm your settings by pressing the “OK” button. This ensures accurate time-stamping of your photos and videos.
What Sd Card Should I Use?
Use an SD card with a capacity of 32GB or less, as larger cards may not be compatible. Ensure the SD card is Class 10 or higher for optimal performance. Always format the SD card in the camera before use to prevent errors and ensure proper functionality.
How Do I Mount My Trail Camera?
To mount your trail camera, choose a sturdy tree or post. Use the provided strap or mounting bracket to secure the camera at the desired height. Ensure the camera is stable and positioned correctly to capture the intended area. Adjust the angle and direction for optimal coverage.
Conclusion
Setting up your Wildgame Innovations Trail Camera is simple and straightforward. Follow the steps carefully. Ensure batteries are fresh and the SD card is inserted. Adjust settings to suit your needs. Position the camera in the ideal spot. Test to confirm it works correctly.
Enjoy capturing stunning wildlife photos. Happy trail camera adventures!
As an Amazon Associate, I earn from Qualifying Purchases.