
To remove the cab roof from a John Deere tractor, first ensure the vehicle is turned off and the keys are removed. Next, locate and disconnect any electrical connections and unfasten the bolts securing the roof.
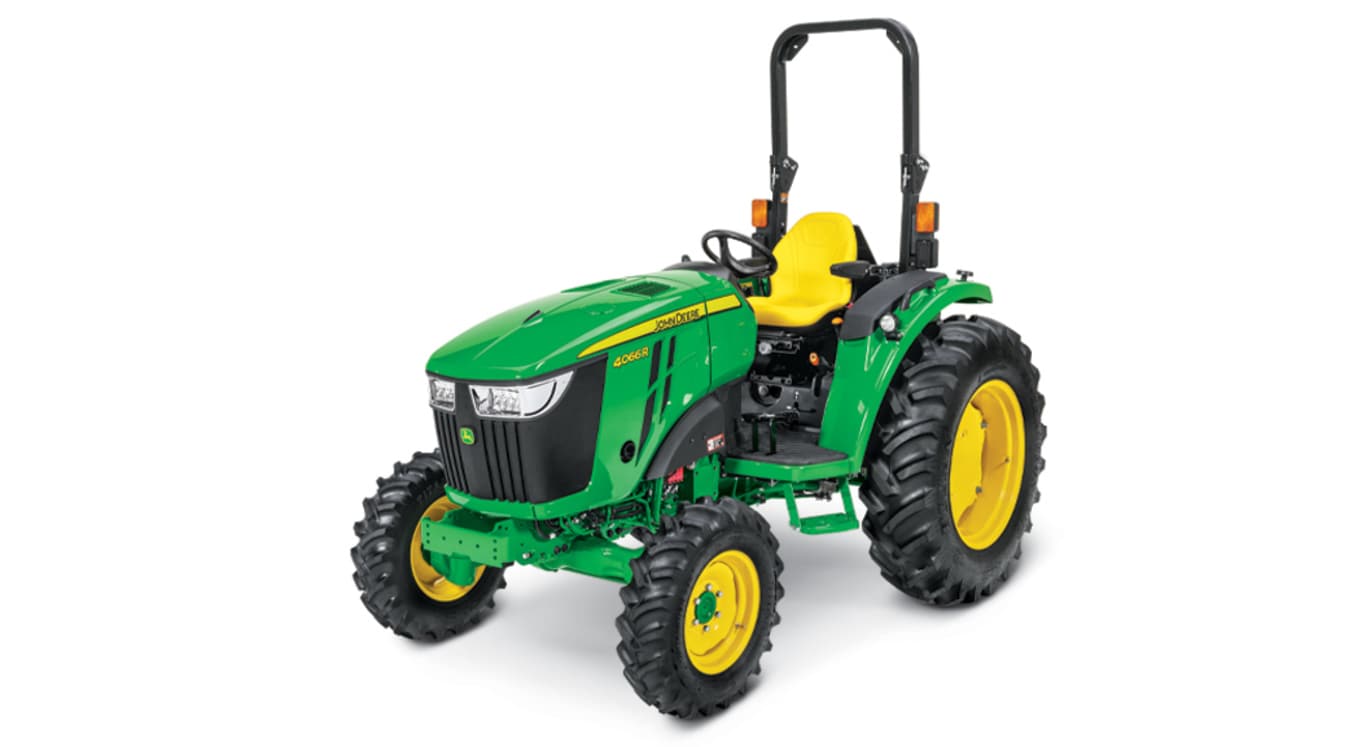
A John Deere tractor stands as an icon of reliability in the farming industry, and maintaining its parts can be a crucial aspect of smooth operations. Whether it’s for repairs, upgrades, or routine maintenance, removing the cab roof might become necessary.
The process requires a methodical approach, with a focus on safety and the integrity of the vehicle. Navigating through the steps to detach the cab roof can be straightforward if done with patience and the proper tools. Knowing the right procedures and following a systematic approach ensures that the roof is removed without damaging any components. It’s essential to tackle this task with full preparation and an understanding of the tractor’s structure.
Credit: www.deere.com
Understanding The Cab Roof Components
Unveiling the secrets of your John Deere cab roof can seem like an intricate task at first glance. Yet, a proper understanding of its components not only simplifies potential repairs but ensures safe and efficient maintenance of your valuable machinery. Mastering the anatomy of your John Deere cab roof is the cornerstone for effortless removal when the need arises. Let’s delve into the components that shape the sturdy shelter atop your tractor.
Identifying Essential Components
The cab roof of a John Deere tractor is an ensemble of various components, each serving a pivotal role in safeguarding the operator and enhancing the machine’s functionality. Recognizing these key elements is critical:
- Roof Panel: The main exterior shield providing protection from the elements.
- Headliner: The interior lining that offers insulation and noise control.
- Mounting Brackets: Secured to the tractor’s frame, they support the roof structure.
- Wiring Harnesses: Electrical pathways for lighting and accessories on the cab roof.
- Latches and Fasteners: Various clips, bolts, and screws that secure the roof to the body.
Exploring The Structure Of The Cab Roof
Understanding how these components interact is key to the successful removal of the cab roof. A stepwise breakdown of the structure:
- The Skeleton: The framework of the cab roof, often reinforced with steel or aluminum for durability.
- The Skin: The external layer which may feature sturdy polymers or metal.
- The Insulation: Materials nested between the headliner and roof panel to dampen sound and insulate the cabin.
- The Attachments: Fixtures and fittings like the roof hatch, speakers, and lights that may need to be handled separately.
Each of these layers is assembled with precision, ensuring the cab roof remains intact under various working conditions.
Preparing For Removal
Tackling the task of removing the cab roof from a John Deere tractor may seem daunting, but with the right approach and careful preparation, it’s quite achievable. Before beginning, it’s essential to ensure you have all necessary tools and equipment on hand, adequate safety measures are in place, and any obstructions are removed. This section will guide you through these preparatory steps, streamlining your efforts for a safe and successful removal.
Gathering Required Tools And Equipment
Gathering the correct tools and equipment is crucial for a smooth removal process. Missing a single item can halt the entire project. Here is a list of what you should have ready:
- Socket set including various sizes
- Wrench set for additional bolt sizes
- Screwdrivers both flat-head and Phillips
- Torx drivers or bits for specialized screws
- Pry bar for leverage
- Lifting equipment – a hoist or forklift if available
- Protective gloves and eyewear
Ensure all tools are in good condition and suitable for the task.
Ensuring Safety Measures Are In Place
Before proceeding, it is vital to ensure safety measures are in full effect to prevent any injuries or accidents. Here’s a checklist for your safety:
- Inspect the area for a flat, stable surface to work on.
- Clear the workspace of any clutter or hazardous materials.
- Verify the tractor is turned off, keys removed, and it’s in park with the brake applied.
- Secure the tractor’s cab roof, ensuring it will not shift unexpectedly.
- Wear appropriate personal protective equipment (PPE), such as gloves and safety glasses.
- Have a first-aid kit readily available for any minor injuries.
- Ensure assistance is present; never attempt to remove the cab roof alone.
Removing Any Obstructions
Clearing the area around the tractor’s cab roof is a fundamental step. Here are specific points to address:
- Remove any attachments from the tractor that may interfere with the removal process.
- Check for any cables, wires, or connections that need to be disconnected.
- Store small parts and fasteners in labeled containers to avoid loss.
Once obstructions are cleared, you can proceed confidently with removing the John Deere cab roof.
Step-by-step Roof Removal Process
Are you preparing to remove the cab roof from your John Deere vehicle? Whether for repair, maintenance, or upgrades, removing the cab roof can seem daunting. However, with the right tools and this step-by-step guide, you will have the roof off safely and efficiently. Protecting the integrity of your machinery and safety during the process is paramount. Follow these detailed steps, and you’ll have a successful removal.
Disconnecting electrical wiringDisconnecting Electrical Wiring
Before starting, ensure your John Deere is switched off and keys are removed. It’s crucial to disconnect all power sources to avoid electric shocks or short-circuiting. Electrical components are delicate; handle with care to avoid damage.
- Locate the wiring harness connectors on the cab roof.
- Depress the tabs on the connectors to detach them.
- Label each connector using masking tape and a marker for easy reassembly.
- Secure the wiring out of the way to prevent it from getting damaged or causing obstructions during the removal process.
Removing Fasteners And Screws
Fasteners and screws secure the cab roof to the vehicle’s frame; removing them is a delicate process. Use proper tools to prevent stripping the heads.
- Identify all visible fasteners around the perimeter of the cab roof.
- Use an appropriate socket wrench or screwdriver to loosen and remove them.
Keep track of all hardware removed; a magnetic tray can be very handy for this purpose. Remember that some fasteners may be concealed by caps or plugs – inspect closely and remove all before attempting to lift the roof.
Lifting and dislodging the cab roofLifting And Dislodging The Cab Roof
The final step is removing the cab roof from the body of the vehicle. For safety, wear gloves and consider safety glasses to protect against accidental debris.
- Enlist assistance — this step requires at least two people.
- Confirm all fasteners are removed and wiring disconnected.
- Gently lift the roof at multiple points to ensure it’s not stuck to any mounts or seals.
- With a steady and coordinated effort, lift the roof off the cab body.
Caution: Lifting should be evenly distributed to avoid bending or warping the roof. Immediately place the roof on a flat, protective surface to avoid damage.
Safely Handling And Storing The Cab Roof
When working on a John Deere tractor, the necessity to remove and subsequently handle the cab roof can arise for a variety of maintenance tasks or upgrades. As sturdy as a John Deere cab roof may be, it remains crucial to handle it with care to avoid damage to the roof or injury to yourself. The following guidelines are designed to ensure that the removal, handling, and storage of the cab roof is carried out safely and effectively, maintaining both your safety and the integrity of your tractor’s components.
Proper Lifting Techniques
Lifting the cab roof off of a tractor is not a one-person job. The key to removing it safely lies in using proper lifting techniques and ideally, mechanical assistance. Keep these steps in mind:
- Enlist help: Always seek the assistance of at least one other person to ensure a balanced lift.
- Use your legs: Bend at the knees and keep your back straight when lifting to reduce the risk of injury.
- Plan your path: Clear the route to your storage area to avoid trip hazards.
- Ensure a firm grip: Wear gloves for a better grip and to protect your hands.
- Consider lifting equipment: If available, use a hoist or lifting tackle to bear the weight of the roof.
Storing The Cab Roof To Prevent Damage
Once the cab roof is safely removed, its storage becomes the next important step. Proper storage conditions ensure that the roof stays in optimal shape and is protected from the elements and potential hazards. Here’s what to keep in mind:
- Choose a clean, dry place: Moisture and dirt can damage the roof, so store it in an area free of these threats.
- Use padding: Prevent scratches and dents by placing the roof on a cushioned surface or padding.
- Avoid pressure points: Distribute the weight evenly to prevent warping or bending.
- Cover it up: Use a breathable tarp or a specifically designed cover to protect it from dust and debris while still allowing air circulation.
Remember, taking the time to safely handle and store your John Deere cab roof will pay off in the long run by preserving its condition and saving you from costly replacements or repairs.
Ensuring A Secure Reassembly
Ensuring a Secure Reassembly of your John Deere cab roof isn’t just about getting the job done; it’s about executing it with precision to maintain the integrity and safety of your machinery. Missing steps or rushing the process can lead to potential hazards that compromise both equipment and operator. Let’s walk through each critical stage, from cleaning to reconnecting essential components, to get your cab roof back securely in place.
Cleaning and inspecting the roof and mounting areaCleaning And Inspecting The Roof And Mounting Area
Start by ensuring that both the cab roof and the mounting area are free from debris and damage. Prolong the life of your equipment with these essential steps:
- Remove any dirt, leaves, or residue that could interfere with a snug reassembly.
- Inspect for any signs of wear or damage, such as cracks or dents, that could impact structural integrity.
- Check all sealants and gaskets around the mounting area. Replace if necessary to prevent water ingress.
Installing The Cab Roof Back In Place
A secure fit is paramount when reinstalling the cab roof. Care and attention to detail here will ensure a steady roof over your head.
- Align the roof carefully with the mount, ensuring all holes for fasteners are in sync.
- Secure the roof first with corner bolts, tightening them in a cross pattern for balanced pressure.
- Proceed with additional fasteners, torquing to manufacturer’s specifications to avoid over- or under-tightening.
Reconnecting Electrical Components And Fastening Securely
The final stage involves the safe reconnection of electrical components and ensuring every fastener is secure. This will guarantee the full functionality of your John Deere cab features upon completion.
Adhere to these principles to maintain electrical integrity:
- Match all wiring harnesses and connectors to their corresponding partners to avoid misconnection.
- Snugly reconnect all components without forcing plugs to prevent any damage.
- Test all electrical features like lights, wipers, and displays before full reassembly to troubleshoot any issues early on.
Upon completion, perform a final inspection to ensure nothing is overlooked, and your John Deere cab roof is ready for any task at hand, safely reassembled and as sturdy as ever.
Frequently Asked Questions On How To Remove John Deere Cab Roof
Can I Remove The Cab Roof On A John Deere Myself?
Yes, with the proper tools and instructions, you can remove the cab roof on a John Deere tractor yourself.
What Tools Are Needed To Detach A John Deere Cab Roof?
You will need a wrench set, screwdrivers, and a lifting device or assistance to safely remove the cab roof.
Step-by-step Guide To Removing John Deere Cab Roof?
Follow the tractor’s manual for specific instructions, generally involving unfastening bolts, disconnecting wires, and lifting the roof off.
Are Special Precautions Required For Removing Cab Roofs?
Ensure the tractor is on stable ground, disconnect the battery, and use proper lifting techniques to prevent injury and damage.
How Long Does It Take To Remove A John Deere Cab Roof?
The time can vary, but with experience and the right tools, it can typically be done within a couple of hours.
Will Removing My John Deere’s Cab Roof Void The Warranty?
It’s important to check your tractor’s warranty terms, as self-performed modifications or repairs can potentially void the warranty.
Conclusion
Removing the cab roof from your John Deere tractor can be straightforward with the right tools and instructions. Always prioritize safety and reference your model’s manual for specific guidance. With patience and meticulous attention, you’ll have your cab roof off in no time, ready for repairs or upgrades.
Remember to keep all removed parts organized for a hassle-free reassembly.
As an Amazon Associate, I earn from Qualifying Purchases.