
Formatting an SD card for a trail camera is easy. It ensures the camera works smoothly.
Trail cameras capture wildlife and help with outdoor activities. A formatted SD card keeps your camera running well. This simple step prevents errors and data loss. You need to follow a few steps to format your SD card correctly. It doesn’t take much time, but it makes a big difference.


Ready to learn how to format your SD card for a trail camera? Keep reading, and we’ll guide you through the process step by step.
Choosing The Right Sd Card
Choosing the right SD card for your trail camera ensures that your camera performs well. The correct SD card helps in storing high-quality images and videos without issues. Let’s dive into the key points to consider.
Compatible Sd Card Types
Trail cameras usually support different types of SD cards. These include:
- Standard SD Cards: These are suitable for older trail cameras.
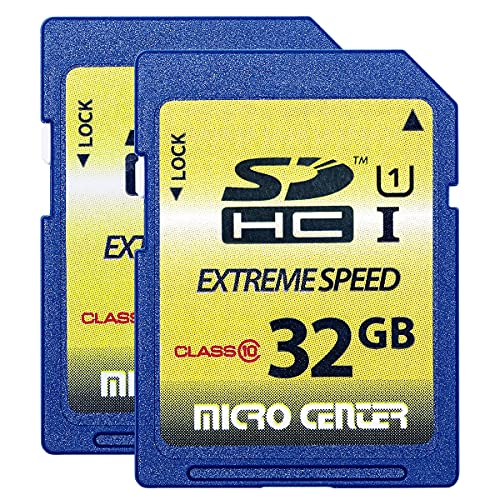
- SDHC (Secure Digital High Capacity): These cards offer more storage, up to 32GB.
- SDXC (Secure Digital eXtended Capacity): These provide even larger storage, ranging from 64GB to 2TB.
Check your trail camera’s manual for the compatible SD card type. Using an incompatible card may cause performance issues or data loss.
Recommended Storage Capacity
The required storage capacity depends on your usage. Here’s a quick guide:
| Usage Type | Recommended Capacity |
|---|---|
| Occasional Use | 8GB to 16GB |
| Regular Use | 32GB to 64GB |
| Heavy Use | 128GB and above |
If you plan to capture high-resolution videos, go for higher storage. For images, a moderate capacity may suffice. Keep in mind that more storage allows for more data without frequent card changes.
Preparing Your Equipment
Before formatting your SD card for a trail camera, it’s essential to prepare your equipment. This ensures the process goes smoothly and you don’t lose any important data. Proper preparation also helps you avoid any potential issues with the formatting process.
Gather Necessary Tools
Start by gathering all the tools you need. You will need your trail camera, the SD card you plan to format, and a computer or laptop. Make sure your computer has an SD card slot or a card reader. Having these tools ready will make the process quicker and easier.
Backup Important Data
Before you format the SD card, back up any important data. Insert the SD card into your computer. Copy all the files to a safe location on your computer. This way, you won’t lose any valuable photos or videos stored on the card.
Once you have backed up your data, you can proceed with formatting the SD card. This step ensures you have a fresh start and your trail camera works efficiently.
Inserting The Sd Card
Inserting the SD card is a crucial step for your trail camera. A proper insertion ensures the camera functions well. Follow these steps to insert the SD card correctly.
Locate The Sd Card Slot
First, find the SD card slot on your trail camera. It is usually on the side or bottom. Check your camera’s manual if you have trouble locating it.
Proper Insertion Techniques
Hold the SD card with the label facing up. Align it with the slot. Gently push the SD card into the slot until it clicks into place. Avoid using excessive force.
Ensure the SD card is fully inserted. The camera might not read it if it is not properly inserted.
Formatting Via Trail Camera
Formatting your SD card using the trail camera itself is convenient. This method ensures your SD card is perfectly compatible with the camera. Here’s a step-by-step guide to help you with the process.
Accessing The Settings Menu
First, power on your trail camera. Locate and press the menu button on your camera. This will bring up the settings menu. Use the navigation buttons to scroll through the options.
Initiating The Format Process
Find the “Format” option in the settings menu. Select it by pressing the OK button. A prompt will appear asking you to confirm the formatting process. Confirm by selecting “Yes” or “OK”. The camera will now format the SD card.
Formatting Via Computer
Formatting an SD card for your trail camera via a computer is a straightforward process. This method ensures your SD card is clean and ready for use. Below are the steps to format your SD card using both Windows and Mac computers.
Connecting The Sd Card To Computer
First, you need to connect your SD card to your computer. You can use an SD card reader or the built-in card slot if your computer has one.
- Insert the SD card into the card reader.
- Connect the card reader to a USB port on your computer.
- Wait for your computer to recognize the SD card.
Using File Explorer On Windows
Once your SD card is connected, you can format it using File Explorer on a Windows computer. Follow these steps:
- Open File Explorer.
- Locate the SD card under This PC.
- Right-click the SD card and select Format.
- Choose the File System (FAT32 is recommended).
- Check the Quick Format box.
- Click Start to begin the formatting process.
A confirmation message will appear once the formatting is complete. Your SD card is now ready for use in your trail camera.
Using Disk Utility On Mac
If you are using a Mac, you can format your SD card using Disk Utility. Follow these steps:
- Open Disk Utility from the Applications folder.
- Select the SD card from the list of drives.
- Click the Erase button at the top.
- Choose the Format (FAT32 is recommended).
- Enter a name for the SD card (optional).
- Click Erase to start formatting.
After the process completes, your SD card is ready to be used in your trail camera.
Troubleshooting Formatting Issues
Formatting an SD card for your trail camera can sometimes be tricky. Errors may occur, leaving you frustrated. This section will help you troubleshoot and fix common formatting issues. Understanding these problems can save you time and effort.
Common Problems And Solutions
One common problem is the SD card not being recognized. Ensure the card is properly inserted. If the issue persists, try using a different card reader. Sometimes, a simple restart can resolve the problem.
Another issue is the card being write-protected. Check the physical lock switch on the side of the card. Move it to the unlocked position. If the switch is broken, you may need to replace the card.
Corrupted files can also cause problems. Use your computer to scan for errors. Most operating systems have built-in tools for this task. Formatting the card on a different device can sometimes help as well.
When To Replace The Sd Card
Repeated errors may indicate a failing SD card. If you frequently encounter problems, consider getting a new card. Cards have a limited lifespan and can wear out over time.
Notice if your trail camera often fails to save photos. This could mean the card is deteriorating. If formatting does not fix the issue, replacement is likely necessary.
Lastly, if you see physical damage on the card, replace it immediately. Damaged cards can cause permanent data loss. Keeping a backup card on hand is always a good idea.
Maintaining Your Sd Card
Maintaining your SD card ensures your trail camera performs at its best. Regular care and proper handling can extend the life of your SD card. This section will guide you through the key practices for maintaining your SD card.
Regular Formatting Schedule
Format your SD card every few weeks. This helps clear old data and prevent errors. Always backup important files before formatting. Regular formatting keeps your SD card clean and efficient. It also reduces the risk of data corruption. Consistency is key. Set a reminder if needed.
Proper Storage Practices
Store your SD cards in a cool, dry place. Avoid exposing them to extreme temperatures. Keep them in protective cases to prevent physical damage. Moisture and dust can harm your SD card. Proper storage extends its life. Handle your SD card with clean hands. Avoid touching the gold contacts. These practices ensure your SD card stays in good condition.
Best Practices For Trail Camera Use
Trail cameras are great tools for wildlife observation. They help you capture images and videos of animals in their natural habitat. To ensure you get the best results, follow some best practices.
Optimizing Camera Settings
Adjusting your camera settings can improve the quality of your images and videos. Set the resolution to high for clear pictures. Use the motion sensor to capture movements without wasting battery life. Choose the right mode for day and night shots. Test your settings before leaving the camera in the field.
Safeguarding Your Footage
Protect your footage by using a high-quality SD card. Format the SD card in the camera before use. This ensures compatibility and reduces the chance of errors. Regularly check your camera to avoid losing valuable footage. Store your footage in a safe place. Back up your files to avoid data loss.
Frequently Asked Questions
How Do I Format An Sd Card For A Trail Camera?
To format an SD card for a trail camera, insert it into your computer. Use the “Format” option in your file explorer. Choose FAT32 or exFAT as the file system. Click “Start” to begin formatting.
Why Won’t My Trail Camera Read The Sd Card?
Your trail camera might not read the SD card due to incompatibility or improper formatting. Ensure the card is formatted to FAT32 or exFAT. Also, check if the card is physically damaged or locked.
Can I Format An Sd Card On The Trail Camera?
Yes, many trail cameras allow you to format the SD card directly. Refer to your camera’s manual for specific instructions. Usually, it’s done through the camera’s settings menu.
What Size Sd Card Is Best For Trail Cameras?
Trail cameras typically support SD cards up to 32GB or 64GB. Check your camera’s specifications for the maximum supported size. Using a card too large might cause compatibility issues.
Conclusion
Formatting an SD card for your trail camera is simple. Follow the steps carefully. Always back up your data beforehand. Choose the right file system format. Stick to your camera’s recommendations. Regularly formatting helps maintain performance. Your trail camera will work smoothly.
Happy wildlife watching!
As an Amazon Associate, I earn from Qualifying Purchases.