
Nothing is more frustrating than a camera not working with Windows 11. You need it for meetings, calls, or capturing memories.
What can you do? Many users face this issue with Windows 11. It can be due to various reasons, from software bugs to hardware problems. Your camera might suddenly stop working, or it may never work from the start. This problem can disrupt your daily tasks, whether for personal or professional use.
In this blog post, we will explore the common reasons why your camera might not be working with Windows 11. We will also provide easy, step-by-step solutions to help you fix the issue. Let’s get your camera up and running again!
Credit: www.drivereasy.com
Common Issues
Many users face problems with their camera on Windows 11. Understanding these issues can help you find a solution faster. This section covers the most common problems users encounter.
Black Screen
A black screen is a frequent issue. The camera turns on, but the screen stays blank. This can be frustrating during video calls or online meetings.
Several reasons can cause this problem. Outdated drivers are a common cause. Ensure your camera driver is up to date. Another reason could be a hardware issue. Check if the camera is connected properly.
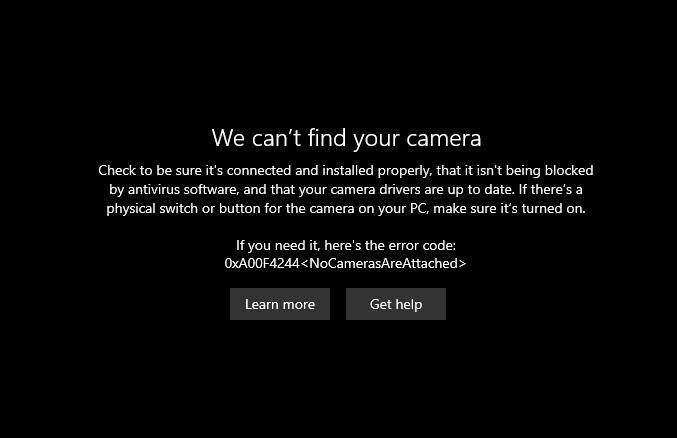
Error Messages
Error messages appear when the camera fails to work. They can be confusing and hard to understand. Common error messages include “Camera not found” or “Camera in use by another app.”
These errors have different solutions. Restart your computer first. This simple step can fix many issues. If the problem persists, check your camera settings. Ensure no other app is using the camera.
Updating your system can also help. Sometimes, Windows updates fix camera issues. Go to Settings, then Update & Security. Check for updates and install them.

Credit: answers.microsoft.com
Initial Checks
Experiencing issues with your camera on Windows 11? Start with some initial checks. These basic steps can often solve the problem quickly.
Cable Connections
First, ensure all cable connections are secure. Check if the USB cable is firmly connected to both the camera and the computer. Sometimes, a loose connection can cause the camera to stop working. Try unplugging and replugging the cable.
Also, test the cable with another device to see if it works. A faulty cable can be a simple, yet overlooked issue.
Camera Privacy Settings
Windows 11 has privacy settings that might block your camera. Go to Settings > Privacy & security > Camera. Make sure the toggle switch for allowing apps to access the camera is on.
Scroll down to see if the specific app you’re using has permission. Enable camera access for that app if it’s turned off.
These initial checks can resolve many camera issues on Windows 11. Basic steps often reveal the root cause.
Update Drivers
Keeping your camera drivers updated is essential for smooth performance. Outdated drivers can cause your camera to malfunction. Updating drivers can resolve these issues quickly. Here’s how to do it.
Device Manager
Open the Device Manager. You can do this by right-clicking the Start button. Select Device Manager from the menu. Find your camera in the list of devices. It might be under Imaging Devices or Cameras. Right-click on your camera. Choose Update Driver from the context menu.
Select Search automatically for updated driver software. Windows will search for the latest driver online. If an update is found, it will be installed. Restart your computer to apply the changes. Your camera should now work correctly.
Automatic Updates
Enable automatic updates in Windows 11. This ensures your drivers stay current. Open Settings by pressing Windows + I. Go to Update & Security. Click on Windows Update. Select Advanced options. Turn on the toggle for Receive updates for other Microsoft products. This will include driver updates.
Windows will now automatically download and install driver updates. This helps keep your camera and other devices working smoothly. Regular updates are important for system stability. So, make sure this setting is enabled.
Check App Permissions
If your camera is not working on Windows 11, the first step is to check app permissions. Often, the issue lies in the system settings, preventing apps from using the camera. Ensuring the right permissions can solve the problem quickly.
Privacy Settings
First, you need to check the privacy settings. Open the Start menu and go to Settings. Then select Privacy & security. Click on Camera under App permissions. Make sure the toggle for “Camera access” is on. This allows your apps to use the camera.
App-specific Permissions
Next, check the permissions for individual apps. Still under Camera settings, scroll down to “Let apps access your camera.” Ensure the toggle is on for the apps you use. If the app is not listed, it may not support camera access. You may need to reinstall or update the app.
Sometimes, third-party apps have their own permissions settings. Open the app and look for a settings or options menu. Ensure the camera permission is granted within the app itself.
Test Camera In Different Apps
Experiencing issues with your camera on Windows 11 can be frustrating. One effective way to diagnose the problem is to test your camera in different apps. This helps determine if the issue is app-specific or a broader system problem.
Built-in Apps
First, try using the built-in apps on Windows 11 to test your camera. Here are a few steps to follow:
- Camera App: Open the Camera app from the Start menu. This app is designed to work seamlessly with your camera hardware.
- Microsoft Teams: Launch Microsoft Teams and start a test call. Check if your camera works during the call.
- Skype: Open Skype and go to Settings > Audio & Video. Ensure the camera preview displays correctly.
If your camera works fine in these built-in apps, the issue might be with a specific third-party app.
Third-party Apps
Next, test your camera in third-party apps. Here’s how you can do it:
- Zoom: Open Zoom and go to Settings > Video. Check if your camera is detected and the preview works.
- Google Meet: Join a Google Meet call and see if your camera is functioning.
- Discord: Open Discord, go to Settings > Voice & Video, and test the camera.
If the camera fails to work in third-party apps, the problem might lie within those apps. Check for updates or reinstall the app to resolve the issue.
Run Troubleshooter
Experiencing issues with your camera on Windows 11 can be frustrating. One of the most effective ways to fix the problem is to run the built-in troubleshooter. This tool can help identify and resolve common issues with your camera. Below, we will guide you through the process of using the Windows Troubleshooter and the Hardware and Devices Troubleshooter.
Windows Troubleshooter
The Windows Troubleshooter is a useful tool for fixing camera issues. To access it, follow these steps:
- Press the Windows key and type “Settings”.
- Select “Settings” from the list.
- In the Settings window, click on “System”.
- Scroll down and click on “Troubleshoot”.
- Click on “Other troubleshooters”.
- Find “Camera” in the list and click “Run”.
Follow the on-screen instructions. The troubleshooter will attempt to detect any issues and fix them.
Hardware And Devices
If the Windows Troubleshooter does not resolve the issue, try the Hardware and Devices troubleshooter. Here’s how:
- Press the Windows key and type “cmd”.
- Right-click on “Command Prompt” and select “Run as administrator”.
- In the Command Prompt window, type
msdt.exe -id DeviceDiagnosticand press Enter. - The Hardware and Devices troubleshooter will open.
- Click on “Next” and follow the instructions.
This tool will check for hardware-related issues and attempt to fix them. Once completed, restart your computer and check your camera.
Reinstall Camera Driver
Struggling with your camera not working on Windows 11? Reinstalling the camera driver may solve your problem. A corrupted or outdated driver can often cause issues. Follow these steps to fix it efficiently.
Uninstall Driver
First, open the Device Manager. You can find it by searching in the Start menu. Once open, locate the ‘Cameras’ section. Click to expand it. Right-click on your camera device. Select ‘Uninstall device’ from the dropdown menu. Confirm any prompts to complete the uninstallation.
Reboot And Reinstall
After uninstalling the driver, restart your computer. Upon reboot, Windows should automatically detect the missing driver. It will reinstall the default camera driver. If it does not, open the Device Manager again. Click ‘Action’ at the top. Then select ‘Scan for hardware changes.’ This should prompt Windows to reinstall the camera driver.
Advanced Solutions
If your camera is not working with Windows 11, there are advanced solutions that can help. These solutions can fix issues not resolved by basic troubleshooting steps. Let’s dive into the more technical fixes for your camera problems.
Bios Settings
Incorrect BIOS settings can cause camera issues. First, restart your computer and enter the BIOS setup. You can usually do this by pressing a key like F2, F10, or Delete during startup. Check the settings related to your camera. Make sure the camera is enabled. Save your changes and exit the BIOS. Your computer will restart. Check if the camera is now working.
Registry Edits
Editing the registry can also fix camera problems. Be careful with this method. Incorrect changes can affect your system. First, press Win + R to open the Run dialog box. Type “regedit” and press Enter. Navigate to HKEY_LOCAL_MACHINE\SOFTWARE\Microsoft\Windows Media Foundation\Platform. Right-click and select New > DWORD (32-bit) Value. Name it “EnableFrameServerMode”. Set its value to 0. Restart your computer.
Another registry edit involves checking the camera permissions. Go to HKEY_LOCAL_MACHINE\SOFTWARE\Microsoft\Windows\CurrentVersion\CapabilityAccessManager\ConsentStore\webcam. Make sure the value of “Value” is set to “Allow”. If not, change it to “Allow”. Restart your computer again. Check if your camera is now operational.
Contact Support
If your camera isn’t working with Windows 11, don’t worry. Contacting support can often resolve the issue quickly. Sometimes, the problem lies beyond your knowledge. In such cases, reaching out to experts can save time and frustration.
Manufacturer Support
First, contact your camera’s manufacturer. They understand their products best. Visit their official website. Look for a support or contact section. They may offer live chat, email, or phone support. Explain your issue in detail. Include your camera model and Windows version. This information helps them diagnose the problem faster.
Windows Support
If the manufacturer can’t help, turn to Windows support. Microsoft offers several ways to get help. Use the Get Help app on your Windows 11 device. This app connects you to a support agent. You can also visit the Microsoft support website. Search for your issue or browse their support articles. Sometimes, the solution is already documented.
Alternatively, join the Microsoft Community forums. Many users share their experiences and solutions there. You might find someone who had the same issue. Reading their solutions can be very helpful. If you still need help, contact Microsoft support directly. They offer phone and chat options.

Credit: www.youtube.com
Frequently Asked Questions
Why Is My Camera Not Working On Windows 11?
Your camera might not work due to outdated drivers, privacy settings, or hardware issues. Ensure your camera is enabled in settings. Update your camera drivers through Device Manager. Check if your antivirus software is blocking the camera.
How Can I Update My Camera Driver?
To update your camera driver, open Device Manager. Locate your camera under “Imaging devices. ” Right-click and select “Update driver. ” Follow the prompts to complete the update. Restart your computer.
How Do I Check My Camera Privacy Settings?
Go to Settings > Privacy & security > Camera. Ensure the “Camera access” toggle is on. Also, check if apps have permission to use the camera.
Can Antivirus Software Block My Camera?
Yes, antivirus software can block your camera for security reasons. Check your antivirus settings and allow camera access. Some antivirus programs have specific camera protection features.
Conclusion
Fixing your camera issues in Windows 11 is possible. Follow the steps outlined here. Check your privacy settings. Update your camera drivers. Restart your device. If problems persist, consider contacting technical support. Keep your system updated. An updated system often resolves many issues.
Regular maintenance can prevent future problems. We hope this guide helps you. Enjoy seamless camera usage on your Windows 11 device!
As an Amazon Associate, I earn from Qualifying Purchases.