
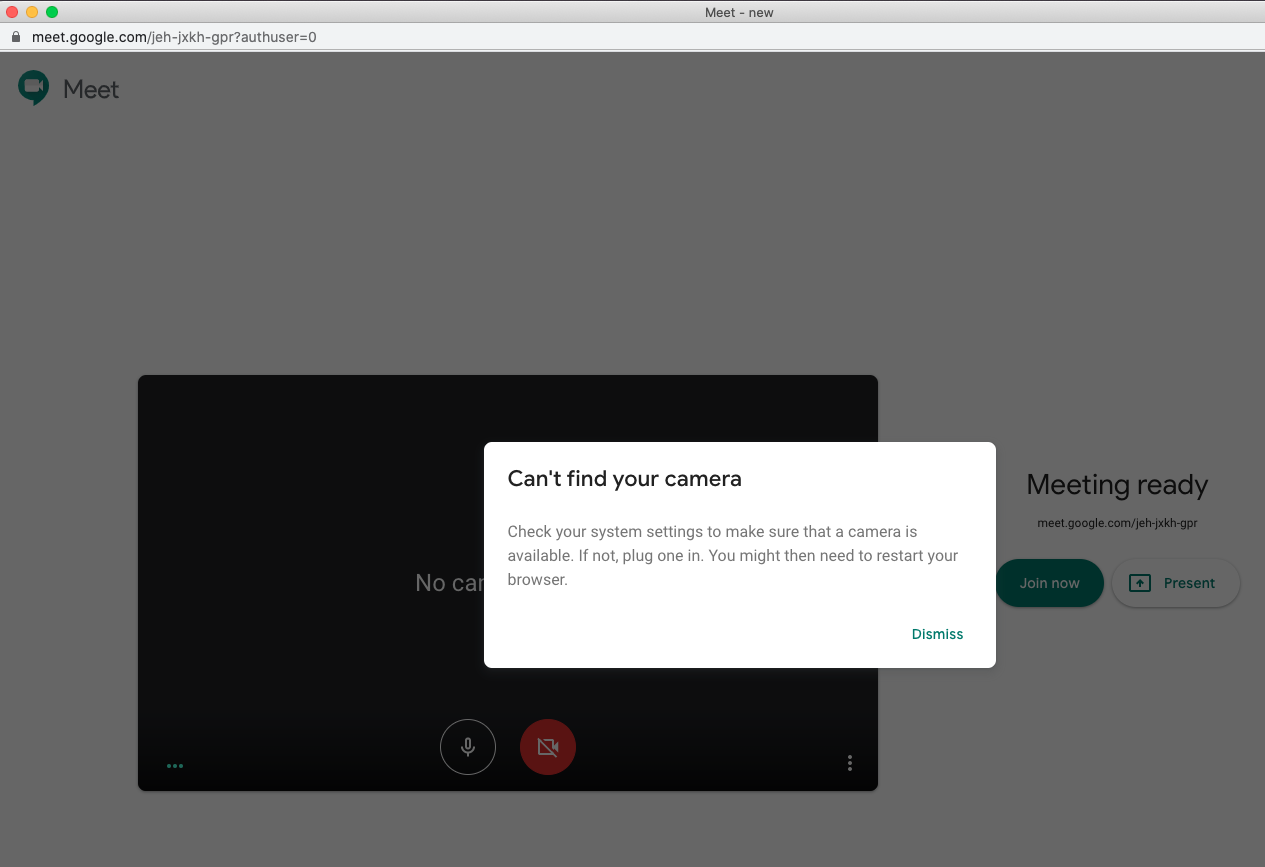
Experiencing issues with your camera in Google Meet? You’re not alone.
Many users face this problem, and it can be frustrating. Google Meet is a popular tool for virtual meetings. It works well most of the time. But, sometimes, your camera might not work. This can happen for many reasons. It could be a simple setting issue or a more complex technical problem.
Understanding why this happens is important. It helps you fix the issue quickly. In this blog, we will explore common reasons for camera problems in Google Meet. We will also provide easy steps to solve them. Let’s get your camera working again!
Common Causes
Experiencing a “Camera Can’t Be Found” error on Google Meet can be frustrating. This issue can disrupt important meetings and calls. Understanding the common causes can help solve the problem quickly. Here, we explore the common causes of this error.
Hardware Issues
The camera might be disconnected or damaged. Ensure it is properly connected to your computer. Check for any physical damage to the camera or its cables. A loose connection can also cause problems.
Another possibility is that the camera is disabled. Look for a physical switch on your device. Some laptops have a camera disable switch for privacy. Ensure this switch is not turned off.
Software Conflicts
Software conflicts can prevent your camera from working. Check if another application is using the camera. Close any other apps that might be using the camera. Multiple apps using the camera at the same time can cause conflicts.
Your camera drivers might be outdated. Update the drivers to the latest version. Go to the device manager on your computer. Look for the camera and check for driver updates.
Browser settings can also cause issues. Ensure that your browser has permission to use the camera. Go to the browser settings and check the permissions. Ensure Google Meet is allowed to access the camera.
Initial Checks
Experiencing the “Camera Can’t Be Found” error in Google Meet can be frustrating. Before diving into advanced troubleshooting, start with some basic checks. This section will guide you through the initial steps to ensure your camera is properly connected and configured for Google Meet.
Camera Connection
First, ensure your camera is connected properly. Here are some steps to verify the connection:
- Check the USB cable or wireless connection of your camera.
- If using a built-in camera, make sure it’s not disabled.
- Try reconnecting the camera to a different USB port.
- Restart your computer to refresh the hardware connections.
Browser Permissions
Google Meet requires permissions to access your camera. Follow these steps to check browser permissions:
- Open Google Chrome and navigate to Settings.
- Scroll down and click on Privacy and Security.
- Select Site Settings.
- Under Permissions, click on Camera.
- Ensure Google Meet is allowed to access your camera.
If permissions are correctly set and the camera still can’t be found, try clearing your browser cache. Sometimes, old cache data can cause conflicts.
| Step | Action |
|---|---|
| 1 | Open Chrome Settings |
| 2 | Navigate to Privacy and Security |
| 3 | Click on Clear Browsing Data |
| 4 | Select Cached Images and Files |
| 5 | Click Clear Data |
These initial checks often resolve the “Camera Can’t Be Found” error in Google Meet. If the problem persists, consider updating your camera drivers or seeking further technical support.
Update Drivers
Updating drivers can solve many issues with your camera not being found on Google Meet. This is because drivers act as the bridge between your hardware and software. Sometimes, outdated drivers can create compatibility issues. Ensuring your drivers are up to date can help resolve these problems.
Windows Update
Updating drivers on a Windows system is straightforward. Follow these steps:
- Press Windows + X and select Device Manager.
- Expand the Cameras section.
- Right-click your camera and select Update driver.
- Choose Search automatically for drivers.
- Follow the on-screen instructions to complete the update.
If the automatic search does not work, visit the manufacturer’s website. Download the latest drivers from there and install them manually.
Macos Update
On a Mac, updating drivers is a bit different. MacOS manages hardware updates through system updates. Follow these steps:
- Click the Apple menu and select System Preferences.
- Choose Software Update.
- If updates are available, click Update Now.
- Wait for the process to complete. Restart your Mac if needed.
For specific camera drivers, visit the manufacturer’s website. Download and install the latest versions as instructed.
Keeping your drivers up to date ensures your camera works well with Google Meet. This simple step can prevent many common issues.
Browser Settings
Experiencing the “Camera Can’t Be Found” error on Google Meet can be frustrating. Often, browser settings play a crucial role in resolving this issue. Adjusting certain settings can help your camera function correctly during online meetings. Below are some steps you can follow.
Clear Cache
Browsers store data to improve performance. Over time, this data can cause issues. Clearing your cache can resolve these problems. Here’s how to do it:
Open your browser settings. Find the option for clearing browsing data. Choose to clear cached images and files. Confirm the action by clicking the clear data button.
Once done, restart your browser. Try accessing Google Meet again. This simple step often fixes the camera issue.
Reset Settings
Sometimes, browser settings get altered. Resetting them can fix various issues, including camera problems. Follow these steps:
Go to your browser settings. Scroll down and find the advanced settings. Look for the reset settings option. Click on it and confirm the reset.
This action will restore default settings. Your browser will be like new. Open Google Meet and check if the camera works.
These steps can resolve the “Camera Can’t Be Found” error. Adjusting browser settings often solves the problem. If the issue persists, consider checking other factors.
Antivirus Interference
Antivirus software is crucial for protecting your computer from malware and viruses. But sometimes, it can interfere with applications like Google Meet. This interference can prevent your camera from being detected. Understanding how to manage your antivirus settings can help fix this issue. Let’s explore two solutions: disabling your antivirus temporarily and whitelisting Google Meet.
Disable Temporarily
One way to check if your antivirus is the problem is to disable it temporarily. This method helps identify if the antivirus is blocking your camera. Open your antivirus program. Find the option to disable it. This is usually found in the settings or preferences menu. Turn off the antivirus for a short period. Then, restart Google Meet and check if the camera works. If it does, the antivirus is likely the cause. Remember to turn your antivirus back on after testing. Keeping it off can make your system vulnerable.
Whitelist Google Meet
If disabling the antivirus fixes the camera issue, consider whitelisting Google Meet. This allows the antivirus to trust Google Meet and not block its functions. Open your antivirus program again. Look for a section called “exceptions” or “whitelist”. Add Google Meet to this list. This tells the antivirus to allow Google Meet to use your camera. Adding to the whitelist can prevent future issues without turning off your antivirus.
By managing your antivirus settings, you can ensure smooth video calls on Google Meet. Disable it temporarily to check for interference. Then, whitelist Google Meet to avoid future problems.
Credit: community.bitdefender.com
Check Camera Privacy
If your camera can’t be found on Google Meet, the issue might be due to privacy settings. Checking your camera privacy settings can help you solve this problem. Follow these steps to ensure your camera settings are configured correctly.
Windows Privacy Settings
On Windows, you need to check if apps can use your camera. Follow these steps:
- Click the Start button and select Settings.
- Go to Privacy.
- In the left pane, click on Camera.
- Ensure the toggle for Allow apps to access your camera is turned on.
- Scroll down and check that Google Chrome or the browser you use for Google Meet is listed and toggled on.
Macos Privacy Settings
On MacOS, you need to allow camera access in your system preferences. Follow these steps:
- Click the Apple menu and select System Preferences.
- Go to Security & Privacy.
- Click the Privacy tab.
- In the left pane, select Camera.
- Ensure the box next to Google Chrome or your browser is checked.
After checking these settings, your camera should work on Google Meet. If it still doesn’t, you may need to restart your computer or browser.
Use External Camera
If you’re having trouble with your camera in Google Meet, using an external camera can help. External cameras often provide better video quality. They can also be easier to manage. This guide will walk you through the process of setting up an external camera. It will also show you how to switch between your built-in and external cameras.
Setup Process
To set up an external camera, you will need a USB port on your device. First, plug the external camera into the USB port. Your computer should recognize the new hardware. If it doesn’t, you may need to install the camera’s drivers. These can usually be found on the manufacturer’s website.
Once the drivers are installed, open Google Meet. Click on the three dots in the bottom right corner of the screen. Select Settings from the menu. In the video tab, you should see an option to select your external camera. Choose the external camera from the dropdown list.
Switch Between Cameras
Switching between cameras is straightforward. In Google Meet, click on the three dots in the bottom right corner. Select Settings. Go to the video tab. Here, you can switch between your built-in and external cameras. Choose the camera you want to use from the dropdown list.
Sometimes you might need to switch cameras during a meeting. Follow the same steps to open the settings. Change the camera from the dropdown list. This makes it easy to switch if one camera stops working.
If you follow these steps, you should be able to use an external camera with Google Meet. This can improve your video quality and make your meetings more professional.

Credit: community.brave.com
Advanced Troubleshooting
Facing the “Camera Can’t Be Found” issue on Google Meet can be frustrating. After trying basic troubleshooting steps, it’s time to look into advanced solutions. These can help resolve deeper issues with your camera.
Reinstall Camera Drivers
Sometimes, the camera driver might be corrupted or outdated. Reinstalling the driver can fix this.
- Open the Device Manager on your computer.
- Find the Camera section and expand it.
- Right-click on your camera and select Uninstall Device.
- Restart your computer. Windows will reinstall the driver automatically.
If Windows does not reinstall the driver, you can download it from the camera manufacturer’s website. Ensure you get the latest version compatible with your operating system.
Use Alternative Browsers
Sometimes, the issue might be with the browser you are using. Trying a different browser can help.
- Download and install an alternative browser like Mozilla Firefox or Microsoft Edge.
- Open Google Meet in the new browser.
- Check if the camera works.
Using a different browser can often resolve compatibility issues. This ensures the problem is not specific to one browser.
Credit: support.google.com
Frequently Asked Questions
Why Can’t Google Meet Find My Camera?
Google Meet may not find your camera due to browser issues, permissions, or hardware conflicts. Check your camera settings and permissions.
How Do I Enable My Camera On Google Meet?
Enable your camera by clicking the camera icon in the address bar. Ensure Google Meet has camera permissions in browser settings.
Why Is My Camera Not Working On Google Meet?
Your camera might not work due to outdated drivers, permissions, or hardware issues. Restart your device and update drivers.
How Do I Troubleshoot Google Meet Camera Issues?
To troubleshoot, restart your browser and device. Check camera permissions and ensure no other apps are using the camera.
Conclusion
Fixing the “Camera Can’t Be Found” issue on Google Meet is important. Follow the steps mentioned to resolve the problem quickly. Check your camera settings and permissions. Update your browser and drivers. Restart your device if needed. Simple solutions often work best.
Troubleshooting can save time and frustration. Stay prepared for future meetings. Your camera should work smoothly now. Enjoy seamless video calls on Google Meet. Happy meeting!
As an Amazon Associate, I earn from Qualifying Purchases.